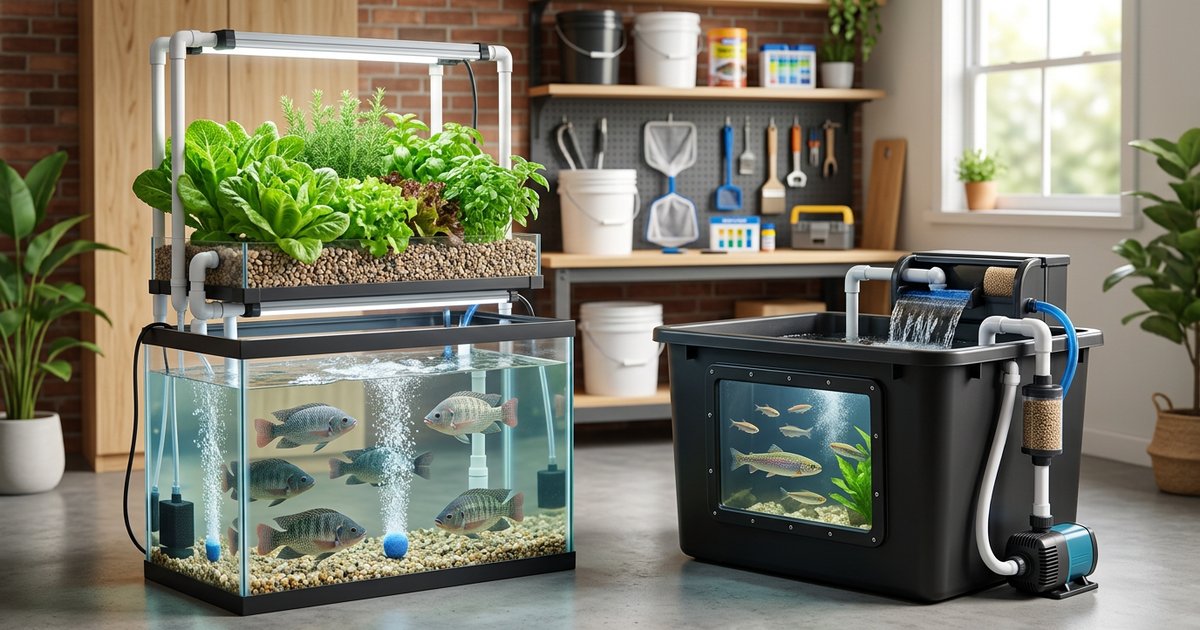
Many home fish farmers produce dozens of pounds of fresh fish each year in modest backyard spaces, with basic setups starting at a few hundred dollars. That makes fish farming at home for beginners more practical than most people expect. Floating cages and simple recirculating systems typically run $300 to $500, and species like tilapia and catfish do well in these small-scale operations. Both grow from fingerlings to harvest size in roughly 4 to 6 months, which means you can cycle through at least one full crop per warm season.
This guide breaks down 5 proven systems that work in backyards, garages, or even basements. Each one costs under $500 to set up. You’ll learn how to do fish farming at home step by step, from picking the right species (tilapia and catfish are the easiest starting points) to maintaining water quality with simple test kits. Think of it as a practical primer on fish farming at home for beginners. Every system includes specific costs, space requirements, and expected yields so you can match one to your actual space and budget, whether that’s a biofloc barrel setup in a garage or a 300-gallon stock tank pond in the yard.
5 Home Fish Farming Systems: Costs and Space Requirements
The cage culture system costs just $100-200 and works perfectly if you already have a pond or lake access. You’ll build or buy floating cages (typically 4x4x4 feet) that suspend in existing water bodies, producing 30-50 pounds of fish annually. This method requires minimal equipment: just the cage frame, netting, floats, and anchoring system. The biggest advantage is zero land preparation or excavation costs.
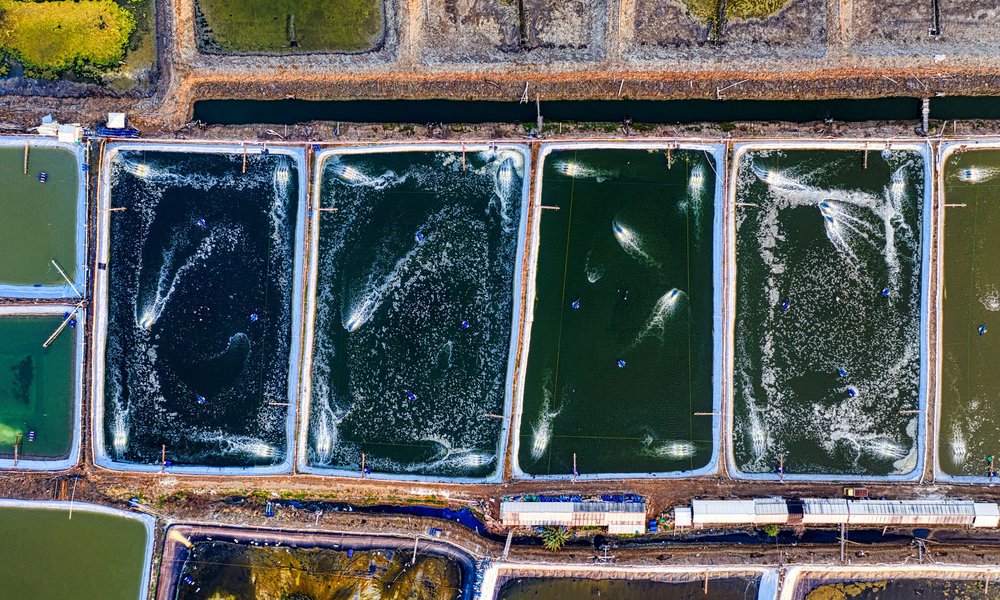
Above-ground pools offer the most flexibility for suburban backyards. A 12-15 foot diameter pool ($300-500) holds 100-200 fish comfortably and fits in spaces as small as 200 square feet. These pools require a simple pump and filter system, plus an aerator for oxygen. You can set up your fish farming at home tank system in a weekend, and many beginners harvest 75-100 pounds of tilapia or catfish in their first year.
Recirculating aquaculture systems (RAS) cost $400-800 but use 90% less water than traditional methods. These indoor or outdoor setups include tanks, biofilters, pumps, and aeration equipment. A basic 500-gallon RAS fits in a 10×10 foot space and produces fish year-round, regardless of climate. The closed-loop design makes it ideal for garages, basements, or greenhouses where water conservation matters.
A basic aquaponics setup can start under $500 if you keep the fish tank around 100 gallons and build your own grow beds from IBC totes. Scaling up to a 250-gallon tank with dedicated plumbing and larger beds pushes costs closer to $700 or more, so budget-conscious beginners should start small. The core concept works well for aquarium fish farming at home: fish waste feeds the plants, plants clean the water, and you get food from both sides. Yields vary widely depending on species, water temperature, and how dialed-in your system is, but a well-managed mid-size setup can reasonably produce dozens of pounds of tilapia or catfish alongside a steady supply of lettuce, herbs, and tomatoes each year. The real savings show up over time, since you’re buying less fertilizer and doing fewer water changes than you would running separate systems.
Traditional pond systems require the most space (500+ square feet) but can deliver 200-500 pounds of fish annually. You can build a functional lined pond for $200-$500 using a 20-mil EPDM rubber liner, which solves the problem for anyone without clay soil that holds water naturally. A 45-mil EPDM liner over a compacted sand base works on sandy or loamy ground where clay isn’t an option. Skip the professionally excavated quarter-acre pond if you’re working within a starter budget. Natural ponds need minimal equipment beyond a basic aerator ($50-$150), making them the lowest-maintenance system once established. This approach suits rural properties best, though even smaller setups on a backyard or fish farming at home terrace can use shallow lined ponds scaled down to 100-200 square feet for modest harvests.
Fish Farming at Home Kits: Pre-Built Options for Beginners
Most fish farming at home kits sold online bundle a tank (usually 100 to 300 gallons), an air pump, a biofilter, fish net, water test strips, and basic feed into one box for $150 to $450. Brands like AquaSprouts, Back to the Roots, and various Alibaba-sourced biofloc fish farming at home setups target beginners who want to skip sourcing parts individually. A typical starter kit under $500 gets you producing tilapia or catfish fingerlings within 8 to 12 weeks, which is why these kits answer the common question of how can I start fish farming at home without an engineering background.
DIY systems built from IBC totes and off-the-shelf plumbing usually cost 20 to 40 percent less than a comparable pre-built kit. But you spend hours hunting for compatible fittings and sizing your own biofilter. For someone researching how to start fish farming at home in Nigeria or another region where specific kit brands aren’t stocked locally, DIY often wins by default since shipping costs can double a kit’s price. If a kit ships domestically to you for under $300, it almost always beats DIY on time saved.
- Tank material: food-safe HDPE or fiberglass, not thin decorative acrylic that bows under pressure.
- Filtration rated for at least 1.5x your tank volume per hour. Undersized filters are the number-one complaint in budget fish farming at home kit reviews.
- Included air pump wattage: you need roughly 1 watt per gallon for catfish or tilapia stocking densities.
- Return policy and warranty, especially from overseas sellers. A cracked tank with no recourse turns a $250 deal into waste.
For true beginners learning how to do fish farming at home, a kit in the $200 to $350 range with a 100-gallon tank is the sweet spot. It keeps risk low, fits a garage or backyard, and leaves budget for fingerlings, feed, and a decent water testing kit. Skip any package that doesn’t include a biofilter or that substitutes a simple sponge filter for one. Fish farming at home for beginners works best when biological filtration is sized correctly from day one.
Best Fish Species for Home Farming
Species selection shapes every cost decision in fish farming at home for beginners. Tilapia tolerate poor water quality, warm temperatures, and crowding far better than coldwater species like trout or bass, which makes them the default choice for small-scale setups. A 250-gallon tank can comfortably support 25 to 50 tilapia, while the same volume holds only 10 to 15 trout. That density difference changes your feed math, your harvest timeline, and your equipment budget. Coldwater species need a chiller running through summer months, easily $200 or more, while tilapia just need a basic aquarium heater in the $40 range to stay above their 60°F comfort floor. Pick the wrong species and you’ll spend more keeping fish alive than you’ll ever recover at harvest.
Tilapia leads as the most beginner-friendly option, tolerating water temperatures between 65-85°F and reaching harvest size in just 4-6 months. Each fish yields 1-2 pounds of mild white meat, and they reproduce readily in warm water. Their hardiness forgives minor water quality mistakes that would kill more sensitive species. Channel catfish prove equally resilient in 70-85°F water, growing to 1-3 pounds within 12 months while handling crowding better than most freshwater fish. Cat fish farming at home works well for beginners partly because their bottom-feeding habits help clean tank waste, reducing the maintenance load on simple filtration setups.
Carp offers extreme hardiness for cooler climates, thriving in 60-75°F water and reaching impressive 2-5 pound weights in 12-18 months. These fish eat almost anything, from kitchen scraps to aquatic plants, reducing feed costs significantly. Largemouth bass commands premium market prices but requires patience, needing 18-24 months to reach harvest size in 70-80°F water. Rainbow trout suits cold-water systems at 50-65°F, growing rapidly in 9-12 months when water quality stays pristine with high oxygen levels.
Step-by-Step Setup Process
Before you stock a single fish, work through the setup steps in order. Check your local zoning ordinances for residential aquaculture rules first. Most municipalities require a permit, and fees typically run $50 to $200 depending on system size and whether you intend to sell your harvest. If you’re figuring out how to start fish farming at home, your county extension office or local agricultural department is the best first call. They’ll tell you exactly what paperwork you need and flag any species restrictions specific to your area.
Pick a spot with reliable water access and electrical outlets for your pumps and aerators. If you’re setting up outdoors, aim for at least 6 hours of direct sunlight, but understand why: sunlight drives algae and plant growth in aquaponic or green water systems, which feed or filter for your fish. A purely recirculating tank system in a shaded garage doesn’t need that sun exposure at all. For indoor setups, humidity is your real enemy. A single 100-gallon tank can push room humidity above 70%, which breeds mold on drywall and ceiling joists within weeks. Install at minimum a bathroom-grade exhaust fan (around $30) vented to the outside, and run a hygrometer so you catch problems before they start. Once you’ve secured any required permits and chosen your site, install your system following manufacturer specs or proven DIY plans. Learning how to do fish farming at home means getting water circulation right from day one. Test every pump and aerator before adding fish, confirming flow rates match the recommended turnover for your tank volume, typically 3 to 5 full cycles per hour for most freshwater species.
The most critical step comes next: cycling your system for 2-4 weeks before adding any fish. This establishes colonies of beneficial bacteria that convert toxic ammonia from fish waste into less harmful nitrates. Add ammonia source (fish food or pure ammonia) to reach 2-4 ppm and monitor levels daily until nitrite spikes then drops to zero.
Stock fingerlings conservatively at first, maintaining 1 fish per 5-10 gallons for beginners. Purchase from reputable hatcheries that provide health certificates. Acclimate new fish by floating their bags in your system for 20 minutes, then gradually mixing system water into the bag. Feed commercial pellets at 2-3% of total fish body weight daily, split into two feedings to reduce waste and maintain water quality.
Legal Requirements and Permits for Home Fish Farming
Zoning laws vary wildly by municipality, and most U.S. counties classify backyard aquaculture under agricultural or livestock codes. In many suburban zones, you can raise fish for personal consumption without a permit, but the moment you sell, you trigger state aquaculture licensing. Texas, for example, requires a Private Fish Stocking Permit even for personal ponds over a certain size, while Florida mandates an Aquaculture Certificate of Registration before any sales. If you’re figuring out how to start fish farming at home in Nigeria, the process differs: most states require registration with the Federal Department of Fisheries, and Lagos State enforces environmental impact assessments for operations above 1,000 fish. Before buying a single fingerling or a fish farming at home kit, call your local planning office and ask specifically about residential aquaculture. A 10-minute phone call can save you a $500 fine.
Water discharge is the regulation that catches most beginners off guard. In the U.S., the Clean Water Act governs any discharge into waterways, and even draining a 300-gallon tank into a storm drain can technically violate it. Biofloc fish farming at home generates nutrient-dense waste water that’s great for garden irrigation but problematic if it reaches public waterways. Many hobbyists sidestep the issue entirely by using their discharge water on lawns or vegetable beds, which typically falls outside EPA jurisdiction. Check your state’s NPDES (National Pollutant Discharge Elimination System) requirements to confirm.
For anyone learning how to do fish farming at home with plans to sell, liability insurance is worth the $200 to $400 per year it typically costs for a small home operation. Standard homeowner’s policies rarely cover agricultural activities, and one visitor slipping near your tank setup could leave you exposed. A simple farm liability rider or a standalone aquaculture policy covers property damage and bodily injury. Fish farming at home for beginners often starts small enough that insurance feels unnecessary, but if you’re asking how can I start fish farming at home and eventually scale to selling at farmers’ markets, get coverage before your first sale, not after your first problem.
Water Management and Maintenance
Proper water management separates thriving home fish farms from expensive failures. Test your water weekly using a freshwater aquarium test kit ($15-30) to monitor ammonia levels below 0.5 ppm, nitrites below 0.5 ppm, and pH between 6.5-8.5. These three parameters directly impact fish health and growth rates. Ammonia spikes above 1 ppm can kill your entire stock within 24 hours.
Water change frequency depends on your system type. Recirculating aquaculture systems (RAS) require 10-20% water changes weekly to dilute accumulated waste products. Natural ponds with established plant filtration may only need water additions to replace evaporation losses. Calculate your biofilter media needs at 1 cubic foot per 10 pounds of fish to ensure adequate biological waste processing. Under-filtered systems crash when beneficial bacteria cannot convert toxic ammonia fast enough.
Monthly filter cleaning prevents clogging that reduces oxygen levels and water flow. Rinse mechanical filters in system water (never tap water) to preserve beneficial bacteria colonies. Check pumps and aerators daily for debris blockages or unusual noises that signal impending failure. A backup battery-powered aerator ($30-50) provides critical oxygen during power outages.
Temperature fluctuations stress fish and reduce feeding efficiency. Monitor water temperature daily with a floating thermometer and maintain species-specific ranges: tilapia thrive at 75-85°F, while trout need 50-65°F. Submersible heaters cost $20-40 per 100 gallons, while small chillers for tropical species start at $200.
Feeding, Growth, and Harvesting
Commercial pellets cost $25-40 per 50-pound bag, and a 100-fish tilapia operation goes through one bag monthly during peak growing season. Feed conversion ratios vary by species and conditions. Tilapia typically convert at 1.5 to 2.0 pounds of feed per pound of body weight gained, according to university extension sources, so your actual numbers will depend on water temperature, stocking density, and feed quality. Watch your fish attack the pellets within 30 seconds of feeding. If food sits uneaten after 5 minutes, you’re overfeeding and creating an ammonia bomb that’ll crash your system.
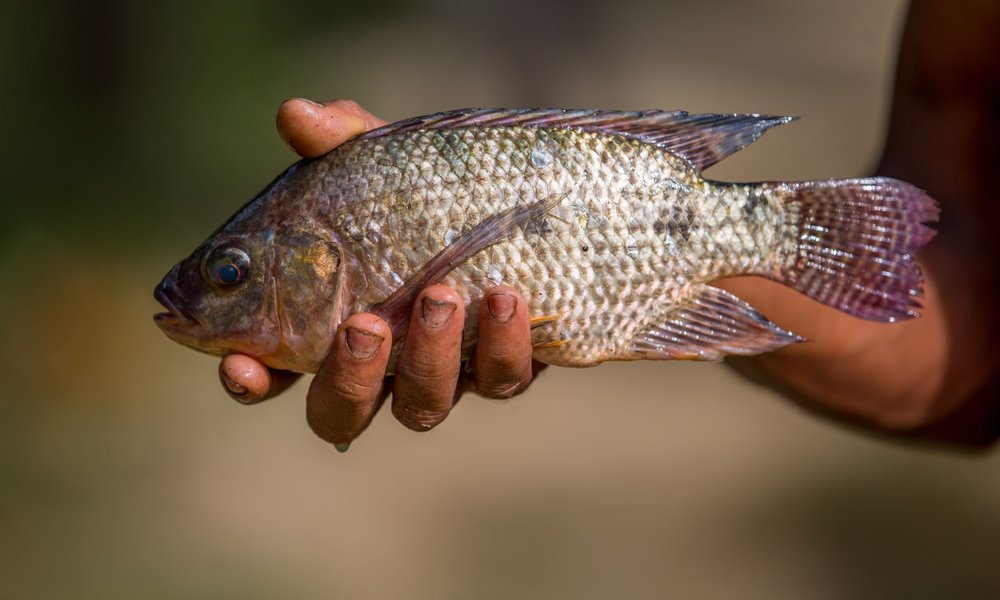
Track growth monthly by netting a sample of 5-10 fish and weighing them on a digital scale. Healthy tilapia gain 1-2 ounces per month in optimal conditions, while catfish typically add 0.5-1 ounce monthly. Record weights in a simple notebook to spot feeding problems early. Fish that stop gaining weight signal poor water quality, disease, or insufficient feed protein levels (aim for 28-32% protein content in pellets).
Harvest tilapia and catfish when they reach 1-2 pounds, typically after 6-9 months of growth. Bass and perch need 12-18 months to reach their 1-1.5 pound market size. For pond harvesting, use a 50-foot seine net ($75-150) with two people walking opposite banks to corral fish into shallow water. Tank systems simplify harvesting: drain water down to 12 inches deep, then scoop fish with a large aquarium net.
Process harvested fish immediately or hold them in clean, aerated water for 24 hours before processing to purge any muddy taste from their flesh. The fasting period lets fish empty their digestive systems and firms up the meat texture. Keep holding water at the same temperature as your growing system to prevent shock, and skip feeding during this final day.
Common Problems and Solutions
Even experienced fish farmers face setbacks, but recognizing symptoms early prevents total losses. Cloudy water strikes nearly every beginner within their first month. Cut feeding by 50% immediately and boost your filtration capacity. Most cloudiness clears within 48 hours once you stop overfeeding. If fish gather at the surface gulping air, oxygen levels have crashed below 4 ppm. Install an aerator within the hour or perform an emergency 25% water change to prevent suffocation.
Stunted growth frustrates new farmers expecting rapid gains. Check your water temperature first, then examine your feed quality. Boost protein content to 32-36% for faster growth rates. Commercial growers achieve 1.5 pounds of weight gain per 2 pounds of high-protein feed. Disease spreads through cramped systems like wildfire. Quarantine every new fish for two weeks in a separate 20-gallon tank before introducing them to your main system.
Predators cost home farmers hundreds of pounds of fish annually. Herons, raccoons, and neighborhood cats view your fish farm as a buffet. Stretch bird netting across tank tops, securing edges with zip ties or bungee cords. For pond systems, motion-activated sprinklers send predators running while using minimal water. Position sprinklers 3-4 feet from pond edges where herons typically wade in for their meals.
Regional Considerations: Starting Fish Farming at Home in Different Climates
Tilapia grows fastest at 25-30°C (77-86°F), which is why it dominates fish farming at home for beginners in tropical countries. If you’re figuring out how to start fish farming at home in Nigeria, you already have the climate advantage: ambient water temperatures stay in the ideal range year-round in most southern states, so you skip the single biggest expense (heating). A basic outdoor concrete or tarpaulin tank setup with aeration runs under $200 in Lagos. In Bangladesh and Uganda, similar setups work with local catfish or tilapia fingerlings sourced from government hatcheries for pennies each.
Temperate climates flip the equation. In northern India or highland South Africa, winter water temps can drop below 15°C, which stalls tilapia growth completely. You have two options: switch to cold-tolerant species like trout or carp, or run an indoor biofloc fish farming at home system with a submersible heater (150-300W units cost $15-40 and add roughly $10-20/month to electricity). Pakistan’s Punjab region sits in a sweet spot where summers support catfish outdoors but winters demand insulated tanks or greenhouses.
- Tropical zones (Nigeria, Bangladesh, Uganda): Tilapia or African catfish in outdoor tarpaulin tanks. Minimal heating. Feed twice daily, early morning and late afternoon to avoid midday heat stress.
- Subtropical zones (coastal India, lowland South Africa, southern Pakistan): Same species, but add a cheap fish farming at home kit with a thermometer and backup aeration for cooler months.
- Temperate or highland zones: Trout or common carp indoors. Budget $50-80 extra for heating and insulation. Reduce feeding frequency in winter since metabolism slows.
Feeding schedules matter more than most beginners realize. In tropical setups above 28°C, fish metabolize food fast, so three small feedings outperform two large ones. Below 20°C, once daily is enough. How can I start fish farming at home in a hot, humid climate without losing fish? Aeration. Warm water holds less dissolved oxygen, so a simple air pump running 24/7 is non-negotiable in places like coastal Nigeria or Bangladesh, even on a budget system.
Key Takeaways for Starting Your Home Fish Farm
So here’s the real math on fish farming for home setups. A $300-500 above-ground pool system stocked with 100 tilapia fingerlings is enough to produce 50-100 pounds of fish in about 6 months with proper care. That’s serious protein. Fresh tilapia at most grocery stores runs $4-8 per pound, and wild-caught species like salmon or cod cost significantly more. If you’re figuring out how to start fish farming at home for beginners, this first-season setup gives you a concrete baseline to measure whether the time, feed costs, and daily maintenance actually pencil out for your household.
Budget $50-75 monthly for feed and utilities, with total first-year costs landing around $800-1200 including setup. Your actual cost per pound of homegrown fish varies quite a bit depending on the system you choose, the species you raise, local feed prices, and what fresh fish sells for near you. Some growers see meaningful savings over grocery store tilapia or catfish; others break roughly even but gain the advantage of knowing exactly how their fish were raised. Factor in the time investment too. Feeding and checking water parameters takes 15-20 minutes daily, and you’ll spend another 2-3 hours each month on deeper cleaning and maintenance tasks.
Success hinges on starting small and scaling gradually. That first 100-fish harvest teaches you water chemistry rhythms, feeding schedules, and local predator patterns without risking major losses. Keep detailed records of feed costs, growth rates, and water test results. These notes become your blueprint for expanding to 200-300 fish in year two, when your per-pound costs drop even further through bulk feed purchases and refined techniques.
Frequently Asked Questions
What is the easiest fish to farm at home?
Tilapia wins for beginners because they’ll survive ammonia spikes that kill trout, reproduce in a trash can, and eat everything from duckweed to kitchen scraps. They grow from 1-inch fingerlings to 1.5-pound plate-size fish in 6 months at 80°F water temperature.
Is indoor fish farming profitable?
Your actual fish farming at home cost depends heavily on where you live, what you pay for electricity, and local market prices for live or fresh tilapia. A 500-gallon basement setup might produce 100 to 200 pounds of tilapia per year, but whether you clear a profit or just break even comes down to variables no generic breakdown can predict. Feed, fingerlings, and electricity are your three big recurring expenses, and they shift dramatically by region. A grower in Florida can run a system year-round with almost no heating costs, while someone in Minnesota might see energy bills spike two or three times higher during winter months just to keep water in the 78 to 82°F range tilapia need. Before you build anything, price out your local electricity rate per kWh, check what tilapia fingerlings sell for from hatcheries that will ship to your state, and figure out what fresh tilapia actually fetches at your nearest farmers market or within your community. Those three numbers will tell you more about profitability than any generic estimate.
What fish are most profitable to farm?
Catfish edges out tilapia for profit in Southern states where they grow year-round without heating costs. Premium species like barramundi or jade perch fetch $15-20 per pound at farmers markets but require pristine water conditions and specialized knowledge that challenges beginners.
How profitable is a fish farm?
Profit potential from a backyard fish setup varies wildly depending on your local market prices, whether your state allows selling live or processed fish, feed costs, and how efficiently you manage water quality. A modest 1,000-gallon system stocked with tilapia can offset grocery bills and generate some side income at farmers markets, but anyone quoting you exact annual returns without knowing your specific costs and local regulations is guessing. Scaling up to a larger operation, say 5,000 to 10,000 gallons, does increase earning potential, but it also means significant upfront spending on tanks, filtration, permits, and months of operating costs before your first harvest is ready to sell. Talk to your county extension office and price out feed locally before you build a business plan around someone else’s numbers.