Author: BlogMatic

  • How to Change Fish Tank Water in 7 Simple Steps (Without Harming Your Fish)

    How to Change Fish Tank Water in 7 Simple Steps (Without Harming Your Fish)

    Learning how to change fish tank water properly is the single most important maintenance skill for keeping fish alive. Regular partial water changes remove harmful nitrates, ammonia, and waste that even the best filters can’t eliminate. Without these changes, toxins accumulate to dangerous levels, stressing fish and inviting disease.

    Most tanks need 25-30% of their water changed weekly or bi-weekly, never 100% at once. Replacing all the water destroys beneficial bacteria and shocks fish with sudden chemistry changes. The process takes 20-30 minutes with basic equipment: a siphon or gravel vacuum, a bucket, and water conditioner to neutralize chlorine.

    Why Partial Water Changes Matter for Fish Health

    Nitrates accumulate in every aquarium, even with the best filtration system running 24/7. When levels climb above 40 ppm, fish experience chronic stress that weakens their immune systems and triggers disease outbreaks. These toxins build up from fish waste, uneaten food, and decaying plant matter. Your filter converts deadly ammonia into nitrite, then into nitrate, but it can’t remove that final compound. Only water changes export nitrates from your closed system.

    Replacing all the water at once destroys the beneficial bacteria colonies living in your substrate and filter media, the same bacteria that convert deadly ammonia into less harmful compounds. A complete water change also shocks fish with sudden shifts in temperature, pH, and mineral content. Partial changes of 25 to 50 percent maintain stable water chemistry while refreshing dissolved oxygen levels and removing debris that clouds your water. The remaining 50 to 75 percent of old water buffers against parameter swings, giving fish time to adjust to the new conditions gradually.

    Tank volume, stocking density, and filtration capacity determine your change frequency. A heavily stocked 20-gallon tank with a dozen fish needs weekly water changes, while a lightly populated 55-gallon setup with strong filtration might stretch to every two weeks. Test nitrate levels regularly to find the schedule that keeps your specific tank below 40 ppm between changes. Goldfish tanks always need weekly changes regardless of size because these fish produce three times the waste of tropical species.

    Equipment You’ll Need for a Water Change

    Before you start siphoning water, gather the right tools to make the job efficient and safe for your fish. Using equipment that’s never touched soap or household cleaners prevents chemical contamination that can kill an entire tank overnight.

    • Aquarium siphon or gravel vacuum in manual or electric models. Manual siphons cost $10 to $20 and work by gravity, while electric versions run $30 to $50 and speed up the process for larger tanks. Choose a diameter that matches your tank size (smaller tubes for tanks under 20 gallons, wider ones for 55+ gallon setups).
    • Clean bucket(s) designated only for aquarium use. A 5-gallon bucket works for most tanks, but keep two on hand if you’re changing water in a 40+ gallon aquarium. Mark these buckets clearly and store them away from cleaning supplies to prevent accidental contamination.
    • Water conditioner or dechlorinator to neutralize chlorine and chloramine in tap water. Most municipal water contains these chemicals at levels that burn fish gills within minutes. Add conditioner to new water before it goes into the tank, following the dosage on the bottle (typically 1 ml per gallon).
    • Algae scraper or pad for cleaning glass before you start siphoning. Scrubbing first lets the siphon pull away the loosened algae and debris instead of leaving it floating in the tank.
    • Optional additions: a thermometer to match new water temperature within 2 degrees of tank water, or a Python no-spill system that connects directly to your faucet and eliminates bucket carrying entirely for $40 to $60.

    Step-by-Step: How to Change Fish Tank Water Safely

    **Step 1: Unplug all electrical equipment.** Before your hands go anywhere near the water, disconnect the heater, filter, and any lights or air pumps. Heaters can crack or malfunction when exposed to air while still hot, and filters can burn out their motors if they run dry. This single precaution prevents equipment damage and eliminates any shock risk.

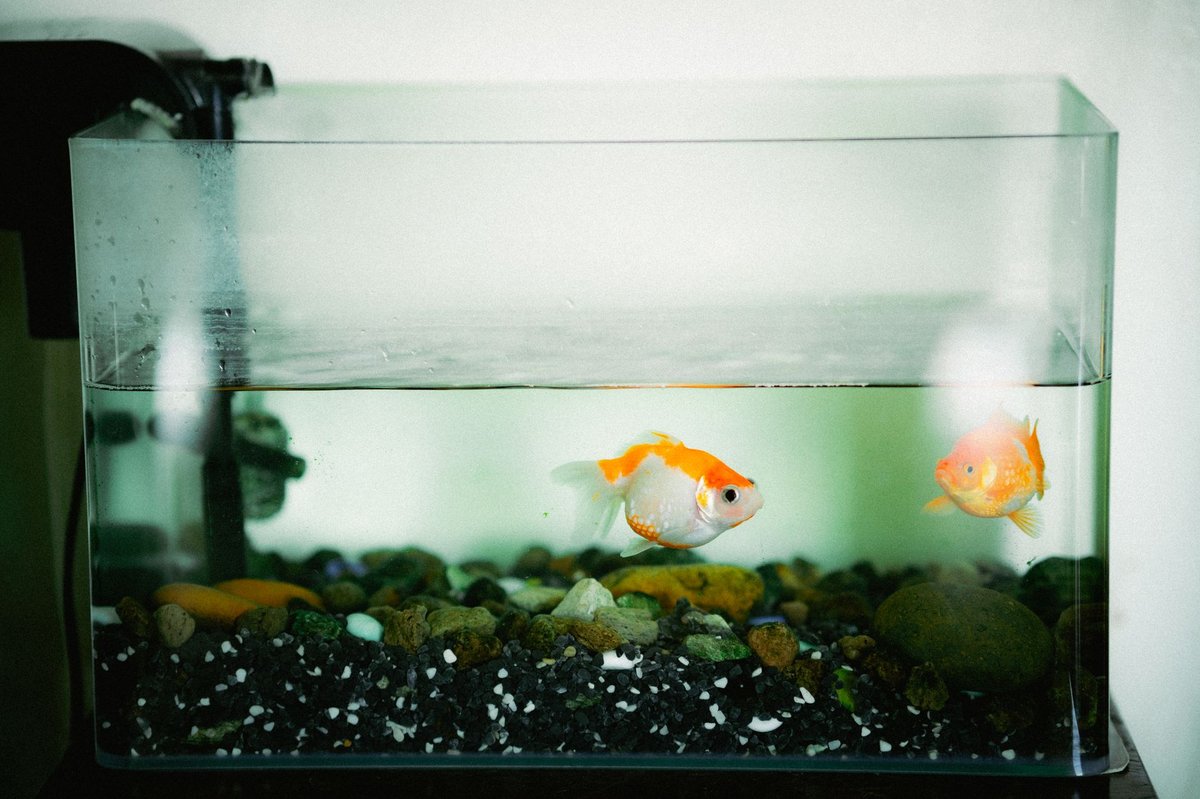
    Two goldfish swimming peacefully in a home aquarium with colorful rocks.
    Photo by Thanh Nhan on Pexels

    **Step 2: Scrape algae off the glass.** Use an algae pad or scraper to remove buildup from the front and side panels. The debris you dislodge will get siphoned out with the old water in the next step, saving you from clouds of floating algae particles. This is the perfect time to flip decorative rocks if algae is growing on them, burying the green side to kill it off naturally.

    **Step 3: Start the siphon and vacuum the gravel.** Insert your gravel vacuum into the tank and begin the water flow into your bucket. Push the vacuum tube into the substrate in small circular motions, watching waste and debris rise up through the tube while the heavier gravel falls back down. Work methodically across the bottom, spending a few seconds in each spot. If you’re learning how to change water in betta fish tank setups or smaller aquariums, use a narrower siphon to avoid removing water too quickly.

    **Step 4: Remove 25 to 30% of the total volume.** For a 40-gallon tank, that means siphoning out about 10 gallons. Stop before the water level drops below your filter intake or exposes the heater element. Removing more than 50% at once can destabilize water chemistry, so even if the tank looks dirty, resist the urge to drain it further. The remaining water buffers against pH swings and temperature shifts when you refill.

    **Step 5: Dispose of the old water.** The easiest option is pouring it down a drain, but old tank water makes excellent fertilizer for houseplants and gardens. It’s loaded with nitrates and organic nutrients that plants absorb readily, so nothing goes to waste.

    **Step 6: Prepare the replacement water.** Fill your bucket with tap water that matches your tank temperature within 2 to 3 degrees Fahrenheit. Add water conditioner according to the bottle instructions, which typically means one capful per 10 gallons. The conditioner neutralizes chlorine and chloramine that would otherwise kill your fish and beneficial bacteria. Let it sit for 30 seconds to mix thoroughly.

    **Step 7: Refill the tank slowly.** Pour the treated water back in gently, aiming the stream at a decoration, rock, or the glass wall to break the flow. This prevents the water from blasting into the substrate and kicking up debris or stressing your fish with turbulence. Once the tank is refilled, plug your equipment back in and verify everything restarts properly.

    How to Condition Water for Fish Tank Water Changes

    Tap water contains chlorine and chloramine, chemicals that municipal water systems add to kill bacteria. These same chemicals burn fish gills on contact and wipe out the beneficial bacteria colonies living in your filter and substrate. Adding untreated tap water directly to your tank can trigger an ammonia spike that kills fish within hours.

    Dose based on the volume of water you’re adding, not your total tank size. If you’re replacing 5 gallons, treat 5 gallons. Seachem Prime, API Stress Coat, and Tetra AquaSafe each list exact measurements on the label. Follow those instructions for your specific water volume. Most conditioners work instantly on contact, but letting treated water sit 5 minutes ensures complete neutralization before it touches your fish.

    If you use a Python-style refill system that connects directly to your faucet, add the conditioner straight to the tank before turning on the water. The incoming flow mixes the treatment throughout the aquarium as it fills. Well water users face different challenges. Test your well water for heavy metals and pH levels before each change, since these can fluctuate seasonally. Spring runoff can drop pH by a full point or introduce iron that stains decorations orange.

    How Often to Change Fish Tank Water (By Tank Type)

    The frequency of water changes depends heavily on your specific tank setup. Standard freshwater community tanks need 25 to 30 percent weekly or 40 to 50 percent bi-weekly to keep nitrates in check. Goldfish produce far more waste than tropical fish, so their tanks require 30 to 40 percent weekly changes regardless of filtration quality.

    Betta fish in bowls or small tanks under 5 gallons without filters need 25 percent changes twice weekly. The limited water volume means toxins concentrate rapidly in these setups. Planted tanks can stretch to 20 to 25 percent weekly since aquatic plants consume some nitrates, but they don’t eliminate the need for water changes entirely.

    New tanks in their first 4 to 6 weeks require a lighter touch. Remove only 10 to 15 percent weekly without disturbing the gravel, since beneficial bacteria colonies are still colonizing the substrate and filter media. Aggressive vacuuming during this period can crash the nitrogen cycle before it establishes. Tanks running without filters need 30 to 50 percent changes every 3 to 4 days minimum because there’s no biological filtration to process ammonia between changes.

    Common Water Change Mistakes to Avoid

    A 100 percent water change strips away every beneficial bacteria colony in your tank, forcing the nitrogen cycle to restart from zero. Fish experience fatal parameter shock when pH, hardness, and temperature all shift at once. A tank that’s been running at pH 7.8 for months, suddenly filled with fresh tap water at pH 6.5, will stress fish into disease within 24 hours. Stick to 25 to 50 percent changes to preserve biological stability while still removing accumulated waste.

    Adding untreated tap water directly to your tank kills fish and bacteria on contact. Chlorine burns gill tissue within seconds and wipes out the nitrifying bacteria that process ammonia. Always dose water conditioner into your refill bucket before pouring, or add it to the tank immediately before refilling if you treat in the aquarium. Temperature mismatches beyond 3 degrees Fahrenheit stress fish immune systems and trigger disease outbreaks. Match new water temperature to your tank reading before adding it.

    Cleaning filter media during the same session as a water change removes too much beneficial bacteria at once. Your biological filtration takes a double hit, risking an ammonia spike within 24 hours. Alternate weeks: change water one week, rinse filter media in old tank water the next. Never use soap-washed buckets for aquarium work. Detergent residue remains even after thorough rinsing and proves toxic to fish at concentrations you cannot see or smell. Designate aquarium-only buckets and label them clearly.

    Skipping gravel vacuuming leaves decomposing waste trapped in your substrate. Uneaten food and fish waste break down into ammonia between water changes, poisoning your tank from the bottom up. Run your siphon through the gravel during every water change to pull out debris before it decays.

    Troubleshooting: Cloudy Water and Fish Stress After Changes

    Cloudy water within hours of a water change typically signals a bacterial bloom triggered by over-cleaning your filter media or shocking the tank with water that’s too cold or too hot. The cloudiness appears milky white as beneficial bacteria multiply rapidly to recolonize surfaces you scrubbed too aggressively. This clears on its own within 24 to 48 hours as the bacterial population stabilizes. Resist the urge to do another water change, which only restarts the cycle.

    Fish gasping at the surface immediately after adding new water means chlorine or chloramine poisoning. Your dechlorinator either wasn’t added or the dose was insufficient for the water volume. Add a double dose of water conditioner right away and turn on extra aeration if you have an air stone. Most fish recover within an hour once the chemicals are neutralized, but gill damage from even brief exposure can take days to heal.

    Lethargic fish hiding near the bottom after a water change indicates the new water was significantly colder or warmer than the tank temperature. Float sealed bags or bottles of warm water in the tank to gradually raise the temperature one degree per hour, or turn off the heater temporarily if you added water that was too hot. Never add ice or hot water directly, which causes additional temperature swings that compound the stress.

    Cloudiness that persists beyond three days points to overfeeding or a filter that can’t handle your bioload, not the water change itself. Cut feeding in half and check that your filter is rated for at least 150 percent of your tank volume. Test your water parameters if fish show continued stress. Ammonia or nitrite readings above 0 ppm require an immediate 50 percent emergency water change with properly conditioned, temperature-matched water to prevent permanent organ damage.

    Key Takeaways for Successful Water Changes

    Stick to 25 to 30 percent partial changes weekly. This single habit prevents most aquarium problems by keeping nitrates under 20 ppm without shocking your fish with dramatic parameter swings. A 30 percent change in a 50-gallon tank removes 15 gallons of nitrate-laden water while leaving 35 gallons to buffer against pH and temperature shifts. Larger or less frequent changes force fish to adapt to bigger chemistry swings that stress their systems even when the final water quality improves.

    Always treat new water with conditioner and match temperature within 2 to 3 degrees Fahrenheit before adding it to your tank. Cold water from the tap can drop your tank temperature by 5 degrees or more during a 30 percent change, sending tropical fish into shock. Fill your bucket, add dechlorinator according to bottle instructions, then let it sit or add warm water until a thermometer confirms it matches your tank. Betta fish and discus are especially sensitive to temperature drops below 76°F.

    Vacuum gravel during every change to remove waste that filters cannot reach. Uneaten food, fish waste, and decaying plant matter sink into substrate where they rot and release ammonia between water changes. Your siphon pulls this debris out while removing water, handling two maintenance tasks at once. Move the vacuum head slowly across the bottom in overlapping passes, spending 3 to 5 seconds in each spot until you’ve covered the entire substrate or reached your target water removal.

    Mark your calendar or set phone reminders because consistency matters more than perfection. A tank that gets 25 percent changes every seven days stays healthier than one that gets 50 percent changes whenever you remember. Missing a week occasionally won’t crash your system, but skipping three weeks in a row lets toxins climb to dangerous levels that require emergency intervention instead of routine maintenance.

    Frequently Asked Questions

    How do I change the water in my fish tank without killing the fish?

    Change only 25-50% of the water at a time, leaving your fish safely in the tank while you work. Use a siphon or gravel vacuum to remove old water, then refill with dechlorinated water that matches the tank’s temperature. Never do a complete water change, as removing all the water eliminates beneficial bacteria and causes dangerous parameter swings that stress or kill fish.

    Should you take fish out of the tank when changing water?

    No, you should leave your fish in the tank during routine water changes. Removing fish causes unnecessary stress from handling and netting, and the 25-50% partial water change is safe for them to remain in. The only exception is if you’re treating a disease or doing emergency maintenance that requires a tank to be completely emptied.

    How often should you change fish tank water?

    Change 25-50% of your aquarium water weekly to maintain healthy conditions for your fish. This regular schedule removes accumulated waste, nitrates, and other pollutants before they reach harmful levels. Brand-new tanks in their first 4-6 weeks of cycling require gentler water changes without disturbing the gravel to preserve developing beneficial bacteria.

    Can you do a 100% water change in my fish tank?

    No, never do a 100% water change in an established aquarium. Complete water changes eliminate the beneficial bacteria that live in your tank and process fish waste, causing dangerous ammonia and nitrite spikes. Stick to removing only 25-50% of the water during each change to maintain stable water chemistry and keep your fish healthy.

  • How to Clean a Plastic Fish Tank in 8 Simple Steps (Without Harming Your Fish)

    Plastic and acrylic tanks scratch far more easily than glass, which means metal scrapers, abrasive sponges, and even rough paper towels can permanently cloud the viewing panels. A single aggressive scrub with the wrong tool leaves you staring through a haze of fine scratches that no amount of polishing will fully remove. This demands a completely different cleaning approach than the metal-blade-and-elbow-grease method that works fine on glass.

    Most routine cleaning happens with your fish still swimming inside, which reduces the stress that comes from netting, transporting, and temporarily housing your livestock. Regular maintenance every 1 to 2 weeks prevents algae buildup and keeps ammonia, nitrite, and nitrate levels stable. A 20-gallon tank typically needs 30 to 45 minutes of work per session, far less than the hours required to recover from neglect.

    This guide walks you through the complete process, from gathering the right equipment (plastic scrapers, not metal) to the final buffing that restores your tank’s shine. You’ll learn which tools remove algae from acrylic without scratching it, how to clean plastic plants and ornaments without harsh chemicals, and the proper sequence for water changes that won’t shock your fish. These eight steps cover both weekly maintenance and the deep cleaning sessions that keep your tank crystal clear.

    Essential Equipment and Supplies for Cleaning Plastic Fish Tanks

    Gathering the right equipment before you start prevents mid-cleaning scrambles and protects your plastic tank from accidental damage. The single most important rule: avoid anything metal or abrasive that can scratch acrylic or polycarbonate surfaces. A plastic or soft-bristle algae scraper removes buildup from interior walls without leaving permanent cloudiness, unlike metal blades that gouge viewing panels in seconds. For stubborn spots on a plexiglass fish tank, a magnetic algae cleaner designed specifically for acrylic works through the tank wall without ever touching the surface directly.

    A gravel vacuum or siphon hose handles two jobs at once: it pulls debris from substrate while draining water for your partial change. Two dedicated buckets (never used for household cleaners) keep dirty and fresh water separate. The fresh water bucket holds tap water treated with a conditioner that neutralizes chlorine and chloramine, both of which kill beneficial bacteria and harm fish gills. Soft microfiber cloths prevent scratches on the exterior, since cotton towels and paper products trap dust particles that act like sandpaper on plastic. An aquarium-safe glass cleaner works on plastic tank exteriors, but a 1:1 white vinegar and water solution costs less and cleans just as effectively. This same vinegar solution safely cleans plastic ornaments and plants when you soak them in a separate container (never inside the tank with fish present).

    A water test kit confirms that ammonia, nitrite, and nitrate levels stay safe after cleaning. Cloudiness often signals a water chemistry problem rather than just physical dirt, so testing before you start scrubbing can save you wasted effort.

    How Often Should You Clean Your Plastic Fish Tank?

    Most established tanks need partial water changes of 15 to 25 percent every week, paired with bi-weekly deep cleaning sessions that include gravel vacuuming and scrubbing decorations. This rhythm keeps ammonia and nitrate levels in check without shocking your fish with sudden environmental shifts. Monthly filter maintenance completes the cycle, though you should rinse media in old tank water rather than tap water to preserve beneficial bacteria colonies.

    Daily spot-cleaning makes weekly maintenance less labor-intensive. Wipe visible algae or debris from viewing panels each morning using a soft cloth, which prevents buildup that later requires aggressive scrubbing. This matters especially for acrylic surfaces, where even minor scratching from embedded particles clouds the tank permanently. For heavy algae growth, soak plastic plants in a 1:1 vinegar-water solution outside the tank during your bi-weekly sessions rather than scrubbing them in place.

    New tanks demand more attention during the 4 to 6 week nitrogen cycle establishment period. Test water chemistry every other day and perform smaller, more frequent water changes (10 percent twice weekly) if ammonia or nitrite spikes appear. Once beneficial bacteria colonize your filter media and substrate, you can shift to the standard weekly schedule. This break-in phase teaches you which tools work without scratching, since you’ll be monitoring and adjusting constantly enough to notice damage immediately.

    Step-by-Step: How to Clean a Plastic Fish Tank Safely

    Start by unplugging all electrical equipment including heaters, filters, and air pumps. Water and electricity create serious shock hazards, and you’ll need to move decorations and reach into corners where cords might dangle. Wait two minutes after unplugging heaters to let the elements cool before exposing them to air.

    Remove decorations and artificial plants, then soak them in a 10% bleach solution (one part bleach to nine parts water) for 15 minutes to kill algae and bacteria. Rinse each piece under running tap water for at least two minutes, then smell them closely. Any lingering chlorine scent means they need another rinse, since even trace amounts can harm fish.

    Hold your plastic scraper at a 45-degree angle against the tank walls and use smooth, overlapping strokes to remove algae. Never press hard or scrub in circles, which grinds particles between the scraper and acrylic. If you feel resistance, stop and rinse the scraper blade. This gentle approach is exactly how to clean the inside of an acrylic fish tank without creating permanent haze.

    Insert your gravel vacuum and work in sections, removing 20 to 25 percent of the water into a bucket. Hover the siphon one inch above the substrate so it pulls waste without sucking up gravel. Empty decorative rocks release hydrogen sulfide (which smells like rotten eggs), so if you detect that odor, vacuum more thoroughly in that area.

    Wipe the exterior glass or acrylic with a microfiber cloth dampened with acrylic-safe cleaner or plain water. Spray the cloth, not the tank, to prevent drips from entering the water. Dry with a second clean microfiber to avoid streaks.

    Add dechlorinated replacement water that matches your tank temperature within 2°F. Cold water shocks fish and crashes beneficial bacteria colonies in your filter. Pour slowly along the tank wall or over a clean plate resting on the substrate to avoid stirring up debris.

    Replace decorations in their original positions (or rearrange if desired), then plug in and restart your heater, filter, and other equipment. Check that filter output creates gentle surface ripples and that the heater indicator light turns on.

    Test water parameters 24 hours later using a liquid test kit. Your pH should match pre-cleaning levels, while ammonia and nitrite should read zero. Nitrate between 5 and 20 ppm confirms your beneficial bacteria survived the cleaning process intact.

    How to Remove Stubborn Algae from Plastic Fish Tanks Without Scratching

    Different algae types demand different removal strategies, but all share one rule: never use metal tools or abrasive pads on plastic tanks. Green spot algae, the hard circular dots that cling to viewing panels, respond best to a plastic credit card or acrylic-safe razor blade held at a shallow angle. Press gently and scrape in one direction rather than sawing back and forth. Brown diatom algae, which appears as a dusty brown film, wipes away easily with a soft cloth and typically signals a new tank still cycling or insufficient lighting rather than a serious problem.

    Black beard algae on decorations requires a different approach since it anchors too firmly for simple wiping. Remove affected items from the tank and soak them in 3% hydrogen peroxide for five minutes, then scrub with a soft brush and rinse thoroughly before returning them to the water. For plastic plants specifically, a 1:1 vinegar and water solution works well. Soak the plants for 30 minutes, scrub gently to remove loosened algae, and rinse under running water until the vinegar smell disappears completely.

    Magnetic cleaners with felt pads handle routine maintenance efficiently, but inspect both the interior and exterior pads before each use. A single grain of sand trapped in the felt will carve circular scratches into your viewing panel as you move the magnet across the surface. These microscratches accumulate over time, clouding the tank permanently in ways that no amount of polishing can reverse. Steel wool, scouring pads, and metal scrapers cause the same irreversible damage, turning a clear acrylic panel hazy within seconds of contact.

    Special Considerations for Acrylic and Plexiglass Fish Tanks

    Acrylic and plexiglass tanks scratch roughly 10 times easier than glass, but they offer one advantage glass doesn’t: you can buff out minor scratches with acrylic polish. Before touching any cleaning tool to the tank surface, rinse it thoroughly under running water. A single grain of sand trapped in a sponge or cloth will carve deep scratches as you wipe, and those grooves collect algae that makes the damage more visible over time.

    Ammonia-based glass cleaners like Windex cause crazing on acrylic tanks, a spider-web pattern of tiny cracks that clouds the material permanently. Stick to cleaners specifically labeled for acrylic, or use plain distilled water for routine exterior cleaning. If your acrylic tank has already developed cloudiness from minor scratches or water spots, buff the affected area with Novus #1 or a similar acrylic polish using small circular motions and a clean microfiber cloth. Work in sections no larger than 12 inches square to maintain even pressure.

    Temperature shock stresses acrylic tanks more than glass because the material expands and contracts faster. Match replacement water to within 1 to 2 degrees Fahrenheit of the tank temperature before adding it. For exterior cleaning of plexiglass tanks, a damp microfiber cloth with distilled water removes fingerprints and water spots without risking chemical damage. The distilled water dries streak-free without leaving mineral deposits that require abrasive wiping to remove.

    Common Mistakes to Avoid When Cleaning Plastic Fish Tanks

    Removing all the water and fish during routine cleaning ranks as the most damaging mistake aquarium owners make. This practice triggers extreme stress in fish and strips away the beneficial bacteria colonies that live on every submerged surface. These bacteria convert toxic ammonia into less harmful compounds, and a complete teardown forces your tank to restart the nitrogen cycle from scratch. Only emergency situations like a disease outbreak or tank crack justify a full removal.

    Soap residue kills fish even in trace amounts. Dawn dish soap, bathroom cleaners, and glass sprays leave behind surfactants and chemicals that don’t rinse away completely from porous gravel and plastic surfaces. These residues leach into the water for weeks, poisoning fish through their gills and skin. Rinsing filter sponges or bio-balls in tap water exposes beneficial bacteria to chlorine, which destroys the colonies you spent months building. Always use dechlorinated tank water for filter maintenance.

    Swapping out all decorations simultaneously removes too much bacterial surface area at once, creating an ammonia spike within 24 to 48 hours. Replace one or two items per cleaning session instead, giving bacteria time to colonize new surfaces. Paper towels leave behind lint and create microscopic scratches on acrylic viewing panels that accumulate into permanent cloudiness. Fish become defensive and aggressive during spawning periods, and cleaning during feeding time leaves uneaten food rotting in corners you can’t reach while decorations sit in buckets.

    Troubleshooting: Cloudy Water, Persistent Algae, and Other Issues

    Cloudy white water appearing within 24 hours of cleaning signals a bacterial bloom, not a cleaning failure. You’ve disrupted the nitrogen cycle by removing too much beneficial bacteria during your cleaning session, and now free-floating bacteria are multiplying rapidly to recolonize surfaces. This cloudiness typically clears on its own within 2 to 3 days as the bacteria attach to substrate and filter media. Resist the urge to clean again or change more water, both of which restart the cycle.

    Green water that persists despite regular cleaning points to excess nutrients or too much light exposure. Cut feeding to only what your fish consume in 2 to 3 minutes, and remove any uneaten food immediately. Limit aquarium lighting to 8 hours daily, and move the tank away from windows where direct sunlight fuels algae growth. If algae returns within days of each cleaning, you’re almost certainly overfeeding, the most common cause of rapid algae regrowth in home aquariums.

    A rotten egg smell during or after cleaning indicates hydrogen sulfide gas trapped in anaerobic pockets deep in your gravel. These oxygen-depleted zones form when debris accumulates faster than your cleaning routine removes it. Vacuum the substrate more thoroughly during your next session, pushing the siphon tube deeper into the gravel and working in a grid pattern to cover every square inch. Hydrogen sulfide is toxic to fish, so address this immediately rather than waiting for your regular cleaning schedule.

    Minor scratches on plastic tanks buff out with acrylic polish applied in small circular motions, but deep scratches that catch your fingernail may be permanent. Prevention matters more than repair: a single cleaning with a contaminated sponge can create dozens of scratches that no amount of polishing will fully erase.

    Key Takeaways for Maintaining a Crystal-Clear Plastic Fish Tank

    Weekly 20% water changes with gravel vacuuming prevent 90% of tank problems before they start. This rhythm removes waste buildup, dilutes nitrates, and keeps algae from gaining a foothold without disrupting the biological balance your fish depend on. A 20 to 30 gallon tank needs 30 to 45 minutes for thorough cleaning, but rushing through the process leads to missed spots and careless tool handling that scratches acrylic.

    One metal scraper can cause permanent damage to acrylic that no amount of polishing will fix. Keep a dedicated set of cleaning supplies for your aquarium, and rinse them under tap water before each use to flush away any sand grains or debris that might scratch the viewing panels.

    Keep fish in the tank during routine cleaning to minimize stress and maintain biological balance. Netting and relocating fish strips away the protective slime coat they produce, making them vulnerable to disease. The beneficial bacteria colonies living on every submerged surface need to stay wet and oxygenated, and removing all the water kills these colonies within 20 minutes.

    Test water parameters weekly for the first month, then bi-weekly once the tank is established and your readings stay consistent. Ammonia and nitrite should always read zero, while nitrates should stay below 20 ppm in most freshwater setups. These numbers tell you whether your cleaning routine is working or whether you need to adjust frequency or technique.

    Frequently Asked Questions

    How to make a plastic fish tank clear again?

    Scrub the interior walls with a plastic algae scraper to remove buildup without scratching the surface, then perform a partial water change of 25 to 30% to eliminate cloudiness. Metal scrapers or abrasive pads scratch plastic and acrylic easily, creating permanent haze. For stubborn algae on plastic surfaces, use a soft cloth or designated acrylic-safe cleaning pad instead of harsh tools.

    How do you clean the inside of a plastic tank?

    Use a plastic algae scraper or soft cloth to wipe down the walls, working from top to bottom to avoid redistributing debris. A gravel siphon vacuums the substrate and removes waste while simultaneously draining water for your regular partial water change. Metal scrapers will scratch plastic tanks, and even fine sand particles trapped under the scraper can create permanent scratches that cloud the tank over time.

    Can I use Dawn dish soap to clean a fish tank?

    Do not use Dawn dish soap or any household detergent to clean a fish tank. Soap residue is toxic to fish and nearly impossible to rinse completely from porous surfaces. Even trace amounts of soap can damage fish gills and disrupt the beneficial bacteria that maintain your tank’s nitrogen cycle. Hot water and aquarium-safe cleaning tools handle all routine cleaning without chemical help.

    What cleans plastic without damaging it?

    Hot water and a soft cloth or plastic scraper clean plastic safely without causing damage or leaving harmful residues. For acrylic or plastic tanks, always use plastic or acrylic-safe tools rather than metal implements, and rinse any cleaning pad thoroughly before use to remove trapped sand or debris that could scratch the surface. If scratches do occur on acrylic tanks, specialized buffing solutions can restore clarity, though prevention through proper tool selection remains the best approach.

  • Fluval vs Aqueon: Which Brand Wins for Filters, Heaters, Tanks & Substrate?

    Fluval vs Aqueon: Which Brand Wins for Filters, Heaters, Tanks & Substrate?

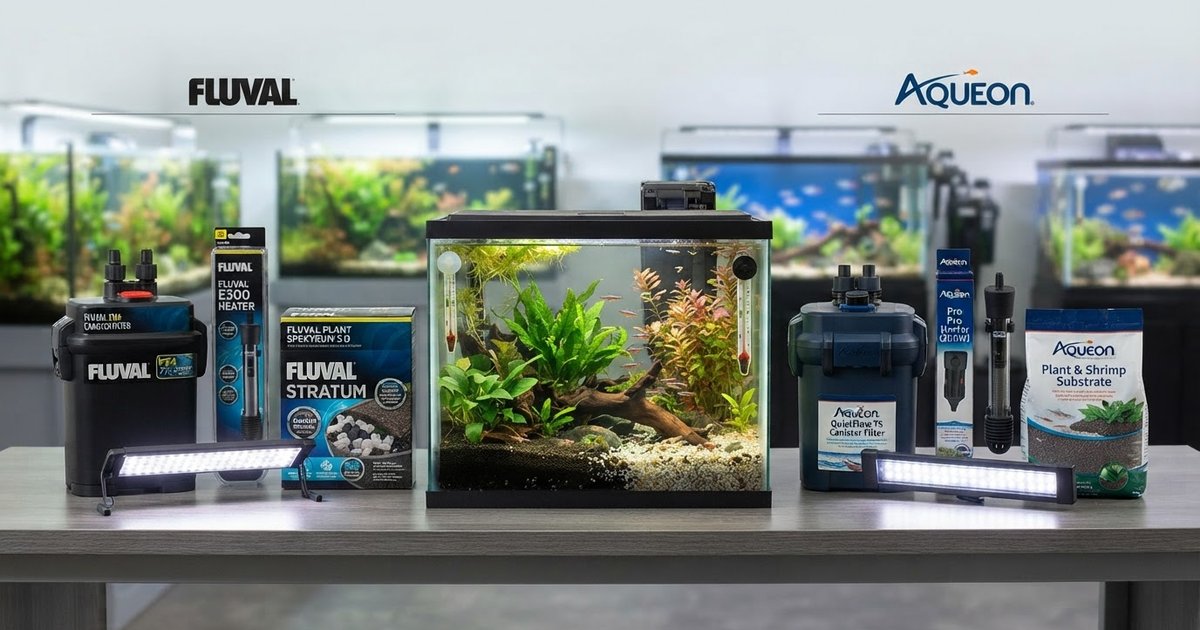
    Walk into any aquarium store and you’ll find shelves stocked with two names: Fluval and Aqueon. The Fluval vs Aqueon debate splits hobbyists because these brands occupy opposite corners of the market. Fluval engineers premium equipment with features like digital temperature displays and multi-stage filtration, while Aqueon builds straightforward, budget-friendly gear that gets the job done without frills.

    This breakdown compares filters, heaters, tanks, and substrate across both brands so you can match equipment to your actual needs. A 20-gallon beginner tank demands different priorities than a 75-gallon planted setup, and spending $150 on a Fluval canister filter makes no sense if a $40 Aqueon hang-on-back handles your bioload perfectly fine. The fluval vs aqueon canister filter question matters most for larger tanks, while the fluval stratum vs aqueon debate centers on planted versus non-planted systems.

    Most experienced aquarists own equipment from both brands because neither wins every category. Fluval dominates planted tank substrate and high-capacity filtration, but Aqueon heaters often outlast their pricier competitors, and Aqueon starter kits cost half what Fluval charges. Choosing the wrong heater risks cooking your fish at 90 degrees, and picking an underpowered filter leaves you scraping algae weekly, so understanding where each brand excels prevents expensive do-overs.

    Fluval vs Aqueon Canister Filters: Performance and Value

    Canister filters separate the serious aquarists from the hang-on-back crowd, and here the performance gap widens. The Fluval 07 series (207, 307, 407) pushes higher GPH ratings through 5-7 media baskets, giving you room for ceramic rings, bio-media, carbon, and polishing pads in true multi-stage filtration. Aqueon’s Quietflow canister line (models 200-400) uses 3-4 baskets, which handles most community tanks but limits customization for planted or heavily stocked setups.

    Price tells half the story. The Aqueon Quietflow 300 retails around $120-140, while the comparable Fluval 307 runs $160-180. That $40 gap shrinks when you account for what’s in the box. Fluval includes a self-priming pump that eliminates the siphon-starting headache and throws in more filter media, so you’re not buying bags of ceramic rings your first week.

    Maintenance schedules favor Fluval’s larger media capacity. Their canisters run 4-6 months between deep cleanings because more media volume means slower clogging. Aqueon Quietflow owners typically crack open their canisters every 2-3 months. If you travel frequently or just hate maintenance, that difference matters. Noise levels flip the advantage back: Aqueon Quietflow genuinely earns its name at 35-40 dB, while Fluval 07 units hum at 40-45 dB. The Fluval moves more water, but you’ll hear it during late-night water changes.

    Hang-On-Back Filters: Fluval AquaClear vs Aqueon QuietFlow

    Hang-on-back filters tell a different story. The Fluval AquaClear line lets you stack your own media (foam, carbon, BioMax ceramic rings) in whatever order suits your tank, while Aqueon QuietFlow locks you into proprietary cartridges that cost $8 to $12 each and need replacing monthly. That monthly expense adds up to $96 to $144 annually, compared to AquaClear media that lasts 6 to 12 months and costs $15 to $25 to replace all three stages at once.

    Flow control separates these filters further. AquaClear models include a dial that adjusts flow from 20% to 100%, which matters enormously if you keep bettas or raise fry in low-current environments. Aqueon QuietFlow units run at a single fixed speed, so you either accept the flow rate or buy a different model. Both brands share the same parent company (Hagen) and use identical pump motors internally, so reliability and lifespan track nearly the same. The real choice comes down to whether you value customization and lower running costs (AquaClear) or prefer the simplicity of drop-in cartridges (QuietFlow).

    Fluval vs Aqueon Heaters: Accuracy and Durability

    Heaters show a clearer winner depending on your priorities. Fluval E-Series heaters mount an LCD display on the control head that shows real-time temperature within ±0.5°F, letting you spot swings before they stress fish. Aqueon Pro heaters use a dial control and maintain ±1°F accuracy, which works fine for most community tanks but falls short for discus, crystal shrimp, or marine reef setups where half a degree matters. The Fluval E-Series is fully submersible, so you can position it horizontally near the substrate or tuck it behind hardscape. Aqueon Pro requires the control dial to stay above the waterline, limiting placement options in shallow tanks or rimless setups.

    Durability splits in an unexpected direction. Aqueon Pro heaters carry a lifetime warranty and use shatterproof construction that survives drops and bumps during water changes. Fluval E-Series heaters come with a 3-year warranty and glass construction, which means they can crack if you knock them against rock or pull them out while still hot. In five years of use, I’ve replaced one cracked Fluval E200 but never an Aqueon Pro.

    Price tips the scale further. A 100W Aqueon Pro costs $25 to $30, while the comparable Fluval E100 runs $45 to $55. Aqueon wins on value for standard community tanks, but Fluval’s precision justifies the premium if you’re keeping species that need tight temperature control. For hobbyists asking are Aqueon aquariums good or are Fluval aquariums good, the heater choice often mirrors the tank choice: Aqueon delivers reliability at a budget price, Fluval adds features for advanced keepers willing to pay more.

    Aquarium Tank Quality: Build and Features

    Tank selection splits along the same price-versus-convenience line. Fluval’s Flex, Spec, and Evo lines bundle built-in filtration, LED lighting, and curved glass into all-in-one kits starting at $120 for 5-gallon models. You unbox it, add substrate and water, and you’re running. Aqueon sells standard rectangular tanks with straight glass and silicone seams as tank-only units, starting at $25 for a 10-gallon. That bare tank needs a separate filter, heater, light, and lid before you can keep fish, but you control every component choice.

    Glass thickness differs slightly but both meet safety standards. Fluval tanks use 5-6mm glass on their 10-20 gallon models, while Aqueon uses 4-5mm on equivalent sizes. The thicker glass in Fluval kits adds rigidity to accommodate the integrated filtration chambers molded into the back or side of the tank. Aqueon’s thinner glass works fine for open-top designs where the rim bears most structural load.

    Both brands back tanks with 1-year warranties against leaks and manufacturing defects. Fluval’s all-in-one kits cost $120-200 depending on size, but they eliminate the guesswork for beginners who don’t yet know which filter pairs with which tank or how many watts of heating a 15-gallon needs. Aqueon’s $25-60 tank-only pricing appeals to hobbyists who already own equipment or want to mix brands, choosing an AquaClear filter with an Aqueon tank and a Fluval heater if that combination fits their setup.

    Fluval Stratum vs Aqueon Plant and Shrimp Substrate

    Substrate choice matters more than most beginners realize, and Fluval Stratum versus Aqueon Plant and Shrimp Substrate illustrates the divide. Fluval Stratum drops pH to 6.0-6.5 and softens water through volcanic soil buffering, making it the default choice for crystal shrimp, Caridina species, and acid-loving plants like Cryptocoryne. Aqueon’s clay-based substrate holds pH at neutral 7.0, which suits Neocaridina shrimp, livebearers, and community tanks where you don’t want water chemistry swings.

    Nutrient longevity separates them further. Fluval Stratum delivers volcanic soil minerals that feed root systems for 12 to 18 months before exhausting, giving plants like Amazon swords and Vallisneria strong anchoring and nutrient uptake. Aqueon’s clay pellets carry nutrients for 6 to 12 months, a shorter window that works fine for fast-growing stems or tanks where you dose liquid fertilizers anyway.

    Handling and breakdown tell different stories. Fluval Stratum clouds the water if you pour it in carelessly (rinse gently, don’t agitate), and the granules crumble into finer particles after 18 to 24 months, compacting the substrate layer. Aqueon pellets stay intact longer and produce less dust, but you lose the pH buffering that keeps sensitive shrimp alive through water changes.

    Cost per gallon runs $18 to $22 for a 4.4-pound bag of Fluval Stratum, covering 5 gallons at a 2-inch depth. Aqueon’s 5-pound bag costs $12 to $15 for the same coverage, undercutting Fluval by about 40 percent if you’re setting up a neutral-pH tank and don’t need the buffering capacity.

    LED Lighting: Fluval AquaSky vs Aqueon OptiBright

    Lighting budgets swing just as wide. The Fluval AquaSky brings Bluetooth app control, 24-hour programmable cycles, and spectrum adjustment from 6500K to 25000K, letting you dial in dawn-to-dusk transitions or boost reds for plant coloration. Aqueon OptiBright sticks with manual on/off switches and two fixed modes: daylight white and blue moonlight. You tap a button, the lights turn on. No timers, no gradual ramps, no spectrum tweaks.

    PAR output separates low-tech fish tanks from planted setups. Fluval AquaSky delivers 50 to 80 PAR at 12 inches, enough for medium-light carpeting plants like dwarf hairgrass or Cryptocoryne species. Aqueon OptiBright puts out 30 to 50 PAR at the same depth, which keeps anubias and java fern alive but won’t push demanding stems or foreground carpets. If you’re running CO2 injection or chasing tight plant growth, you need the extra photons Fluval provides.

    A 20-inch Fluval AquaSky costs $90 to $110, while the same-length Aqueon OptiBright runs $40 to $55. You’re paying double for the app control and programmable sunrise simulation. That premium makes sense for planted tanks where light timing affects algae and plant health, but it’s wasted money on a fish-only community tank with plastic decor. Pick Fluval if you’re dosing fertilizers and trimming stems weekly. Grab Aqueon if you just want to see your fish without fiddling with schedules.

    Frequently Asked Questions

    Is Fluval better than Aqueon? No, but it costs more for features serious aquarists actually use. Fluval builds equipment like the FX6 canister filter ($350) and E-Series heaters ($45 to $65) with digital controls, tighter tolerances, and multi-stage media capacity that matter in planted tanks, reef systems, or breeding setups. Aqueon targets beginners with simpler gear like QuietFlow filters ($25 to $40) and standard glass tanks ($30 for a 10-gallon) that get fish wet without the learning curve.

    Which brand lasts longer? Fluval, but the gap is smaller than the price difference suggests. Fluval canister impellers and O-rings typically run 4 to 6 years before needing replacement parts, while Aqueon QuietFlow motors last 3 to 5 years in most setups. Both brands honor one to three year warranties depending on the product line, so catastrophic failures get covered either way.

    Can you mix Fluval and Aqueon products? Yes, and most hobbyists do exactly that. You might run a Fluval 407 canister on a standard Aqueon 75-gallon breeder tank, or pair Aqueon OptiBright lighting with Fluval Stratum substrate in a budget planted setup. The brands use standard tubing sizes (5/8 inch and 3/4 inch) and universal heater clips, so components swap freely.

    Which brand offers better customer support? Fluval responds faster but Aqueon replaces defective units with less hassle. Fluval’s online ticket system typically answers technical questions within 24 hours, while Aqueon phone support runs during business hours only. Aqueon retailers handle most warranty swaps in-store, saving you return shipping time that Fluval requires for direct replacements.

    Final Verdict: Choosing Between Fluval and Aqueon

    Pick Fluval if you’re running planted tanks, keeping sensitive species requiring precise parameters, or want all-in-one solutions. The 40 to 80 percent premium you pay upfront buys digital temperature controls accurate to half a degree, multi-stage filtration with six months between media swaps, and app-controlled lighting that simulates natural photoperiods. Discus breeders, crystal shrimp keepers, and aquascapers building high-tech CO2 setups consistently choose Fluval because the tighter tolerances prevent parameter swings that cost more in livestock losses than you save on equipment.

    Choose Aqueon for budget-conscious setups, fish-only tanks, or when you prefer modular equipment you can upgrade piece by piece. A 20-gallon Aqueon tank costs $30 versus $120 for a comparable Fluval Flex kit, and that price gap lets you allocate funds toward better livestock or more plants. The lifetime heater warranty covers replacements without receipts or time limits, and switching from proprietary QuietFlow cartridges to reusable sponge and ceramic media drops your annual filter costs from $96 to under $15. Community tank owners keeping hardy species like tetras, barbs, and livebearers get everything they need without paying for precision they won’t use.

    Many experienced aquarists mix brands instead of pledging loyalty to one logo. Aqueon Pro heaters deliver the best reliability-to-cost ratio at $25 with lifetime coverage, while Fluval AquaClear filters give you media flexibility that proprietary cartridge systems can’t match. Substrate choice depends entirely on water chemistry goals, not brand preference. A typical mixed setup pairs an Aqueon 40-gallon breeder ($50), AquaClear 70 filter ($60), and Aqueon Pro 200-watt heater ($25) with whatever substrate buffers or stabilizes the parameters your specific fish and plants require.

    Frequently Asked Questions

    Is Aqueon or Fluval better?

    Fluval excels in filtration technology and premium equipment while Aqueon dominates in affordable starter kits and basic tanks. Fluval’s canister filters like the FX series push 400+ GPH through multi-stage media baskets, but you’ll pay $250-350 versus $120-180 for comparable Aqueon models. Aqueon’s all-in-one kits bundle tank, filter, heater, and lighting for $50-80, while Fluval’s Spec and Flex kits start at $120 for similar sizes but include Bluetooth-controlled LEDs and integrated filtration chambers.

    Is Fluval a good aquarium brand?

    Fluval targets experienced aquarists with canister filters that run 4-6 months between cleanings and planted tank substrates that buffer pH to 6.0-6.5 for crystal shrimp. Their Spec and Flex nano tanks (5-16 gallons) pack built-in filtration and curved glass into compact footprints that fit desks and countertops. The brand’s products cost 40-80 percent more than budget alternatives, but the FX6 canister ($350) moves 563 GPH through seven media baskets, while the E-Series heaters hold temperature within 0.5°F instead of the 1-2°F swings cheaper models allow.

    What is the best brand for aquariums?

    Fluval leads in canister filtration with the FX series (400+ GPH, $250-350), Aqueon in starter kits ($50-80 with tank, filter, heater, and light), and brands like Marineland compete with HOB filters while Eheim builds German-engineered canisters for $300-500. A planted tank keeper might run a Fluval 407 canister ($180) with Aqueon Pro heaters ($25 with lifetime warranty) on a standard Aqueon 40-gallon breeder ($50), mixing brands to get the best component for each job rather than paying premium prices across the board.

    Are Aqueon tanks good quality?

    Aqueon tanks use 4-5mm glass on 10-20 gallon models and silicone seals that hold for 5-10 years in typical use. Their standard rectangular tanks come from the same manufacturing facilities as several other budget brands, making a $30 Aqueon 10-gallon functionally identical to competitors at the same price point. The rimmed design adds structural support for larger sizes like 55 and 75 gallons (which hold 460-630 pounds when filled), but you lose the frameless aesthetic that rimless tanks provide for aquascaping setups where the glass edges stay visible.

  • How to Clean a Fish Tank: Complete 12-Step Guide for Healthy Fish

    Why Proper Fish Tank Cleaning Matters for Your Aquarium

    A murky fish tank with stressed, gasping fish isn’t just unsightly—it’s a health crisis brewing in your living room. Regular cleaning maintains water quality by removing waste, uneaten food, and toxins that accumulate despite your filter’s best efforts. The nitrogen cycle depends on balance, and neglected tanks quickly spiral into dangerous ammonia or nitrite spikes that can kill fish within days.

    Most beginners fear accidentally killing fish during cleaning or destroying beneficial bacteria colonies. You’ll keep your fish in the tank during routine maintenance, and proper technique actually protects those helpful bacteria living in your filter and substrate. The key is partial water changes—typically 10-50% of total volume—never the 100% swaps that would crash your ecosystem. Think of it like changing your car’s oil, not replacing the entire engine.

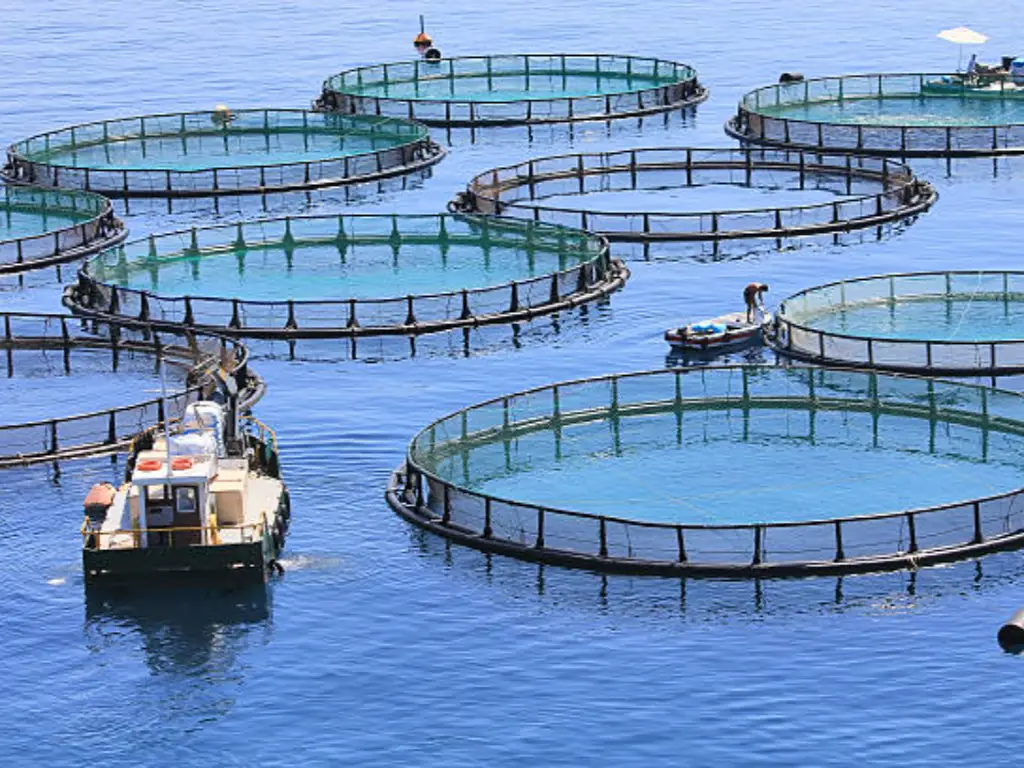
    Cleaning involves siphoning debris from gravel, scrubbing algae from glass, rinsing filter media in old tank water, and refilling with dechlorinated water matched to your tank’s temperature. Large-scale fish farming operations prove this approach works: they maintain water quality through consistent partial changes, biological filtration, and careful monitoring—not by emptying and scrubbing tanks.

    How Often Do Fish Tanks Need to Be Cleaned?

    Cleaning frequency depends on three variables: tank volume, fish population density, and filtration capacity. A heavily stocked 10-gallon tank with a basic sponge filter needs weekly 25% water changes and gravel vacuuming. That same maintenance schedule would stress a lightly stocked 75-gallon tank with canister filtration—bi-weekly cleanings work better for larger systems with lower bioload. Small tanks accumulate waste faster because there’s less water to dilute toxins, making them less forgiving of skipped maintenance.

    New tank owners face different timing. Don’t perform full cleanings during the first 4-6 weeks while beneficial bacteria colonize your filter media and substrate. Light debris removal is fine, but aggressive gravel vacuuming or filter cleaning disrupts the nitrogen cycle before it stabilizes. Test ammonia and nitrite levels instead—once both read zero consistently, you’ve established enough biological filtration to start regular maintenance.

    Your aquarium tells you what it needs between scheduled cleanings. Cloudy water signals bacterial blooms from overfeeding or inadequate filtration. Green water or thick algae coating the glass means excess nutrients and light. A sulfur or rotten egg smell indicates dangerous hydrogen sulfide buildup in the substrate—clean immediately. These warning signs override any calendar-based schedule. Adjust your routine based on what you observe: if algae returns within days of scrubbing, reduce feeding amounts or shorten your light cycle rather than cleaning more aggressively.

    Essential Equipment and Supplies You’ll Need

    Gathering the right tools makes the process efficient and safe for your fish. A gravel vacuum or siphon with bulb is non-negotiable for substrate cleaning—it simultaneously removes debris and drains water. Without a vacuum, you can carefully scoop gravel into a bucket and rinse it with old tank water, though this method is time-consuming and stresses fish more. For glass maintenance, an algae scrubber or magnetic cleaner prevents scratching while reaching every corner. Designate at least two buckets exclusively for aquarium use—household residue from cleaning products can poison your tank even after rinsing.

    Water conditioner or dechlorinator is mandatory for treating tap water before it enters your tank, neutralizing chlorine and chloramine that kill beneficial bacteria and harm fish gills. A water test kit measuring ammonia, nitrite, nitrate, and pH tells you whether your cleaning schedule is working or needs adjustment. Optional but useful tools include a soft toothbrush for scrubbing decorations, a blade scraper for stubborn glass algae, and an infrared thermometer to match new water temperature precisely to your tank’s current reading.

    Kit Type Essential Items Approximate Cost
    Basic Cleaning Kit Gravel vacuum, algae pad, 2 buckets, water conditioner, liquid test kit $40-60
    Advanced Cleaning Kit Above plus magnetic cleaner, blade scraper, infrared thermometer, extra siphon hose $80-120

    Never use Dawn dish soap, household cleaners, or any detergent on aquarium equipment—even trace amounts are toxic to fish. Equally critical: don’t rinse filter media in tap water. Chlorine kills the beneficial bacteria colonies that process ammonia and nitrite, forcing your tank to re-cycle. Always rinse sponges and bio-media in a bucket of old tank water you’ve just removed during a water change.

    How to Clean a Fish Tank: 12-Step Process

    A routine maintenance session takes 30-60 minutes depending on your tank size—a 20-gallon typically needs about 35 minutes, while a 75-gallon might stretch closer to an hour. Your fish stay in the tank throughout this entire process. Removing them causes unnecessary stress and risks injury during netting and transfer. You’ll only need to remove fish when setting up a brand-new tank or during rare deep-cleaning emergencies involving hydrogen peroxide treatments for severe algae or disease outbreaks.

    Wash your hands thoroughly with plain water—no soap residue should contact tank water. Unplug electrical equipment like heaters and filters to prevent damage and eliminate shock risk. Most decorations can be scrubbed in place, but you can remove ornaments or the heater now if you’re planning a deeper clean. Check that your replacement water is within 2-3 degrees of the current tank temperature to avoid shocking your fish during refilling.

    Step 1: Test Water Quality and Wash Your Hands

    Before you touch the water or begin vacuuming, test your aquarium’s current parameters using a liquid test kit. Record pH, ammonia, nitrite, and nitrate readings in a notebook or on your phone. These baseline measurements give you a reference point to confirm your cleaning actually improved water quality rather than disrupting the nitrogen cycle. If your post-cleaning nitrate reading drops from 40 ppm to 15 ppm after a water change, you’ve done your job correctly. If ammonia suddenly spikes from 0 to 0.5 ppm, you’ve over-cleaned and removed too much beneficial bacteria.

    Scrub your hands and forearms up to the elbows with plain water only—no soap, lotion, or sanitizer. Even trace amounts of these chemicals will poison your fish. If you have cuts, open wounds, or simply prefer a barrier, use aquarium-safe gloves that reach past your wrists. Your hands will be in the tank whether you’re cleaning fish tank gravel without a vacuum by hand-scooping debris or repositioning the heater after maintenance. Soap residue is particularly dangerous because it doesn’t rinse off completely and will create a toxic film on the water surface.

    Step 2: Unplug Equipment and Prepare the Tank

    Turn off all electrical equipment before touching anything inside the tank. Switch off the heater, filter, and lights at the power strip or unplug each component individually. This prevents electrical shock and protects heating elements that can crack if exposed to air while still hot. Wait 15 minutes after unplugging the heater before handling it—most units need this cooling period to avoid burns or damage.

    The heater itself needs attention during this step. Use a clean algae pad or soft cloth to wipe down the glass tube while it remains submerged or just after removal. Mineral deposits and algae build up on the surface and reduce heating efficiency. Never submerge the electrical cap or cord connection in water, and never rinse the entire unit under a faucet. If you’re doing a deep clean on an empty tank, the heater comes out completely, but for routine maintenance without changing all the water, a quick wipe-down while partially submerged works perfectly.

    Remove synthetic decorations like plastic plants, ceramic castles, and resin ornaments for separate scrubbing. These items trap debris in crevices and develop stubborn algae that’s easier to clean outside the tank. Natural decorations like driftwood and live plants stay put—removing them disrupts beneficial bacteria colonies and stresses the ecosystem. Place the synthetic items in a bucket or sink for cleaning with hot water and an algae scrubber. The filter pump stays in place since you’ll address it during the water change phase when you can rinse components in old tank water rather than tap.

    Step 3: Clean Algae from Glass and Decorations

    Tackle the algae coating your glass walls. A magnetic scrubber lets you clean without draining the tank—place one pad inside against the glass, hold the magnetic half outside, then drag slowly across the surface. The interior pad follows along, scraping away green film while your hands stay dry. For tougher spots, switch to an algae pad with more abrasive texture, or use a blade scraper held at a 45-degree angle. Work from top to bottom in overlapping vertical strokes.

    Stubborn calcium deposits or dried algae on an empty tank require stronger measures. Mix white vinegar with water at a 1:1 ratio, apply to the affected areas, and let it sit for 10-15 minutes before scrubbing with a clean cloth. Rinse thoroughly three times with plain water to remove all vinegar residue before refilling. Never use soap, glass cleaner, or household chemicals—even trace amounts poison fish.

    Scrub those removed decorations and ornaments using a dedicated algae brush or old toothbrush dipped in the tank water you drained earlier. The same beneficial bacteria that colonize your filter also live on these surfaces, so tap water’s chlorine would kill them. Rinse each piece in the bucket of old tank water, scrub away visible algae and detritus, then set aside to return after the water change. In planted tanks, avoid trimming or rearranging vegetation during routine cleaning—you’ll disturb root systems and beneficial bacterial colonies.

    Step 4: Vacuum the Substrate and Perform Water Change

    Address the primary source of waste buildup: your substrate. Insert your gravel vacuum into the tank at a 45-degree angle, submerging the wide tube completely. Squeeze the siphon bulb or pump the tube up and down several times to start water flow—you’ll see debris swirling upward through the tube while heavier gravel falls back down. Work in a systematic pattern across the tank bottom, hovering the vacuum 1-2 inches above the substrate for 3-5 seconds per spot. Focus on waste-heavy areas beneath feeding zones and around decorations where detritus accumulates. For sand substrates, hold the vacuum slightly higher (2-3 inches) and wave it gently side-to-side rather than plunging in—this lifts waste without sucking up fine particles or destroying the bacterial colonies living in the top sand layer.

    Continue vacuuming until you’ve removed 10-25% of total water volume for weekly maintenance, or 25-50% for bi-weekly schedules. A 20-gallon tank needs 2-5 gallons removed weekly, while a 75-gallon requires 7.5-18 gallons. Watch your bucket levels rather than trying to calculate precisely—you’ll develop an eye for it after two or three sessions. Small tanks under 5 gallons without siphon equipment can be cleaned by hand: use a turkey baster to target waste pockets, then scoop out water with a clean cup dedicated solely to aquarium use.

    Don’t discard that nutrient-rich waste water immediately. Pour it directly onto houseplants or your garden—the nitrates and organic matter that harm fish make excellent fertilizer for terrestrial plants. Your tomatoes and ferns will thrive on what your goldfish left behind.

    Step 5: Clean Filter Media (Without Killing Beneficial Bacteria)

    Your filter houses the biological powerhouse of your aquarium—colonies of beneficial bacteria that convert toxic ammonia into less harmful compounds. Cleaning filter media requires a delicate balance: remove enough gunk to maintain water flow, but preserve those microscopic workers. Start by removing your filter cartridge or sponge and gently squeezing it in a bucket of tank water you’ve just siphoned out. The murky cloud you see is exactly what you want—debris washing away while bacteria-coated surfaces remain intact. Never rinse biological media under tap water; chlorine and chloramine will annihilate your bacterial colony in seconds, forcing your tank to re-cycle and potentially killing your fish.

    Canister filters need more attention to individual components. Disassemble the unit and rinse ceramic rings, bio-balls, and coarse sponges in that same bucket of old tank water. Clean the impeller housing with a small brush or cotton swab to remove slime buildup that reduces flow rate—this is one component you can rinse with fresh water since it doesn’t harbor beneficial bacteria. For sump systems, pull filter socks weekly and either rinse them in tank water for immediate reuse or toss them in the washing machine without detergent for a thorough cleaning.

    Replace mechanical filter media like fine polishing pads every 2-4 weeks when they become clogged and brown. Biological media—ceramic rings, bio-balls, established sponges—should last months or years until they physically break down. If your filter uses disposable cartridges with built-in carbon and biological surfaces, you’re forced into an expensive cycle of replacing good bacteria. Consider switching to a filter with separate mechanical and biological compartments, giving you control over what gets replaced and what stays.

    Step 6: Refill with Conditioned Water

    You’re ready to add fresh water. The key distinction: topping off replaces evaporated water (which leaves minerals behind), while refilling after a water change dilutes accumulated nitrates and replenishes minerals. Always refill with treated water that matches your tank’s temperature within 2-3 degrees. An infrared thermometer gives instant readings without waiting for a glass thermometer to stabilize—point it at your tank water, then at your bucket to confirm they match.

    Add dechlorinator directly to your refill bucket before pouring, following the dosage for your water volume. Most municipal water contains chlorine or chloramine—both kill beneficial bacteria and harm fish gills. Chlorine evaporates within 24 hours if water sits exposed to air, but chloramine remains stable for days. That’s why the old “let water sit overnight” advice fails in most cities that switched to chloramine decades ago. Dechlorinator neutralizes both compounds instantly, making the 24-hour wait unnecessary and wasting time you could spend enjoying your aquarium.

    Saltwater refills require extra steps. Mix your salt in a separate container until it reaches the correct specific gravity (measure with a refractometer), then let it circulate for an hour before adding to your tank. Freshwater aquarists can pour treated water directly from the bucket, angling the stream against the glass to avoid disturbing substrate and stressing fish with turbulence.

    Step 7: Reassemble and Restart Equipment

    Carefully place your decorations back where they belong. Position taller items toward the back and sides to maintain sightlines, and ensure caves or hiding spots sit firmly on the substrate rather than propped at angles that might topple. Check that your heater hangs vertically with the minimum water line submerged—most units will crack if powered on while partially exposed to air.

    Power on your equipment in the correct sequence to avoid stressing your system. Start with the heater, giving it two minutes to adjust to the new water temperature before activating the heating element. Next, restart your filter and watch for steady water flow through the intake and output—air bubbles trapped in the impeller chamber will cause rattling or reduced flow. Prime the filter by tilting it gently or using the manual pump if your model includes one. Finally, turn on your lights.

    Inspect the tank perimeter and equipment connections for leaks during the first 10 minutes. Wipe down the outside glass where drips may have splashed, and check underneath the tank stand for moisture. Listen for unusual sounds from your filter—grinding or excessive humming signals a problem with the impeller or trapped debris. If your fish are breathing rapidly at the surface, retest ammonia immediately; disturbed substrate occasionally releases pockets of hydrogen sulfide that smell like rotten eggs and require another partial water change to dilute.

    Test your water parameters again 30 minutes after completing the cleaning. Compare these readings to your pre-cleaning baseline—pH should remain stable within 0.2 units, and nitrates should drop by 30-50% if you performed a proper water change. Record the new numbers alongside your cleaning date to track trends and adjust your maintenance schedule as needed.

    Special Cleaning Scenarios and Deep Cleaning

    Certain situations demand more than your standard weekly routine. A brand-new tank requires thorough rinsing with plain water—no soap—to remove manufacturing residues and dust. Scrub all surfaces with a clean sponge, rinse three times, then fill and drain completely before adding substrate and décor. This prevents chemical contamination that standard dechlorinator can’t neutralize.

    Severe algae outbreaks sometimes call for hydrogen peroxide treatment. Remove fish to a temporary container, then spot-treat affected areas with 3% hydrogen peroxide using a syringe—about 1ml per gallon of tank volume applied directly to algae patches. Let it sit for five minutes before performing a 50% water change. The peroxide oxidizes algae on contact but breaks down quickly into harmless water and oxygen. Emergency deep cleaning with complete substrate replacement becomes necessary when you detect hydrogen sulfide (rotten egg smell) or when substrate has compacted so densely that anaerobic pockets form. Remove fish, drain the tank entirely, and replace all gravel or sand—this resets your beneficial bacteria colonies, so treat it like cycling a new tank.

    Cold water systems need less frequent cleaning than tropical tanks because lower temperatures slow bacterial activity and waste decomposition. A goldfish tank at 68°F might need cleaning every 10 days, while a tropical setup at 78°F benefits from weekly attention. If you lack a gravel vacuum, use a turkey baster to manually remove debris from substrate corners and a clean cloth to wipe glass—just dechlorinate replacement water in a bucket before adding it. Heavily planted aquariums require a gentler touch: vacuum only the open substrate areas between plant clusters, never disturbing root zones. The plants themselves consume nitrates and stabilize your ecosystem, so aggressive cleaning actually works against you.

    How to Keep Fish Tank Clean Between Water Changes

    Daily maintenance keeps your aquarium pristine without touching the water. Scrape new algae spots with a magnetic cleaner during your morning fish check—thirty seconds of prevention beats an hour of deep cleaning later. Remove uneaten food within five minutes of feeding using a fine mesh net, and pull out any dead plant leaves before they decompose into ammonia. Check that your filter intake isn’t clogged with debris, and wipe salt creep from the tank rim with a damp cloth.

    Feeding discipline cuts waste buildup in half. Your fish need only what they consume in two to three minutes, twice daily. Overfeeding creates excess ammonia as food decays and fish produce more waste. Match your stocking levels to your tank’s bioload capacity—a general rule allows one inch of adult fish per gallon in well-filtered systems, though this varies with species metabolism and swimming habits.

    Live plants function as biological scrubbers that absorb nitrates, compete with algae for nutrients, and oxygenate water continuously. Fast-growing stem plants like hornwort and water sprite pull the most nutrients from the water column, while root feeders such as Amazon swords extract waste from substrate. UV sterilizers complement this natural filtration by killing free-floating algae spores and parasites that pass through the bulb chamber, clearing green water blooms without chemicals or water changes.

    Common Fish Tank Cleaning Mistakes to Avoid

    Improper cleaning techniques can undo months of careful maintenance. The most destructive mistake beginners make is replacing all the water at once. A complete water change crashes the nitrogen cycle by eliminating the dissolved bacteria and minerals that keep ammonia and nitrite levels stable. Stick to 25-30% water changes during routine maintenance, reserving larger changes only for emergency situations like medication treatments.

    Over-cleaning poses an equally serious threat. Scrubbing decorations until they shine, rinsing filter media under hot tap water, and vacuuming every inch of substrate in a single session destroys the beneficial bacteria colonies that process fish waste. Stagger your deep cleaning tasks across different weeks—clean your filter one week, then tackle substrate and decorations the following week. This approach maintains stable bacterial populations while still addressing grime buildup.

    Never reach for soap, detergents, or household cleaners, even if your glass looks cloudy. Residue from these products leaches into water and poisons fish through their gills and skin. Plain water and dedicated aquarium tools handle every cleaning task safely. Temperature mismatches cause similar stress—adding cold tap water to a tropical tank shocks fish and can trigger disease outbreaks. Match refill water to within two degrees of your tank temperature.

    Watch for a rotten egg smell when disturbing substrate during vacuuming. This hydrogen sulfide gas indicates anaerobic pockets where oxygen can’t reach—areas that develop in compacted gravel or sand. The gas is toxic to fish when released suddenly into the water column. If you detect this smell, vacuum slowly and in shorter sessions, allowing time between passes for gas to dissipate. Leaving your fish in the tank during routine cleaning is actually safer than netting and moving them, which causes injury and stress far worse than temporary cloudiness.

    Troubleshooting Post-Cleaning Issues

    Even with careful technique, you may notice problems in the hours after cleaning. Cloudy water is the most common issue—if it’s white or grayish, you’re seeing a bacterial bloom triggered by disturbed organic matter, which will clear within 48 hours as your filter processes the particles. Tan or brown cloudiness means you stirred up too much substrate debris; run your filter continuously and avoid feeding heavily until it settles. If cloudiness persists beyond three days, test for ammonia.

    Watch your fish closely for the first 24 hours. Heavy breathing at the surface, clamped fins, or unusual hiding signals stress from temperature shock or chemical imbalance. Verify your water temperature matches what it was before cleaning, and test immediately for ammonia—aggressive gravel vacuuming or scrubbing filter media under tap water can crash your beneficial bacteria colony, causing ammonia to spike. If levels exceed 0.25 ppm, perform a 25% emergency water change with conditioned water and add a bacterial supplement.

    Equipment problems usually trace to reassembly errors. A loud filter means the impeller housing wasn’t seated properly or air pockets remain in the intake tube—turn off the filter, remove the media, and reinstall the impeller firmly before restarting. Heaters that won’t turn on likely weren’t fully submerged before plugging in; unplug, wait five minutes, ensure the water line covers the minimum marker, then reconnect. If fish continue showing distress beyond 48 hours despite normal test readings and proper temperature, contact an aquatic veterinarian rather than attempting additional water changes.

    Frequently Asked Questions

    What is the best way to clean a fish tank?

    Regular partial water changes (10-25% weekly), vacuuming the gravel to remove waste, scraping algae from glass, and rinsing filter media in old tank water—never tap water. Always keep fish in the tank during routine cleaning and use a dechlorinator when adding fresh water.

    Do you leave fish in the tank while cleaning?

    Yes, you should leave fish in the tank during routine cleaning. Removing fish causes unnecessary stress and can harm their protective slime coat. Only remove fish for emergency deep cleaning, medical treatment, or when completely breaking down a tank.

    How often do fish tanks need to be cleaned?

    Most fish tanks need partial cleaning weekly or bi-weekly. Perform 10-25% water changes weekly for heavily stocked tanks, or 25-50% every two weeks for lightly stocked aquariums. Small tanks under 10 gallons require more frequent cleaning than larger, established systems.

    Can I use Dawn dish soap to clean a fish tank?

    No, never use Dawn dish soap or any household cleaners to clean a fish tank. Soap residue is toxic to fish and nearly impossible to rinse completely. Use only hot water, white vinegar for stubborn deposits on empty tanks, or aquarium-safe cleaning products specifically designed for fish tanks.

  • Fish Farming for Beginners at Home: A Comprehensive Guide

    Getting Started with Fish Farming at Home

    Imagine cultivating your own fresh fish right at home, providing a sustainable source of protein for your family. Home fish farming is an increasingly popular practice that not only promotes self-sufficiency but also offers numerous environmental benefits. From reducing your carbon footprint to fostering a mini-ecosystem, the advantages are ample.

    Starting fish farming at home may seem daunting, but with the right approach, beginners can manage it effectively. The process begins with understanding the basics of aquaculture systems and selecting the one that suits your space and budget. Whether you opt for a simple pond setup or a more sophisticated recirculating system, each has its unique requirements and benefits.

    Beginners can expect an initial learning curve, but the rewards of home fish farming are worth the effort. Not only do you gain fresh produce, but you also learn valuable skills in water management, species selection, and aquaculture techniques. While the fish farming at home cost can vary, investing in the right equipment and fish species will ensure a fruitful harvest. As you embark on this journey, you’ll discover that fish farming at home is not just a hobby, but a commitment to sustainable living.

    Types of Aquaculture Systems for Home Fish Farming

    Choosing the right aquaculture system is crucial for successful home fish farming. Each system offers unique advantages and challenges, and the best choice often depends on available space, resources, and personal preferences.

    • Pond Systems: These are traditional setups where fish are cultivated in natural or constructed ponds. Pros include a natural environment for fish and relatively low setup costs. However, pond systems require significant land space and can be difficult to manage in terms of water quality.
    • Cage Systems: In this setup, fish are kept in cages submerged in natural water bodies like ponds or lakes. Cage systems allow easy monitoring and harvesting but can expose fish to wild species and water quality issues.
    • Recirculating Systems: These systems use tanks where water is filtered and reused. They offer high control over water conditions and efficient space usage, making them ideal for limited areas. The downside is the high initial investment and technical expertise required.
    • Aquaponics: Combining fish farming with hydroponics, aquaponics is a symbiotic system where fish waste provides nutrients for plants. It is highly sustainable and efficient but demands close monitoring and a balanced ecosystem to thrive.

    Consider the space and resources you have. For instance, a backyard pond might suit those with ample outdoor space, while an indoor tank system is ideal for limited areas. Each system requires different levels of maintenance and investment, so weigh these factors carefully to match your capabilities and goals.

    Choosing the Right Fish Species for Your Farm

    Selecting the right fish species is a crucial step in setting up your home fish farm, as it can significantly impact your farm’s success. Commonly recommended species for beginners include tilapia, catfish, and carp. These species are popular due to their hardiness, rapid growth rates, and adaptability to different aquaculture systems.

    • Tilapia are known for their resilience and can thrive in a variety of water conditions, making them an excellent choice for novices.
    • Catfish are another beginner-friendly option, prized for their ability to grow in crowded environments and their tolerance to varying water quality.
    • Carp, especially koi and common carp, are adaptable and can be a visually appealing addition to your fish farm.

    Think about your local climate, water resources, and your farm’s purpose—be it personal consumption, ornamental, or small-scale sales. Maintenance needs and dietary requirements should fit your schedule and budget. By aligning these factors, you can choose a species that thrives in your setup, ensuring a successful venture.

    Step-by-Step Guide to Setting Up Your Fish Farm

    Setting up your fish farm begins with thorough research. Understanding the basics of aquaculture, the specific needs of your chosen fish species, and the environmental requirements is crucial. Begin by selecting a suitable location that provides ample space and access to clean water. Ideally, the location should be easily accessible for maintenance and feeding, while also being sheltered from extreme weather conditions.

    Infrastructure setup is the next step. Depending on the chosen aquaculture system, you may need tanks, ponds, or cages. Constructing a reliable water supply system is essential, along with installing filtration and aeration equipment to maintain water quality. A sturdy framework that supports the weight and movement of water is critical to avoid structural issues.

    • Fish tanks or pond liners
    • Water pumps and aerators
    • Filtration systems
    • Thermometers and pH meters
    • Fish feed and storage containers
    • Netting or fencing for protection

    Managing Your Fish Farm: Best Practices

    Once your infrastructure is in place, attention turns to managing the day-to-day operations. Water quality is the linchpin of a successful fish farm. Regularly test for parameters like pH, ammonia, nitrates, and dissolved oxygen. Each species has specific water requirements, so ensure you tailor the conditions accordingly. For example, tilapia thrives in water with a pH between 6.5 and 8.5.

    Feeding practices are equally crucial. Overfeeding can lead to water pollution, while underfeeding stunts growth. Use a high-quality pellet feed appropriate for your fish species, and follow a feeding schedule that aligns with their growth stage. Generally, fish should be fed twice daily, but adjust based on water temperature and feeding response.

    Disease control starts with prevention. Quarantine new fish before introducing them to the main tank. Maintain clean equipment, and routinely check fish for signs of illness, such as unusual swimming behavior or discoloration. Implement biosecurity measures by limiting access to the farm to prevent pathogen introduction.

    Incorporating a regular cleaning schedule for tanks or ponds helps mitigate disease risks. Remove uneaten food and waste promptly. By prioritizing water quality, efficient feeding, and vigilant disease prevention, your home fish farm will sustain healthy fish and optimize yields.

    Cost Breakdown for Home Fish Farming

    Starting a home fish farm is an exciting venture, but understanding the financial commitment is essential. Initial setup costs can vary significantly based on the scale and type of aquaculture system you choose. For instance, a basic pond system might require less investment compared to a recirculating aquaculture system, which involves more advanced equipment.

    • Tanks or ponds: Expect to spend between $100 and $500 depending on size and material.
    • Filtration and aeration systems: These are crucial for maintaining water quality, with prices ranging from $50 to $300.
    • Fish stock: The cost of purchasing juvenile fish can range from $0.50 to $3.00 per fish, depending on the species.
    • Feed: Budget approximately $20 to $50 monthly for fish feed, though this can fluctuate depending on growth rates and species needs.

    To keep costs manageable, start small. Expand as you gain experience. Look for second-hand equipment or consider DIY solutions to save money. Prioritize quality, especially for filtration and feed, as these directly affect fish health and yield.

    Additionally, consider potential savings on groceries by providing your own fish, which can offset some of the initial expenditures. With careful planning and resourceful strategies, home fish farming can become a cost-effective way to enjoy fresh, home-grown fish.

    Legal and Regulatory Considerations

    Navigating the legal landscape of home fish farming is a crucial step in ensuring your operation runs smoothly and within the boundaries of the law. The first thing you need to do is research if any permits are required in your area. This can vary widely depending on your location, as some municipalities have specific regulations governing aquaculture activities, even at a small scale.

    Contact your local environmental protection or agricultural department to inquire about necessary permits. Some regions might require an aquaculture permit or a water use permit, especially if your setup involves significant water usage or discharge. It’s also worth checking if there are any zoning laws or homeowner association rules that could impact your ability to farm fish at home.

    • Visit your local government website for specific regulations.
    • Check if an environmental impact assessment is needed for your setup.
    • Consult with local aquaculture experts or associations for guidance.

    Compliance doesn’t stop at getting permits. Stay updated on local regulations and adjust your practices as needed. Keep records of all communications and approvals. This diligence not only ensures compliance but also prepares you for future expansion.

    Troubleshooting Common Problems in Fish Farming

    Even with careful planning, challenges in home fish farming are inevitable. Water quality issues, for instance, can rapidly escalate if not addressed. Cloudy or discolored water often signals an imbalance. Regularly testing for pH, ammonia, and nitrate levels is crucial. Implementing a robust filtration system can help maintain clarity and balance, while regular partial water changes alleviate harmful accumulations.

    Disease outbreaks are another common hurdle. Observing your fish daily for signs of stress or illness, such as abnormal swimming or loss of appetite, can lead to early detection. Quarantining new arrivals reduces the risk of introducing pathogens. If disease strikes, isolate affected fish and consult a local aquaculture expert for treatment options tailored to the specific ailment.

    Prevention is your best defense. Adopting biosecurity measures, like controlling access to your fish tanks and sterilizing equipment, minimizes contamination risks. Educate yourself on the specific needs of your fish species and ensure their environment meets these requirements consistently. By being proactive in monitoring and maintaining your farm’s ecosystem, many common pitfalls can be avoided.

    Frequently Asked Questions

    What is the easiest fish to farm at home?

    Tilapia is often considered the easiest fish to farm at home due to its hardy nature and fast growth rate.

    How many months does it take for a fish to grow?

    It typically takes 6 to 8 months for fish like tilapia to reach maturity, depending on the species and farming conditions.

    What is the best fish to start farming?

    Tilapia is a popular choice for beginners due to its adaptability and high market demand.

    How many fish should I put in a 1 acre pond?

    A 1 acre pond can typically support 1,000 to 2,000 fish, depending on the species and management practices.

  • Understanding Aquaculture: A Comprehensive Guide to Fish Farming

    Introduction to Aquaculture

    If you’re exploring fish farming basics, you’re looking at an industry that now supplies approximately 56% of all seafood consumed globally. Aquaculture, the practice of breeding, rearing, and harvesting fish, shellfish, and aquatic plants in controlled environments, has ancient roots. Fish farming dates back thousands of years to ancient China, where carp were raised in ponds. Today’s operations look vastly different. This beginner’s guide will walk you through how aquaculture works, from understanding different farming systems to recognizing why this method of food production has become essential. The numbers tell the story: aquaculture accounts for more than 50% of the seafood on plates worldwide, and that percentage climbs each year as wild fish stocks face increasing pressure.

    Aquaculture farming has evolved substantially, driven by both necessity and innovation. With the global population projected to reach nearly 10 billion by 2050, aquaculture stands as a vital component of food security. This industry is not just about increasing fish production; it’s about creating sustainable practices that ensure long-term viability. This evolution is powered by significant aquaculture research, which focuses on improving yield, reducing environmental impact, and enhancing nutritional value. For instance, advancements in aquaculture equipment, such as automated feeding systems and water quality monitors, have made operations more efficient and eco-friendly.

    “Aquaculture is not just about producing more fish; it’s about doing so in a way that respects our planet,” says Dr. Sarah Thompson, a leading aquaculture scientist.

    • Over 580 species are farmed globally.
    • Asia accounts for 89% of global aquaculture production.
    • The industry provides direct employment to over 19 million people.

    Types of Aquaculture

    Aquaculture is a diverse field, encompassing both marine and freshwater systems. In marine aquaculture, operations focus on saltwater environments, such as oceans and estuaries. These setups often aim to cultivate species like salmon, sea bass, and shrimp, which are high in demand globally. Freshwater aquaculture, on the other hand, takes place in inland water bodies such as ponds, rivers, and lakes. Commonly farmed species in freshwater systems include tilapia, catfish, and carp.

    • Fish: The most common focus, including species like salmon, tilapia, and catfish.
    • Shellfish: Includes oysters, mussels, and shrimp, often cultivated in both marine and freshwater systems.
    • Aquatic plants: Seaweed and algae, grown for food, biofuel, and pharmaceuticals.

    The equipment and techniques in aquaculture split sharply between marine and freshwater operations. Marine farms rely on sea cages anchored 50 to 200 meters offshore and longlines suspended in the water column, both built to handle wave action and tidal currents. Freshwater setups look completely different. A basic pond setup for tilapia starts with earthen basins 1 to 2 meters deep, lined or unlined depending on soil type, with gravity-fed inlets and drainage monks at the low end. Raceways, common for trout, are long concrete channels where water circulation flows through at 4 to 8 turnovers per hour, flushing waste continuously. Indoor operations use tank systems with mechanical filtration and aeration, giving farmers precise control over temperature and dissolved oxygen. Each system matches the biology: catfish tolerate low oxygen in still ponds, while salmon need high flow and cold water to survive.

    An experienced aquaculture farmer knows that success hinges on understanding the unique demands of each species, from diet to habitat requirements.

    Globally, aquaculture is a critical component of food production. Organizations like Aquaculture International promote sustainable practices and technological innovation, ensuring the industry’s growth aligns with environmental stewardship. As the demand for seafood rises, the role of aquaculture will only expand, providing the world with a reliable source of nutritious food.

    Getting Started: How to Start a Fish Farm

    Your first fish farm needs three essentials: a water source with consistent flow or reliable refill capacity, adequate space (even a backyard pond starting at 200 square feet works for beginners), and access to quality fingerlings from a reputable hatchery. Most new farmers underestimate water quality management. You’ll need a test kit for pH, ammonia, and dissolved oxygen levels, checking these parameters at least twice weekly during your first year.

    Site selection depends on whether you’re testing the waters with a small operation or planning commercial scale. For home-based systems, check local zoning laws first (many residential areas restrict pond size or water discharge). Commercial sites require proximity to markets (fresh fish lose value quickly), reliable electricity for aeration, and soil that holds water if you’re building earthen ponds. Clay-rich soil works best, while sandy soil needs expensive pond liners.

    Budget $3,000 to $5,000 for a basic backyard setup including pond construction or tank purchase, aeration equipment, basic water testing tools, and your first batch of fish. Tilapia and catfish dominate beginner recommendations because they tolerate crowding, accept cheap feed, and forgive water quality mistakes that would kill trout or bass. Catfish handle temperatures from 75°F to 85°F, while tilapia thrive in slightly warmer water and grow faster.

    The biggest mistake new farmers make is overstocking. Start with 500 to 1,000 fingerlings maximum for your first cycle, even if your pond could theoretically hold more. This gives you room to learn feeding schedules, recognize disease symptoms early, and correct problems before losing your entire stock. Plan four to six months from stocking fingerlings to harvest size, depending on species and feeding intensity.

    Essential Fish Farming Practices and Management

    Successful fish farming runs on routine. Check dissolved oxygen levels first thing each morning, ideally before feeding. Most species need at least 5 mg/L, and anything below 3 mg/L means you’re courting disaster. Test pH weekly (target 6.5 to 8.5 for most freshwater species), ammonia every three days during the first month after stocking, and nitrite levels whenever fish show stress signs like gasping at the surface or refusing food.

    Feed at consistent times, typically twice daily for grow-out operations. A common mistake is overfeeding, which degrades water quality faster than anything else. Use the 5-minute rule: fish should consume all feed within five minutes, or you’re wasting money and fouling your system. Calculate feed amounts at 2 to 3 percent of body weight daily for most species, adjusting based on water temperature since cold water slows metabolism.

    Stock conservatively until you understand your system’s carrying capacity. Tilapia can handle 50 to 100 fish per cubic meter in recirculating systems with good filtration, but ponds typically max out at 3 to 5 fish per cubic meter. Watch for lethargy, fin damage, or unusual swimming patterns during daily rounds. These early warnings catch disease before it spreads through your entire stock. Harvest when fish reach market size (usually 1 to 2 pounds for tilapia, 18 months for catfish), and always fast fish for 24 hours beforehand to reduce waste during transport.

    Environmental and Economic Impact of Aquaculture

    Aquaculture offers a controlled alternative to traditional fishing, which often leads to overfishing and habitat destruction. By managing breeding, feeding, and harvesting, aquaculture reduces bycatch and preserves marine ecosystems. Innovations like recirculating aquaculture systems exemplify this commitment, recycling water and minimizing waste. These systems are a testament to the industry’s potential for eco-friendly practices that safeguard aquatic environments.

    Aquaculture drives real economic value across the globe. The sector generates over $260 billion annually, with production now exceeding 90 million tonnes. China dominates the market, while Norway and Chile have built their economies around salmon farming specifically. The industry creates jobs at every level: hatchery technicians, farm managers, feed mill operators, and processing plant workers. In the Philippines, tilapia and milkfish farming supports thousands of coastal communities and positions the country among the world’s top aquaculture producers. These aren’t just impressive numbers. They represent a sector that functions as both a primary food source and a major employer in countries where traditional fishing can no longer meet demand.

    • Aquaculture minimizes environmental impact through controlled breeding and waste management.
    • Global aquaculture production in 2020: 87.5 million tonnes valued at $263 billion.
    • Philippines as a leading producer of tilapia and milkfish, thanks to historical roots in aquaculture.

    Technological Advancements in Aquaculture

    Modern sensors now track dissolved oxygen, ammonia, and pH levels every few minutes, giving farmers the data they need for effective water quality management. This shift from manual testing to automated monitoring parameters has cut labor costs while catching problems before they kill stock. Automated feeders respond to these real-time conditions, adjusting portion sizes based on water temperature and fish activity levels. Smart feeding strategies reduce waste by up to 30% compared to fixed schedules, since uneaten feed degrades water quality and inflates costs. The technology itself matters less than how farmers use it to make faster decisions about feeding times, stocking density, and when to trigger water exchanges.

    In coastal aquaculture, submersible fish pens are a game-changer. These pens adjust their depth according to weather conditions, protecting fish from storms and predators while minimizing environmental impact. Meanwhile, satellite tracking systems in open ocean farms allow for remote management, reducing labor costs and enhancing operational efficiency. These innovations not only boost productivity but also ensure sustainable practices that preserve marine ecosystems.

    • Smart feeding systems that use AI to optimize feed delivery, minimizing waste and improving fish health.
    • Remote sensing technologies that predict algal blooms and other environmental hazards.
    • Genetic advancements that enhance disease resistance and growth rates in farmed species.

    These technological innovations not only boost productivity but also contribute to more sustainable aquaculture practices. By integrating cutting-edge tools, fish farming can meet the rising global demand for seafood while preserving marine ecosystems.

    Regulatory Frameworks in Aquaculture

    Regulatory frameworks form the backbone of aquaculture practices worldwide. They ensure that operations are conducted in a manner that sustains both economic growth and environmental health. Globally, regulations vary significantly. In the European Union, for instance, the Common Fisheries Policy sets stringent guidelines on environmental impact and fish health. This contrasts with countries like China, where rapid development sometimes outpaces regulatory enforcement. Yet, China remains the largest aquaculture producer, highlighting a complex balance between growth and regulation.

    In the United States, aquaculture is governed by a combination of federal and state regulations. The National Oceanic and Atmospheric Administration (NOAA) oversees marine aquaculture, enforcing practices that protect ecosystems and ensure food safety. States add another layer of rules, tailored to local environments and markets. In Southeast Asia, regulatory frameworks are evolving, with countries increasingly adopting international best practices to balance growth and sustainability.

    Regulations impact aquaculture practices in numerous ways. They dictate everything from the species that can be farmed to the density of fish in pens. For example, Denmark’s strict water quality standards have led to innovative closed containment systems, reducing pollution and improving fish welfare. These regulatory pressures drive technological advancements and compel farmers to adopt sustainable methods, ensuring aquaculture remains a viable means to meet global seafood demand.

    Consumer Perspectives and Market Trends

    Consumer perceptions of aquaculture products split along clear lines. Traceability matters to buyers who want to know where their fish comes from, and farmed fish delivers consistency that wild-caught stocks can’t always match (especially for species like Atlantic salmon or tilapia where wild populations have declined). The concerns are real too. Artificial feeding practices and antibiotic use in some operations make shoppers hesitate. Consumer research shows that many seafood buyers appreciate aquaculture’s environmental benefits, though concerns about fish welfare and nutrition persist. These mixed attitudes drive the growing market for certified sustainable products, with labels like ASC (Aquaculture Stewardship Council) and BAP (Best Aquaculture Practices) becoming more common on retail packaging.

    • Demand for species like tilapia and shrimp is soaring due to their affordability and versatility.
    • Organic and eco-labeled fish products are gaining traction in Europe and North America.
    • Asia Pacific leads in aquaculture production, driven by growing domestic consumption.

    The market reflects shifting priorities towards sustainable and health-conscious choices. Organic fish production, though still a niche, is experiencing steady growth. Retailers are responding by increasing shelf space for responsibly farmed seafood. In regions like North America and Europe, consumers are willing to pay a premium for certified sustainable products. Meanwhile, the Asia Pacific market is booming, fueled by rising middle-class populations that demand affordable, high-quality protein sources.

    Future Trends and Innovations in Aquaculture

    Recirculating aquaculture systems (RAS) are revolutionizing fish farming. These land-based facilities use minimal water and produce little waste, filtering and reusing water in a closed-loop system. This model is sustainable and can be implemented even in urban areas. Offshore aquaculture is also expanding, utilizing vast ocean spaces for species typically farmed in coastal settings. These advancements are crucial as climate change threatens wild fisheries, ensuring a steady seafood supply.

    The integration of AI and machine learning is another frontier. Predictive analytics are optimizing feed efficiency, reducing costs, and improving growth rates. By analyzing patterns in fish behavior, these technologies help farmers make informed decisions on feeding schedules and environmental adjustments. This not only boosts productivity but also ensures fish welfare, addressing some ethical concerns associated with large-scale aquaculture.

    “By 2030, aquaculture is expected to supply over 60% of fish for human consumption,” according to the Food and Agriculture Organization of the United Nations.

    Looking ahead, the development of alternative protein sources for fish feed is set to transform the industry. Insects, algae, and microbial proteins are gaining traction as sustainable feed ingredients, reducing reliance on wild fish stocks. This shift could significantly lower the carbon footprint of aquaculture, while also cutting costs. Global investment in aquaculture technology continues to grow, paving the way for more resilient and efficient operations. As climate change pressures wild fisheries, the innovations in aquaculture promise to play a crucial role in meeting the world’s seafood demand sustainably.

    Frequently Asked Questions

    How did aquaculture start?

    Fish farmers in ancient China were raising carp in ponds over 4,000 years ago, making aquaculture one of humanity’s oldest methods of boosting food production. The practice spread through Asia, where communities learned to control water levels, manage fish populations, and harvest protein far more reliably than wild fishing allowed. Romans later farmed oysters and fish in coastal ponds, but the real explosion in controlled aquatic farming didn’t happen until the 20th century, when scientists figured out how to breed fish in captivity and manage water quality at scale.

    Why is aquaculture considered sustainable?

    Aquaculture earns its sustainability credentials through several mechanisms that traditional fishing can’t match. Fish farms operate in controlled environments where farmers monitor water quality, feed conversion ratios, and waste output daily, allowing them to optimize resource efficiency in ways that would be impossible in open ocean fishing. This precision matters for overfishing prevention too. By meeting seafood demand through farming rather than wild capture, aquaculture takes pressure off depleted ocean stocks. Well-managed operations also contribute to habitat restoration, particularly when integrated with wetland systems or when retired farms return coastal areas to natural conditions.

    What are the main types of aquaculture?

    Aquaculture splits into two broad categories: marine operations in saltwater environments and freshwater systems in rivers, lakes, and artificial enclosures. If you’re starting out, you’ll likely choose between pond farming (the most common entry point for tilapia and catfish), cage culture in existing water bodies, or recirculating tank systems that give you precise control over water quality. Each method suits different species and scales, from backyard ponds raising a few hundred fish to industrial cage operations producing thousands of pounds per harvest cycle.

  • Aquaponics System Setup Guide for Beginners

    Understanding Aquaponics: A Beginner’s Overview

    You can build a working aquaponics system in a single weekend with basic materials from your local hardware store. Fish waste provides essential nutrients for plant growth, while the plants filter and clean the water for the fish. This closed-loop ecosystem produces both protein and vegetables using 90% less water than traditional soil gardening. The step-by-step setup process is straightforward: you’ll connect a fish tank to a grow bed, add a pump to circulate water, and introduce beneficial bacteria that convert fish waste into plant food. Once you understand how these three components work together, you’ll see why aquaponics has become one of the most efficient ways to grow food at home.

    Aquaponics eliminates chemical fertilizers and pesticides entirely, giving you a cleaner, organic way to grow food at home. The aquaponics benefits extend beyond environmental impact. You can produce more food in less space than traditional gardening allows. A backyard aquaponics system lets you raise tilapia or catfish while simultaneously growing lettuce, basil, and tomatoes in the same water loop. You’ll harvest fresh produce and protein year-round, and the system practically runs itself once established, requiring far less daily work than soil-based gardens.

    • Fish farming generates nutrient-rich water which feeds plants.
    • Plants act as a natural filter, purifying the water for fish.
    • Aquaponics systems can be set up indoors or outdoors, providing flexibility in design.
    • The cycle of nutrients and water conservation leads to sustainable food production.

    Choosing the Right Aquaponics System

    Start by picking an aquaponics system that matches your available space and skill level. Media bed systems work best for beginners because they handle three jobs at once: supporting plants, filtering water, and housing beneficial bacteria. Fill your grow beds with expanded clay pebbles or similar media to a depth of 12 inches. This depth gives plant roots enough room while creating space for bacteria colonies to establish themselves. The media acts as a biofilter, converting ammonia from fish waste into nitrites, then into nitrates that plants can absorb. Water from your fish tank floods the grow beds, plants pull out nutrients, and the cleaned water returns to the fish. Many DIY aquaponics builders start here because media beds are forgiving and require fewer components than other system types.

    The nutrient film technique (NFT) suits those with space and ambition. It channels a thin film of nutrient-rich water over plant roots in narrow channels. Ideal for leafy greens, it requires vigilance to prevent clogs and maintain water flow. A backup pump is wise to avoid system failure.

    Deep water culture (DWC) is another option, especially if you’re interested in rapid plant growth. Here, plant roots dangle directly in oxygenated water. It’s efficient and allows for fast growth, but requires a reliable aeration system to keep plants healthy.

    • Space availability: Smaller spaces might favor media bed setups.
    • Maintenance: Consider your willingness to monitor and maintain system parameters.
    • Plant selection: Choose a system that supports your chosen crops, like leafy greens or larger vegetables.
    • Budget: Factor in initial costs and ongoing expenses.

    Choose wisely, as the right system can lead to a thriving aquaponics garden that brings fresh produce and fish to your table.

    Cost and Budget Considerations for Your First System

    A basic 10-gallon desktop system costs $150 to $300 if you buy a commercial kit, or as little as $75 if you source parts yourself from hardware stores and use repurposed containers. Medium systems (50-100 gallons) run $500 to $1,200 for kits, while DIY builds typically land between $200 and $400. Large beginner setups with 200+ gallons of fish tank capacity push $1,500 to $3,000 for commercial options, though determined DIYers can build similar systems for $600 to $900 using IBC totes and standard plumbing parts.

    Commercial kits save time but cost roughly double what you’d spend building from scratch. The tradeoff matters most when you’re testing whether aquaponics fits your lifestyle. A $200 DIY system lets you experiment without major financial commitment, while a $400 kit gets you running in an afternoon with instructions and customer support. Budget $15 to $40 monthly for electricity (depending on system size and climate), $20 to $60 for fish food, and $10 to $25 for pH buffers and test supplies.

    Return on investment depends entirely on what you grow and whether you offset grocery bills or sell produce. Most beginners break even on a medium system within 12 to 18 months if they consistently harvest high-value crops like basil, lettuce, or tomatoes. Small desktop systems rarely pay for themselves in pure dollars but deliver fresh herbs worth $10 to $20 weekly at grocery store prices. Track your actual harvest weights for three months to get realistic numbers for your specific setup and growing skills.

    Essential Components of an Aquaponics System

    A successful aquaponics system hinges on four essential components: the fish tank, grow bed, water pump, and filtration system. Each plays a vital role in maintaining the balance of this aquatic ecosystem.

    The fish tank is where it all begins. It’s the heart of your system, providing a home for the fish that produce the waste essential for plant nutrition. For a beginner home setup, start with a 300 to 500 liter (roughly 80 to 130 gallon) system size, which gives you enough water volume to maintain stable conditions without overwhelming your space. Fish stocking density matters more than most beginners realize. A safe starting point is one pound of fish per 5 to 10 gallons of water, so that 100 gallon tank can support about 10 to 20 pounds of tilapia or catfish once they’re fully grown. Smaller systems work, but they’re less forgiving when water quality shifts.

    The grow bed sits above the fish tank and houses your plants in a growing medium like expanded clay pebbles. These pebbles support the root systems while hosting beneficial bacteria that convert fish waste into plant nutrients. Most beginners use a flood and drain system, where a bell siphon automatically fills the grow bed with nutrient-rich water, then drains it back to the fish tank in cycles. This flooding and draining happens every 15 to 45 minutes depending on your setup, which oxygenates the roots and prevents them from sitting in stagnant water. Size your grow beds to roughly half the volume of your fish tank, though you can adjust this ratio once you understand how much waste your specific fish load produces.

    A water pump is the workhorse, circulating water between the fish tank and grow bed. This movement ensures that fish waste is transported to the plants, where it’s converted into nutrients. Look for a pump that can cycle the entire volume of your fish tank every hour to maintain optimal conditions.

    Finally, the filtration system keeps the water clean and free of toxins. Mechanical filters remove solid waste, while biological filters host beneficial bacteria that convert ammonia into nitrates, a form of nitrogen plants can absorb. Both are crucial for preventing the buildup of harmful substances, ensuring a thriving ecosystem.

    Setting Up Your Fish Tank

    Start by picking a spot for your fish tank where temperature fluctuations are minimal. Avoid areas near windows where sunlight might cause algae blooms or in drafty spots where the water temperature can drop significantly. A stable environment helps maintain the wellbeing of your fish, which in turn supports the entire aquaponics system.

    Once you’ve found the right location, you’ll need to fill your tank with water. But not just any water—dechlorinated water is key. Chlorine is harmful to fish and beneficial bacteria, so use a water conditioner or let tap water sit for 24-48 hours to allow chlorine to dissipate. This step ensures your aquatic ecosystem starts off on the right foot.

    Now, onto setting up the pump. The pump is crucial as it circulates water between the fish tank and the grow bed, delivering nutrients to plants and returning filtered water to the fish. Opt for a submersible pump that can handle the volume of your system, typically rated in gallons per hour (GPH). A pump capable of circulating the entire tank volume every hour is a good rule of thumb. Proper installation includes placing the pump at the bottom of the tank, ensuring it has a consistent flow without obstructions.

    Cycling Your Aquaponics System

    Before you add fish to your system, you need to cycle it for 4 to 6 weeks. This process grows colonies of beneficial bacteria that break down toxic ammonia from fish waste into nitrites, then into nitrates that feed your plants. Without these bacteria established first, ammonia levels will spike and kill your fish within days. The nitrogen cycle runs continuously once started, but it takes time for bacterial populations to build up enough to handle the bioload of a full fish stock.

    Start your system with water and hardy plants, but hold off on adding fish for at least four weeks. This fishless cycling process builds the bacterial colonies you need without risking fish health. Add pure ammonia (available at hardware stores, just make sure it’s unscented and additive-free) or simply drop in fish food that will decompose and release ammonia. For ammonia dosing, aim for 2-4 ppm (parts per million) on your test kit. Test daily. You’ll see ammonia spike first, then drop as beneficial bacteria convert it to nitrites (usually within 7-10 days). Those nitrite levels will climb next, then fall as a second type of bacteria converts them to nitrates. The whole cycle takes 4-6 weeks. Your system is ready when you can add ammonia and see it convert to nitrates within 24 hours with zero ammonia or nitrite readings.

    • Maintain ammonia levels at 3-5 ppm through regular testing and adjustments.
    • Watch for nitrite levels to peak, then gradually decline as nitrates appear, signaling the completion of the cycle.
    • Only introduce fish once ammonia and nitrite levels stabilize near zero and nitrates are present.

    Cycling takes 4 to 8 weeks, influenced by water temperature and quality. Rushing risks fish health. Patience ensures a thriving environment for fish and plants.

    Selecting and Caring for Fish

    Choosing the right fish species determines whether your aquaponics system thrives or struggles. Tilapia tops the list for beginners because they tolerate water temperatures from 60°F to 86°F and handle fluctuating pH levels without dying on you. Goldfish work well if you’re starting small or live somewhere cold, since they survive near-freezing temperatures that would kill tropical species. Catfish grow larger than tilapia (often reaching 1 to 3 pounds in a home system), which means more waste production and heavier nutrient loads for your plants. Just remember that fish stocking density matters more than species alone. You can’t pack 50 tilapia into a 50-gallon tank and expect them to survive, no matter how hardy they are.

    Feeding your fish is straightforward but requires consistency. Most aquaponics fish thrive on commercially available fish pellets, which provide a balanced diet. Feed your fish once or twice a day, giving them only as much food as they can consume in five minutes to prevent overfeeding and water pollution. Keeping an eye on water quality is crucial; regularly test ammonia, nitrite, and nitrate levels. The water should remain clear with a stable temperature, ideally between 75-80°F for species like tilapia.

    • Choose hardy fish like tilapia or goldfish.
    • Feed fish with high-quality pellets.
    • Monitor water quality frequently.
    • Maintain a consistent feeding schedule.

    Plant Selection and Growth in Aquaponics

    Now that your fish are happily swimming, let’s shift our focus to the plants. Start with leafy greens like lettuce, spinach, kale, and arugula. These grow fast (harvest in 4-6 weeks), tolerate beginner mistakes, and thrive in the nutrient-rich water your fish produce. Herbs are equally forgiving. Basil, mint, cilantro, and parsley establish quickly and give you continuous harvests if you pick regularly.

    Once you’ve succeeded with greens for two or three months, try fruiting plants like tomatoes and peppers. These need more nutrients, stronger light (at least 8 hours of direct sun or equivalent grow lights), and better support structures since they get heavy. Cherry tomatoes work better than beefsteak varieties in most beginner systems. The extra nitrogen from fish waste actually benefits tomatoes more than soil growing does. Peppers, especially jalapeños and bell peppers, produce well but take 10-12 weeks to fruit. Match your plant choice to your system size too. Media beds handle tomatoes and other heavy feeders better than raft systems, which excel at lettuce and herbs.

    • Lettuce: Grows rapidly and requires minimal maintenance.
    • Spinach: Thrives in cooler temperatures, making it perfect for indoor systems.
    • Basil: A fast-growing herb that benefits from regular pruning.
    • Mint: Known for its vigorous growth and aromatic leaves.

    To optimize plant growth, keep the pH level between 6.8 and 7.2. This range ensures nutrient availability and promotes healthy root development. Pay attention to the spacing of your plants; overcrowding can lead to competition for light and nutrients, stunting growth. Regularly check for pests, as the humid environment can attract unwanted visitors. Introducing beneficial insects like ladybugs can naturally keep pest populations in check.

    The secret to a productive aquaponics system lies in consistent monitoring and a willingness to adjust as needed. – Aquaponics Enthusiast

    Maintaining Your Aquaponics System

    Regular water testing keeps your aquaponics system running smoothly. Test ammonia, nitrites, and nitrates every week using a basic test kit (the API Freshwater Master Kit runs about $25 and lasts months). Aim for ammonia near zero, nitrites at zero, and nitrates between 5-30 ppm. If nitrates climb above 40 ppm, you’re likely overfeeding your fish or your grow beds aren’t handling the bioload. Beyond weekly water testing, build a maintenance schedule that includes monthly tasks: scrub algae off tank walls, check all pump connections for leaks, and inspect air stones for clogs. Every three months, clean your bell siphons or drain valves completely. Most beginners skip the monthly cleaning of mechanical filters, then wonder why their pumps lose flow after six weeks.

    • Check water levels and top up as needed, especially during hot spells.
    • Clean the pump and filters to prevent clogs, ensuring water circulates efficiently.
    • Inspect fish for signs of stress or disease, such as erratic swimming or discoloration.

    Learning to spot and fix problems early prevents total system failure. Yellowing leaves usually mean your fish aren’t producing enough waste for the plant load, or your biofilter hasn’t matured enough to convert ammonia into usable nitrates. Feed your fish slightly more (aim for 1-2% of their body weight daily) or wait another week for beneficial bacteria to colonize. Fish gulping air at the surface means dissolved oxygen has dropped below 5 mg/L. Drop in two extra air stones or increase your pump flow rate by 20%. These aquaponics mistakes happen to everyone in the first three months, so check your system twice daily until you recognize what normal looks like.

    Remember, a stable system is a happy system. Consistency in maintenance routines can prevent most problems before they arise.

    Common Mistakes to Avoid When Starting Aquaponics

    Most beginners kill their first batch of fish by adding a full stock load within days of filling their tanks. The nitrogen cycle needs 4 to 6 weeks to establish beneficial bacteria that convert ammonia to nitrites, then to nitrates. Start with just 3 to 5 small fish in a 100-gallon system, test your water daily, and wait until ammonia and nitrite readings stay at zero for a week straight before adding more.

    Climate mismatches cause slow failures that frustrate new growers. Tilapia need water temperatures between 75°F and 86°F, so they’ll struggle or die in an unheated greenhouse during winter in cold regions. Trout thrive in 50°F to 60°F water but suffer above 70°F. Match your fish species to your actual water temperature range, or budget for heaters or chillers that can cost $100 to $500 depending on system size.

    Inadequate aeration kills fish faster than almost any other mistake. Fish tanks need at least one air stone per 50 gallons, running 24 hours a day. If your pump fails overnight, fish can suffocate by morning. Keep a backup air pump on hand (they cost around $15 to $30), and check dissolved oxygen levels stay above 5 mg/L. pH swings between 6.0 and 8.0 stress both fish and plants, so test twice weekly and adjust gradually, never more than 0.2 units per day. Overfeeding creates the same problem as overstocking: excess waste spikes ammonia levels and crashes your system. Feed only what fish consume in 5 minutes, once or twice daily.

  • Common Fish Diseases: A Comprehensive Guide for Aquaculture Farmers

    Common Fish Diseases: A Comprehensive Guide for Aquaculture Farmers

    Fish diseases cost aquaculture farmers real money, and this guide walks you through the most common threats you’ll face in your operation. You’ll learn to identify specific symptoms of diseases like Ichthyophthirius multifiliis (Ich) and Aeromonas infections, understand which treatments work for each pathogen, and build practical fish health management protocols that catch problems before they spread. A single outbreak of Ichthyophthirius multifiliis (Ich) can cause significant mortality in your stock within days if not caught early. The difference between a minor setback and a major loss comes down to early detection and knowing exactly how to respond.

    Why Disease Prevention Matters

    Effective fish health management starts with water quality. Test ammonia, nitrite, and dissolved oxygen levels daily during critical periods like after stocking or temperature swings. Elevated ammonia levels stress fish and create conditions for bacterial infections. Most species show stress at ammonia concentrations above 0.5-1.0 mg/L, though tolerance varies by species. Keep dissolved oxygen above 5 mg/L for most species. Beyond water parameters, biosecurity matters just as much. Quarantine new stock for 14 days minimum before introducing them to your main population. Disinfect nets and equipment between ponds using a 200 ppm chlorine solution. Many farmers skip this step and pay for it when one infected batch spreads disease across their entire operation. Aquaculture disease management also means controlling stocking density. Overcrowding creates stress, increases waste loading, and allows pathogens to spread faster through direct contact. A well-designed prevention program costs a fraction of treating a full-blown outbreak, where you’re looking at medication expenses, lost growth, and often significant mortality.

    Economic Impact of Fish Diseases in Aquaculture

    Disease outbreaks can wipe out 30 to 80 percent of a fish farm’s stock in a matter of weeks, translating to losses that often exceed hundreds of thousands of dollars for medium-sized operations. A single outbreak of bacterial gill disease in a tilapia farm can kill 50 percent of fingerlings within 72 hours, destroying months of investment in feed, labor, and infrastructure before fish reach market size.

    Treatment costs add up fast. Antibiotics and medicated feed can run $2,000 to $5,000 per treatment cycle for a modest operation, but the real expense comes from lost production time. When you lose a grow-out cycle to disease, you’re looking at 4 to 8 months of zero revenue while fixed costs like pond maintenance, electricity, and labor continue. Farms operating on thin margins, typically 10 to 15 percent profit, can’t absorb multiple disease events without going under.

    Prevention costs a fraction of what you’ll spend managing an outbreak. Investing $500 monthly in biosecurity measures, water quality monitoring, and prophylactic treatments beats the alternative: emergency treatments, mass mortality, and damaged fish that fetch 40 to 60 percent less at market because of visible lesions or poor flesh quality. Buyers reject diseased stock outright, forcing farmers to sell at distressed prices or absorb total losses.

    Key Signs of Sick Fish

    Behavioral changes give you the earliest warning system for fish disease symptoms, often days before physical signs emerge. Watch for lethargy, erratic swimming, reduced appetite, and clamped fins. A normally active fish that suddenly drifts without purpose, refuses its regular feed, or bumps into tank walls needs immediate attention. These shifts are your first chance to intervene, and catching them early separates a treatable problem from a tank-wide outbreak. Discoloration on scales or skin signals advanced health problems, though subtle color changes can reveal stress or early-stage infection. Ichthyophthirius multifiliis (Ich), one of the most common parasitic infections in aquaculture, typically shows up first as behavioral changes before the characteristic white spots appear on the body.

    Disease Diagnosis Methods

    Start every disease investigation by watching your fish during feeding time. Healthy fish rush to the surface and compete aggressively for feed, while sick fish often hang near the bottom, swim erratically, or isolate themselves from the school. Check for visible signs like white spots (ich), frayed fins, cloudy eyes, bloated abdomens, or unusual mucus production. This simple observation costs you nothing and catches many common problems before they spread through your entire pond, giving you a head start on fish disease diagnosis without expensive lab work or equipment.

    For parasites, you need a basic compound microscope (400x magnification minimum) and fresh gill or skin scrape samples. Mount the tissue in pond water on a slide and scan for moving parasites like Ichthyophthirius, Trichodina, or monogenean flukes. Most external parasites are identifiable within 10 minutes at the microscope. Bacterial infections require culture plates and 24 to 48 hours of incubation, followed by antibiotic sensitivity testing to determine which treatments actually work against your specific pathogen strain.

    Viral diseases demand PCR testing at a certified laboratory, since viruses are invisible under standard microscopy. Spring viremia of carp, koi herpesvirus, and viral hemorrhagic septicemia all require molecular diagnostics for confirmation. PCR testing typically takes several days to a week, with costs varying by laboratory and pathogen tested. Contact local diagnostic laboratories for current pricing. For recurring mortality problems or unusual presentations, histopathology provides the definitive answer by examining preserved tissue under a microscope. Contact a fish health specialist when mortality exceeds 2% daily, when visual diagnosis is unclear, or before treating with expensive medications that might be ineffective.

    Physical Signs

    • White, red, or unusual spots on the skin or fins
    • Frayed, decaying fins
    • Cotton-like growths on the body or mouth
    • Swollen abdomen or bulging eyes
    • Ulcers or sores on the body 

    Behavioral Signs

    • Gasping at the water surface
    • Rubbing against objects (flashing)
    • Lethargy or unusual swimming patterns
    • Loss of appetite
    • Erratic buoyancy (floating or sinking abnormally) 

    Most Common Fish Diseases

    Common Parasitic Fish Diseases

    Parasitic fish diseases rank among the costliest problems in aquaculture, capable of wiping out 30% or more of stock within days if left unchecked. External parasites like Ichthyophthirius multifiliis (the white spot pathogen) attach to skin and fins, creating the characteristic salt-grain appearance that gives the disease its name. Gill parasites, particularly Dactylogyrus flukes, compromise oxygen uptake and make fish gasp at the surface. Effective parasite control starts with quarantine protocols for new stock, a 14-day minimum isolation period that catches most infections before they reach your main tanks. For parasitic disease treatment, formalin baths at 150-250 ppm for 60 minutes work against many protozoans, while praziquantel addresses trematode infections at 5-10 mg/L as a prolonged bath. Water quality management matters more than most farmers realize. Parasites thrive in stressed fish, so maintaining dissolved oxygen above 5 mg/L and keeping ammonia below 0.02 mg/L cuts infection rates substantially. Regular monitoring catches outbreaks early. Check a sample of fish weekly for behavioral changes like flashing (rubbing against surfaces), excess mucus production, or the lethargy that signals advanced infestation.

    • Maintain optimal water quality to reduce stress, which can make fish more susceptible to infections.
    • Implement regular monitoring and quarantine procedures to detect early signs of infestation.
    • Utilize anti-parasitic treatments, such as formalin baths or copper sulfate, under professional guidance.

    Emerging Fish Diseases

    Climate change and global trade are driving a surge in fish disease outbreaks across aquaculture operations. Water temperatures above optimal ranges weaken fish immune systems, making them susceptible to pathogens they would normally fight off. The water mold Saprolegnia has become a persistent problem in hatcheries, particularly during fingerling production when temperature fluctuations stress young fish. Bacterial diseases now pose an even greater threat. Columnaris disease, caused by Flavobacterium columnare, spreads rapidly in warm water above 25°C and can wipe out entire tanks within 48 to 72 hours if left untreated. Infectious Salmon Anaemia, a viral infection, continues to devastate salmon farms in multiple countries. These outbreaks don’t just kill fish. They force farmers to cull stock, halt production cycles, and absorb treatment costs that can exceed thousands of dollars per incident.

    New pathogens continue to emerge in aquaculture systems, and *Pseudomonas aeruginosa* stands out as a particularly adaptable threat. This bacterium colonizes biofilms in tank walls, pipes, and filtration equipment, making it nearly impossible to eliminate once established. In densely stocked systems, it spreads rapidly through water contact and causes ulcerative skin lesions that progress to systemic infection within 48 to 72 hours. Effective pathogen management requires both prevention and rapid response. Install UV sterilization on incoming water, maintain stocking densities below 30 kg per cubic meter, and monitor fish daily for early lesion detection. When you spot an outbreak, immediate isolation of affected tanks and targeted antibiotic treatment (based on sensitivity testing) can cut mortality rates by 60 to 70 percent compared to delayed disease outbreak response. The key mistake farmers make is waiting for widespread mortality before acting, by which point the pathogen has already seeded multiple tanks through shared equipment or aerosol transfer.

    1. Increased global trade has facilitated the spread of pathogens like *Grouper iridovirus*, impacting both wild and farmed fish.
    2. The rise of *Gyrodactylus salaris*, a parasitic flatworm, poses a significant threat to salmon farms across Europe.
    3. Novel viral diseases such as the Betanodavirus are emerging, causing considerable losses in aquaculture, especially in marine species.

    Common Viral Fish Diseases

    Viral fish diseases spread fast through aquaculture systems and can wipe out entire populations before you’ve identified the problem. Infectious pancreatic necrosis (IPN) hits young salmonids hardest, causing their bellies to swell and gills to turn pale. Viral hemorrhagic septicemia (VHS) is less picky about its hosts. It infects dozens of species, causing internal bleeding and sluggish behavior that makes affected fish easy targets for predators. Koi herpesvirus (KHV) tears through koi and carp operations, creating patchy skin lesions and causing fish to swim erratically near the surface. Channel catfish virus becomes particularly dangerous when water temperatures climb above 25°C, attacking fingerlings and juveniles with hemorrhages at the fin bases and a distinctive corkscrew swimming pattern just before death.

    Viral infections demand a different diagnostic approach than bacterial or parasitic problems. The behavioral signs (lethargy, erratic swimming, sudden die-offs) overlap with dozens of other conditions, so relying on them alone wastes time. Instead, watch for virus-specific indicators: hemorrhaging in the gills or internal organs, pale or swollen kidneys visible through the body wall in translucent species, and clustered mortality that jumps from 2% to 15% within 48 hours. When you see these patterns, send samples for PCR testing rather than guessing. Most farmers I know who’ve dealt with viral outbreaks say they lost an extra week by treating for the wrong pathogen first. That delay turns a containable problem in one tank into a facility-wide crisis.

    Prevention is always better than cure. Implement rigorous biosecurity measures—quarantine new stock, use virus-free water sources, and maintain optimal water quality. Vaccination is available for certain viral diseases like IPN, offering an effective line of defense. In case of an outbreak, isolating affected fish and consulting with a veterinarian can help manage the situation and minimize losses.

    Common Bacterial Fish Diseases

    Bacterial fish diseases rank among the most common threats in aquaculture, draining profits from freshwater and marine operations alike. Take Aeromonas salmonicida, the pathogen behind furunculosis in salmonids. It creates boil-like lesions and internal hemorrhaging that can kill an entire year class within days if you catch it too late. Water temperature drives the spread. Between 10 and 15 degrees Celsius, the bacteria multiplies fast, which is why spring and fall hit trout and salmon farms hardest.

    Columnaris disease, caused by Flavobacterium columnare, attacks the skin, gills, and mouth tissue with distinctive white or gray patches that look like cotton or saddle-shaped lesions. Warm water species face the highest risk when temperatures climb above 20 degrees Celsius. Streptococcus species have become a major concern in tilapia farming, causing meningoencephalitis and septicemia that manifest as erratic swimming, eye cloudiness, and sudden death. In marine systems, Vibrio species dominate the bacterial threat landscape, thriving in saltwater environments and causing vibriosis in everything from shrimp to grouper.

    Daily observation catches problems before they spiral out of control. Check your stock every morning for behavioral red flags: fish hanging at the surface gulping air, lethargy near tank bottoms, or erratic swimming patterns. These signs typically appear 24 to 48 hours before visible lesions or fin damage show up. Run water quality tests immediately when you spot unusual behavior. For fish disease treatment, oxytetracycline and florfenicol are your workhorses, but you’ll need veterinary authorization and must follow local antibiotic regulations to the letter. Bath treatments handle external bacterial infections, while medicated feed reaches systemic problems inside the fish. Complete the full antibiotic course even after symptoms vanish. Stopping three days early because the fish look healthy breeds resistant bacterial strains that can wipe out future crops.

    Antibiotic Resistance and Responsible Treatment

    Antibiotic resistance has become a critical issue in aquaculture, with resistant bacterial strains appearing in farms across Southeast Asia, Europe, and the Americas. Overuse of oxytetracycline and florfenicol in particular has led to treatment failures that cost farmers thousands of dollars per production cycle. The problem stems from misdiagnosis, underdosing to save money, and skipping withdrawal periods before harvest. Proper antibiotic protocols require accurate bacterial identification through lab testing, calculating dosages based on actual fish biomass, and following minimum withdrawal periods (typically 21 to 42 days depending on the drug and species).

    Regulatory frameworks vary dramatically by region. The European Union maintains a strict list of approved antibiotics for aquaculture and requires veterinary prescriptions, while some Asian countries still allow over-the-counter sales. The United States requires FDA approval for each species and disease combination, which is why only a handful of antibiotics are legally available for fish farmers. Many operations now face audits from export markets demanding proof of responsible antibiotic use.

    Alternatives to antibiotics have proven effective in reducing disease pressure. Probiotics like Bacillus subtilis can colonize fish intestines and outcompete pathogenic bacteria. Beta-glucan immunostimulants boost natural immune responses when added to feed at 0.1 to 0.2% of diet weight. Commercial vaccines now exist for major diseases like vibriosis, furunculosis, and viral hemorrhagic septicemia. A Norwegian salmon farm that switched to a vaccine-based health program reduced antibiotic use by 95% while maintaining survival rates above 92%.

    1. White Spot Disease (Ich)

    White spot disease is caused by the parasite Ichthyophthirius multifiliis and is highly contagious. It appears as small, white, pinhead-sized spots on the fish’s skin and fins, resembling sprinkled salt.

    Treatment:

    Salt treatment works as a first-line defense for mild ich outbreaks. Dissolve non-iodized salt at 1 to 3 grams per liter (roughly 0.1% to 0.3% salinity) and maintain this level for 5 to 7 days. The salt disrupts the osmotic balance of the parasite without harming most freshwater fish, though scaleless species like catfish require lower concentrations around 1 gram per liter.

    Formalin treatment tackles moderate to severe white spot disease infections more aggressively. Apply 15 to 25 ppm (parts per million) as a prolonged bath for 12 to 24 hours, or use 100 to 250 ppm for a short dip lasting 30 to 60 minutes. Monitor oxygen levels closely during formalin treatment since it depletes dissolved oxygen rapidly. Many farmers lose fish to suffocation rather than the chemical itself.

    Raise water temperature to 28 to 30 degrees Celsius if your species can tolerate it. Higher temperatures speed up the parasite’s life cycle, forcing it into the free-swimming stage where treatments actually work. The ich parasite remains invulnerable while encysted under the fish’s skin, which is why timing matters more than dosage.

    Combine methods for stubborn cases. Run salt at 1 gram per liter while applying formalin at the lower end of the dosage range. This dual approach hits the parasite from two angles without pushing toxicity levels too high. Replace 30% of the water between treatments to prevent chemical buildup.

    • Gradually increase water temperature to 29°C over 24 hours to accelerate the parasite’s life cycle
    • Use a specific white spot cure medication
    • Remove carbon from filters during treatment
    • Treat the entire tank for the recommended duration 

    2. Fin Rot

    Fin rot, one of the most common bacterial infections in aquaculture, causes fins to fray and decay from the edges inward. You’ll notice the fin margins turning white or translucent while the base becomes inflamed and red. Left untreated, the infection progresses toward the body, destroying fin tissue entirely and potentially spreading to other fish in your system.

    Treatment:

    Start with water quality improvement before reaching for medications. Test ammonia, nitrite, and pH levels immediately, then perform a 30 to 50 percent water change if readings show any elevation. Poor water conditions cause most fin rot cases, and fixing the environment alone often stops mild infections within five to seven days.

    For moderate to severe fin rot treatment, combine water changes with salt baths at 1 to 3 grams per liter for 10 to 15 minutes daily. This works for freshwater species and controls secondary bacterial infections without the cost or resistance risks of antibiotics. Remove any sharp decorations or aggressive tank mates that might have caused the initial injury.

    Antibiotic treatment becomes necessary when fin tissue shows rapid deterioration or white, fuzzy edges that indicate columnaris bacteria. Oxytetracycline at 50 to 75 milligrams per kilogram of feed for 10 days treats systemic infections in food fish. For ornamental species in display tanks, a bath treatment with nitrofurazone or kanamycin following label directions targets the infection directly. Isolate affected fish during treatment to prevent disease spread and reduce the total antibiotic load in your system.

    • Check water quality and perform a 25% water change
    • Treat with antibacterial medications like Furan 2 or Melafix
    • Remove carbon from filters during treatment 

    3. Fungal Infections (Saprolegniasis)

    Fungal infections appear as white, cotton-wool-like growths on the skin, mouth, fins, or gills. These infections usually occur as secondary problems when fish are already stressed or injured.

    Treatment:

    • Treat the underlying cause or injury
    • Perform a 30-50% water change
    • Use aquarium salt if fish tolerate it
    • Apply anti-fungal medication or methylene blue 

    4. Dropsy (Infectious Dropsy)

    Dropsy is a serious bacterial infection characterized by a swollen abdomen, protruding scales (pinecone appearance), and listless behavior. The condition is often fatal.

    Treatment:

    • Quarantine affected fish immediately
    • Maintain excellent water quality
    • Avoid overcrowding and feed high-quality food
    • Treatment is difficult; antibiotics may be attempted but often unsuccessful 

    5. Velvet Disease

    Velvet is caused by parasitic dinoflagellates and appears as a fine, yellowish-to-gold dust on the fish’s skin, particularly on the fins and gills.

    Treatment:

    • For tropical fish: raise temperature to 29°C and turn off lights
    • Perform a 30-50% water change
    • Use aquarium salt with caution
    • Treat with Acriflavine medication 

    6. Ammonia Poisoning

    Though not a disease, ammonia poisoning is common in poorly maintained systems. Fish may gasp at the surface with red or inflamed gills.

    Treatment:

    • Test water for ammonia and pH
    • Perform a 30-50% water change
    • Clean gravel with a siphon
    • Avoid overfeeding and overcrowding 

    7. Ulcers

    Ulcers appear as reddened sores on the fish’s body, most commonly affecting cold-water fish like goldfish .

    Treatment:

    • Check water conditions and perform water change
    • Quarantine affected fish
    • Treat with Melafix
    • Use different nets to avoid contamination 

    8. Swim Bladder Disorder

    Affected fish swim erratically, have difficulty staying upright, or float to the surface. The condition often results from constipation or air gulping .

    Treatment:

    • Check water chemistry and perform 25% water change
    • Withhold food for up to 48 hours
    • Feed thawed, skinned peas as a natural laxative
    • Reduce water level to half if fish sit at the bottom 

    9. Cotton Mouth

    This bacterial infection causes white or greyish spots around the fish’s head and mouth, sometimes turning yellowish with red edges .

    Treatment:

    • Perform a 30-50% water change
    • Use aquarium salt if fish tolerate it
    • Treat with Furan 2, Melafix, or vet-prescribed antibiotics 

    10. Slime Disease

    This parasitic disease causes excessive mucus production, giving the fish a greyish-white slimy appearance .

    Treatment:

    • Check water pH and perform 30-50% water change
    • Remove activated carbon before treatment
    • Use Furan 2 or Melafix
    • Maintain healthy water conditions to prevent recurrence 

    Disease Prevention Strategies

    Water quality monitoring forms the foundation of disease prevention strategies in any aquaculture operation. Check temperature, pH, and dissolved oxygen every morning before you feed. Most species handle pH between 6.5 and 8.5, but a sudden swing of more than 0.5 units in 24 hours will stress your fish no matter where they started. Keep dissolved oxygen at 95% saturation or higher throughout the entire day cycle.

    Quarantine new stock for at least 14 days in a separate system with dedicated nets and equipment. Watch for behavioral changes during this period. Erratic swimming or reduced feeding typically show up three to five days before you see physical disease signs. Run a prophylactic formalin bath at 150 to 250 ppm for one hour when fish arrive, then repeat on day seven if they show no stress.

    Breaking pathogen transmission cycles is how disease control in aquaculture actually works. Pull dead fish within two hours because they turn into bacterial incubators fast. Clean your biofilters weekly, on schedule, not when you finally remember. Disinfect nets and handling equipment between ponds using 200 ppm chlorine solution for 30 minutes or quaternary ammonium compounds at the rates the manufacturer specifies. Put foot baths at entry points so you stop tracking pathogens between systems on your boots.

    Vaccination prevents specific bacterial diseases like vibriosis and furunculosis, but you need to time it right. Vaccinate at least three weeks before you expect disease pressure and when water temperatures support immune response, typically above 12°C for salmonids. Probiotic feeds with Bacillus or Lactobacillus strains can reduce gut pathogen loads, but they need consistent use for at least 30 days to colonize the digestive tract. Run health assessments every two weeks to catch problems while you still have treatment options.

    1. Maintain Water Quality: Test water regularly for pH, ammonia, nitrites, and temperature. Healthy water means healthy fish .
    2. Quarantine New Fish: Always isolate new fish for 2-4 weeks before introducing them to your main system .
    3. Provide Proper Nutrition: Feed high-quality food in appropriate quantities. Poor nutrition weakens immune systems .
    4. Avoid Overcrowding: Stock at appropriate densities to reduce stress and disease transmission .
    5. Remove Dead Fish Promptly: Dead fish can spread disease and pollute water .
    6. Clean Equipment: Use separate nets for different tanks and disinfect regularly .

    Record Keeping and Disease Monitoring Systems

    A simple notebook tracking daily mortality counts can reveal patterns that save thousands of dollars in losses. Start by logging three basics every morning: number of dead fish, tank or pond location, and water temperature. Within two weeks, you’ll spot trends invisible to memory alone. I’ve seen farmers discover that mortalities spike exactly 72 hours after feed changes, or that one specific pond consistently shows problems every spring.

    Your disease logs need four columns: date, clinical signs observed, treatment applied, and outcome. When columnaris appears for the third time in six months, those records tell you whether it’s the same strain, whether your treatment protocol works, and whether environmental triggers repeat. Photograph lesions and abnormal behavior with your phone, date-stamped. These images become reference points when deciding if a new outbreak matches a previous one or signals something different.

    Most countries require farmers to report specific diseases within 24 to 48 hours of suspected diagnosis. In the United States, this includes viral hemorrhagic septicemia (VHS), spring viremia of carp (SVC), and infectious salmon anemia (ISA). Check your national and state lists annually, as designations change. Failure to report can result in quarantine violations, fines, or loss of certification. Keep your local veterinary authority’s contact information posted in your record book, not buried in email somewhere.

    Water Quality Management

    Poor water quality kills more farmed fish than infectious diseases, often weakening immunity before pathogens even arrive. Temperature tolerance varies dramatically by species: tilapia thrive between 82-86°F, while rainbow trout need 55-60°F to maintain optimal growth and disease resistance. A 5-degree swing outside these ranges can suppress immune function within 48 hours, leaving fish vulnerable to opportunistic infections like columnaris or ich.

    Dissolved oxygen below 5 mg/L causes chronic stress in most species, and levels under 3 mg/L trigger mass mortality events. Install continuous DO monitors in high-density systems rather than relying on daily spot checks. Ammonia spikes above 0.5 ppm damage gill tissue and create entry points for bacterial pathogens. Effective ammonia management requires testing twice daily during feeding periods when waste production peaks. Nitrite toxicity becomes a concern above 1.0 ppm, as it interferes with oxygen transport in the blood by converting hemoglobin to methemoglobin. Monitor all three water quality parameters together, since problems rarely occur in isolation. A sudden ammonia spike often leads to secondary nitrite problems within 48 hours as nitrifying bacteria struggle to keep pace with the increased load.

    pH shifts of more than 0.3 units per day stress fish even if the final value stays within acceptable ranges (6.5-8.5 for most species). Sudden drops often indicate nitrification problems or organic acid buildup from uneaten feed. Establish a testing schedule that matches your system’s bioload: small recirculating systems need daily checks, while large ponds can work with twice-weekly monitoring. Water exchange rates depend on stocking density, but 10-15% daily turnover prevents most accumulation issues in moderate systems. Mechanical and biological filtration must match your maximum feeding rate, not average stocking levels.

    Biosecurity Measures

    Biosecurity lapses can result in catastrophic losses for aquaculture operations. The most effective farms install footbaths at facility entry points, enforce strict access controls that limit who can enter production areas, and maintain dedicated quarantine tanks for all new stock arrivals. These quarantine periods typically last 14 to 30 days, giving farmers time to observe new fish for signs of disease before introducing them to existing populations. Farms that implement these protocols consistently see significant reductions in disease outbreaks. The investment in biosecurity infrastructure pays for itself quickly when you consider the alternative: losing entire tanks or ponds to preventable infections that spread through contaminated equipment, clothing, or untested new arrivals.

    • Using footbaths and hand sanitizers for anyone entering the facility.
    • Regularly disinfecting equipment and gear.
    • Strictly controlling access to the farm to minimize human traffic.
    • Quarantining new stock for a period of 10-14 days.
    • Implementing routine health checks and monitoring of fish.

    Biosecurity measures deliver measurable results when implemented correctly. Trout farms that have adopted multi-layered biosecurity protocols, including mandatory disinfection of transport vehicles and buffer zones between farm sections, have reported significant reductions in infection rates. The key lies in consistency. A single weak point in your biosecurity chain, whether it’s an unsterilized net or an uncontrolled visitor entry, can undermine months of careful disease management work.

    Advanced Disease Management Techniques

    Probiotics improve fish gut health, which strengthens immune systems and reduces vulnerability to pathogens. Research on tilapia has shown that diets enriched with specific probiotic strains can reduce infection rates and improve overall fish health. You can deliver probiotics through feed or water, giving you flexibility based on your farm setup. Feed-based delivery works well for intensive systems where you control rations precisely, while water-based application suits pond environments where fish feed naturally. This adaptability makes probiotics a practical tool for disease prevention across different aquaculture operations.

    Vaccination has revolutionized fish health management in commercial operations. By immunizing fish against specific pathogens, farmers can significantly decrease mortality rates. Vaccines against Aeromonas salmonicida have significantly reduced disease outbreaks in salmon farms. The key is selecting the right vaccine for the prevalent pathogens in your area and ensuring fish are vaccinated at the appropriate age and size. Timing matters because fish under 2 grams typically lack a fully developed immune system and won’t respond effectively to most vaccines.

    Genetic selection provides a long-term strategy for enhancing disease resistance. By breeding fish that naturally exhibit resilience to certain diseases, farmers can develop stocks that require fewer interventions. Selective breeding programs for Atlantic salmon have demonstrated increased resistance to Infectious Salmon Anemia over multiple generations. This approach reduces disease management costs while improving overall farm sustainability.

    Case Studies in Disease Management

    Tilapia farms battling Streptococcus agalactiae outbreaks have found success by instituting comprehensive vaccination programs alongside enhanced water quality management practices, resulting in reduced mortality rates and improved fish growth. This bacterial infection thrives in high-density aquaculture environments, where stress and poor water conditions create ideal circumstances for rapid spread. The combination of preventive vaccination and environmental control addresses both the pathogen itself and the underlying conditions that allow it to flourish. Farms that implement these dual strategies typically see measurable improvements within the first year, though results vary based on initial stocking density, water temperature, and management consistency.

    Salmon farms dealing with Infectious Salmon Anemia have successfully curbed virus spread by enhancing site disinfection, controlling farm access, and diversifying stock to include more resilient strains. Biosecurity protocols matter most during outbreaks. Farms that implement strict disinfection procedures at entry points and limit unnecessary personnel movement can contain the virus before it spreads through adjacent pens. Adding ISA-resistant genetic lines to your stock rotation provides a buffer against future outbreaks, though these strains may grow slightly slower in the first months after stocking.

    These cases underscore the importance of adaptive management strategies in aquaculture. Whether through vaccination, environmental management, or biosecurity, each method offers unique benefits. Real-world experiences like these shape effective disease management practices, emphasizing the balance between prevention and intervention.

    Zoonotic Diseases: Protecting Yourself

    Zoonotic fish diseases present significant human health risks, as they can be transmitted from fish to people. Mycobacterium marinum is one such bacterial infection prevalent in aquaculture settings, causing painful skin ulcers known as “fish tank granulomas” on the hands of those who handle infected fish or come into contact with contaminated water. Additionally, Vibrio species can lead to severe gastrointestinal illnesses, with Vibrio vulnificus being particularly notorious for causing infections in individuals with compromised immune systems. Other zoonotic pathogens, such as Aeromonas hydrophila, can also pose threats, resulting in skin infections and gastrointestinal distress. Recognizing these zoonotic fish diseases is vital for aquaculture farmers, as it helps safeguard both fish health and the well-being of workers.

    Protection measures:

    • Wear gloves when handling fish or aquarium water
    • Cover cuts and open wounds
    • Wash hands thoroughly after contact with fish or water
    • Avoid splashing water on your face
    • Seek medical attention if you develop skin lesions after fish contact 

    Treatment Quick Reference Guide

    Chemical Treatments for Fish Diseases

    Chemical treatments are essential in the fight against fish diseases, providing targeted solutions to combat various pathogens. Formalin is particularly effective against external parasites such as ich and flukes, while hydrogen peroxide is widely used to address bacterial gill disease and fungal infections. Potassium permanganate acts as an oxidizing agent, helping to clear organic material from the water, which in turn reduces harmful bacteria levels. However, safety in fish disease management must be a priority; careful dosage and monitoring are crucial to avoid toxicity and ensure the well-being of the fish. Always consult specific guidelines and research to determine the most effective and safe application methods for these chemical treatments for fish diseases.

    Safety is paramount when using these chemicals. Always adhere to recommended dosages and wear protective gear such as gloves and goggles. Overdosing can harm fish and disrupt the aquatic environment. It’s also vital to ensure adequate water aeration during treatment, as some chemicals can deplete oxygen levels.

    While chemical treatments offer quick relief, they have limitations. Some pathogens may develop resistance, reducing effectiveness over time. Additionally, chemicals can stress fish if not used properly, affecting their immune systems. Always combine chemical treatments with good husbandry practices to manage fish health comprehensively.

    Chemical Treatment Guidelines

    When treating fish diseases chemically, precision and safety are paramount. Start by selecting the correct chemical agent for the specific disease, considering both the type of fish and the environment. For example, formalin is effective against external parasites like gill flukes but requires careful handling. Use it at a concentration of 25 mg/L for 30 to 60 minutes, ensuring proper aeration during treatment.

    • Ensure accurate dosing: Overdosing can harm fish, while underdosing may not eradicate the disease.
    • Monitor water quality: Some treatments can deplete oxygen levels or alter pH.
    • Wear protective gear: Chemicals like formalin and copper sulfate are hazardous to human health.

    Be aware of potential side effects, such as stress in fish or, in severe cases, mortality. Chemical treatments can also lead to resistance, making pathogens harder to eliminate over time. Rotate chemicals or combine them with alternative methods to mitigate this risk. Always document treatments, noting the chemical used, concentration, and duration, to track any resistance or adverse reactions.

    Final Thoughts

    Successful fish farming requires vigilant monitoring and prompt action when health challenges arise. Understanding common fish diseases and recognizing early signs can drastically reduce losses in your aquaculture operation. Regular water quality checks, proper nutrition, and strict quarantine protocols are vital for effective aquaculture health management. These proactive strategies protect your stock and boost productivity, making them essential investments. Continuous learning in fish health management is crucial; staying informed about the latest research and practices will further enhance your ability to maintain a healthy aquaculture environment.

    Resources for Aquaculture Farmers

    Aquaculture farmers seeking to deepen their knowledge of fish diseases can turn to a variety of resources. Books like ‘Fish Disease: Diagnosis and Treatment’ provide practical insights that can be invaluable in managing health issues. The ‘Fish Health Section’ of the American Fisheries Society offers a wealth of research papers and guidelines tailored to aquaculture practices.

    Websites such as FishBase and the World Aquaculture Society deliver up-to-date information on species-specific diseases and management strategies. Organizations like the Global Aquaculture Alliance also provide educational resources, including webinars and best practice guidelines, to support sustainable aquaculture.

    • Aquaculture forums on Reddit and Facebook, where farmers share experiences and solutions
    • The Aquaculture Network, a platform for discussion and knowledge exchange
    • Online courses from institutions like the University of Florida that focus on fish health management

    Engaging in online forums can connect farmers with peers facing similar challenges. These communities foster collaboration, allowing for the sharing of real-world experiences in disease management and treatment. Participating in discussions can offer fresh perspectives and practical strategies.

    Conclusion and Future Directions

    Understanding the common diseases that affect fish in aquaculture is crucial for maintaining healthy stock and ensuring profitability. From ichthyophthirius multifiliis to viral hemorrhagic septicemia, recognizing symptoms early can make the difference between a minor setback and a devastating loss. Prevention through biosecurity measures, regular health assessments, and proper husbandry practices can significantly reduce disease outbreaks. Farmers must remain vigilant and proactive.

    Ongoing education is vital in the ever-evolving field of aquaculture. The introduction of new technologies and changing environmental conditions necessitate continuous learning. Participating in workshops, online courses, and conferences can help farmers stay updated on the latest research and best practices. For instance, studies show that farms with staff trained in fish health management report up to 30% lower mortality rates. By investing in education, aquaculture farmers can enhance their operational efficiency and resilience against diseases.

    Understanding Fish Disease Transmission

    Disease transmission in aquaculture systems often occurs through direct contact between fish, contaminated water, or shared equipment. Pathogens can easily spread in densely populated tanks or ponds, where fish are in close proximity. For instance, a study showed that overcrowded environments can facilitate rapid disease outbreaks, with some pathogens doubling their spread rate when fish density exceeds 10 kg/m³.

    Water quality plays a critical role in disease dynamics. Poor water conditions, such as high ammonia levels or low dissolved oxygen, weaken fish immune systems, making them more susceptible to infections. Regular monitoring and maintenance of water parameters, coupled with effective filtration systems, can significantly reduce the risk of disease outbreaks.

    • Maintain optimal fish density to minimize stress.
    • Implement biosecurity measures to prevent pathogen entry.
    • Regularly test water quality to ensure a healthy environment.
    • Use effective filtration and aeration systems.
  • Fish Farming Business Plan: Essential Components

    Fish Farming Business Plan: Essential Components

    A fish farming business plan is your roadmap to success in aquaculture. It helps you secure financing, manage risks, and build a sustainable operation. Here’s what it needs to include.

    1. Executive Summary

    Your Executive Summary anchors the entire fish farm business plan by introducing the fundamentals first: your business name, business address, owner names, and business structure (LLC, partnership, sole proprietorship, or corporation). After establishing these basics, spell out your mission statement, vision, and the specific objectives you’ll hit in years one through three. Include your unique value proposition here, whether that’s organic certification, a direct-to-restaurant distribution model, or a focus on high-value species like barramundi or Arctic char. This is also where you state your capital requirements upfront. Specify your total startup costs, break down how much initial funding you need, and identify your sources (personal savings, bank loans, angel investors, or grants). A complete aquaculture business plan executive summary tells lenders exactly how much you’re asking for and what you’ll do with it. This opening section typically runs one to two pages and gives lenders or investors everything they need to decide whether to keep reading. Think of it as covering the 7 main points in a business plan in condensed form: who you are, what you’re selling, who’s buying it, how you’ll operate, what makes you different, how much capital you need, and what returns you project.

    What Are the 7 Main Points in a Business Plan?

    What are the 7 main points in a business plan for fish farming? The structure mirrors what banks demand from any agricultural loan: Executive Summary, Company Description, Market Analysis, Organization & Management, Products/Services, Marketing & Sales Strategy, and Financial Projections. I’ve watched loan officers flip straight to the financials first, then work backward to verify management credentials and market demand. They’re hunting for specific answers. Can your operation generate $8,000 per acre annually to cover a $50,000 startup loan? Does your team include someone who’s actually raised tilapia through a full growth cycle? Have you called the three seafood distributors in your county to confirm they’ll buy your catfish? Each section of your aquaculture business plan exists to address one of these risk factors. Miss any component and you hand the bank an easy reason to reject your application.

    For fish farming, these sections take on industry-specific content. Your Executive Summary highlights stocking density targets (like 50 tilapia per cubic meter) and projected harvest cycles. Market Analysis digs into local wholesale prices for live catfish or the retail demand for organic trout in your region. Organization & Management covers who has aquaculture training and whether you’re hiring a full-time farm manager or running operations yourself. Products/Services specifies your fish species, target weights at harvest (such as 1.5-pound bass), and whether you’ll sell fingerlings, table-ready fish, or both.

    Many fish farming plans add two critical sections beyond the standard seven: an Operations Plan detailing water quality management, feeding schedules, and biosecurity protocols, and a Risk Management section addressing disease outbreaks, oxygen depletion events, and market price volatility. A tilapia farm might explain backup aeration systems in Operations and carry mortality insurance in Risk Management. These additions transform a generic business plan into a document that demonstrates you understand the biological and operational realities of raising aquatic animals for profit.

    2. Company & Market Analysis

    Your target market analysis converts into action plans through three concrete steps. First, identify your target market by naming actual buyers: independent restaurants within 50 miles, regional grocery chains like Whole Foods or Sprouts, or export brokers shipping to Asia. Second, segment these customers by their purchasing requirements. Restaurants want consistent portion sizes and weekly delivery schedules. Grocery chains need volume commitments, third-party certifications, and locked-in pricing for 90-day periods. Export buyers pay premium rates for specific species but require strict quality documentation at every stage. Third, apply specific market research methods that reveal competitive gaps. Start with a SWOT analysis that shows where you stand against existing tilapia operations saturating local markets. Call 20 restaurants in your delivery radius and ask what fish species they want but struggle to source consistently. Check your state’s aquaculture production reports (most agriculture departments publish these annually) to see what species local farms already produce at scale. Run a PEST analysis to catch regulatory changes, like new water use restrictions or shifts in organic certification standards. The sustainable seafood trend creates real opportunities for species like barramundi or catfish to command better margins than commodity fish. If every farm in your region grows tilapia, you’re stuck competing on price alone. Find a niche species that local restaurants want but can’t source reliably, then structure your production capacity and delivery schedule around that specific gap. One Virginia farmer I know switched from tilapia to hybrid striped bass after discovering three high-end restaurants willing to commit to 100 pounds per week at $7.50 per pound, double his tilapia revenue.

    • Define your company’s goals and values
    • Describe your products and their unique features
    • Outline your target market

    Understanding your market drives every decision about which fish species to raise. Start with market demand analysis using surveys or local sales data to identify what buyers actually want. Tilapia is popular due to its relatively fast growth rate and efficient feed conversion, typically reaching market size within 6 to 8 months. It thrives in warmer climates, making it ideal for tropical and subtropical regions. Choose tilapia if your target customers prioritize affordability and consistent availability. Trout commands higher prices and attracts premium buyers willing to pay more for quality. Your species choice must align with local preferences and your supply chain capabilities, or you’ll struggle to move product even if you raise it successfully.

    • Analyze market size, trends, and demand in your target area
    • Identify competitors and understand their strengths and weaknesses
    • Determine your competitive advantages

    Species Selection:
    Choose species based on market demand, growth rates, and compatibility with your farming system. Popular options include tilapia, catfish, salmon, and trout. Research production costs carefully—for example, pond-raised tilapia costs $1.50–3.00 per pound, while indoor systems can reach $5.00 per pound.

    Management Team & Organizational Structure

    Your management team section must prove you can actually run a fish farm, not just dream about it. Start with the farm owner’s resume: list specific aquaculture training (like a degree in fisheries science or a six-month internship at an operational tilapia farm), years of hands-on experience with the species you’re raising, and any relevant business management background. If you lack direct fish farming experience, pair yourself with a technical manager who has at least three years operating recirculating aquaculture systems or pond-based operations. Investors and lenders want to see that someone on your core team has successfully grown fish to market size before.

    A small-scale operation (under 5,000 fish) typically needs just the owner and one part-time worker for feeding, water testing, and maintenance. Scale up to 20,000 fish in multiple ponds or tanks, and you’ll need a full-time farm manager, two daily operations staff for feeding and monitoring, and a part-time technician for equipment repairs. Your organizational chart should show clear reporting lines: operations staff report to the farm manager, who reports to the owner or general manager. Include a brief job description for each role, specifying who handles water quality testing (critical for preventing die-offs), who manages feed inventory and ordering, and who’s responsible for harvesting and sales coordination.

    Don’t forget to address your advisory support. List your veterinarian with aquatic animal experience, your feed supplier’s technical representative, and any university extension agents you’ll consult for disease diagnosis. These relationships matter as much as your payroll staff, especially in your first two production cycles when problems arise fast.

    Materials and Equipment Needed for Fish Farming

    Your equipment budget will likely consume 30-40% of your initial startup capital, so understanding what you actually need prevents costly mistakes. Start with your grow-out system: recirculating aquaculture systems (RAS) require tanks (typically fiberglass or polyethylene), while pond-based operations need quality liners (HDPE or RPE) that run $0.50-$2.00 per square foot depending on thickness. Budget at least $15,000-$25,000 for a basic 1,000-gallon RAS setup, or $8,000-$12,000 per acre for pond construction with proper grading and liner installation.

    Water management equipment keeps your fish alive when things go wrong. You need primary and backup aeration systems (paddle wheel aerators or diffused air systems), circulation pumps rated for continuous operation, and mechanical or biological filtration appropriate to your stocking density. A backup generator is non-negotiable. I’ve seen entire harvests lost during 4-hour power outages because operators skipped this $2,000-$5,000 investment. Size your generator to run all critical aeration and circulation equipment simultaneously.

    Monitoring tools catch problems before they become disasters. At minimum, stock digital thermometers, dissolved oxygen meters (expect $200-$800 for reliable units), pH meters, and ammonia/nitrite test kits. Test daily during the first month of each production cycle, then shift to weekly testing once systems stabilize. For feeding, automatic feeders ($500-$3,000 each) reduce labor costs and improve feed conversion ratios by delivering consistent portions. Store feed in sealed, rodent-proof containers in climate-controlled spaces to prevent spoilage and maintain nutritional value.

    Harvesting and biosecurity equipment rounds out your essential purchases. Seine nets sized to your ponds or tanks, grading tables or mechanical graders for size sorting, and insulated transport containers maintain fish quality from harvest to sale. Biosecurity materials include footbaths at facility entry points, dedicated boots and coveralls for staff, and EPA-approved disinfectants. These simple protocols prevent disease introduction that could wipe out months of growth and tens of thousands in revenue.

    Feed Requirements and Feeding Schedules

    For 1000 catfish, expect to use 8 to 12 bags of feed per month, with the exact amount depending on their current weight and growth stage. Fingerlings consume far less than market-size fish approaching harvest. A 15kg bag of feed typically costs between $12 and $18, making feed your largest recurring expense at roughly 60 to 70 percent of total operating costs.

    Match feed type to fish size. Starter feeds (0.5mm to 2mm pellets) work for fingerlings up to about 10 grams. Switch to grower feeds (2mm to 4mm) once fish reach 10 to 100 grams, then move to finisher feeds (4mm to 6mm) for fish over 100 grams until harvest. Feed juvenile fish four to five times daily, reducing to two or three times as they mature. Most farmers feed early morning and late afternoon to avoid the midday heat when fish are less active.

    Store feed in a cool, dry location off the ground to prevent moisture damage and pest infestation. Most commercial feeds maintain quality for three months when properly stored, but buy only what you’ll use within 30 to 45 days to ensure freshness. Track your feed conversion ratio by dividing total feed weight by total fish weight gained. Catfish typically achieve a 1.2 to 1.5 FCR under good management, meaning 1.2 to 1.5 kilograms of feed produces one kilogram of fish. Tilapia often perform slightly better at 1.0 to 1.3, while ornamental species vary widely.

    Financial Projections & Startup Costs

    Startup costs vary widely based on scale and system type, with major expenses including infrastructure, water management equipment, and initial stock. What materials are needed for a fish farm? Your equipment costs break down into several categories: pond construction or recirculating tank systems form your largest investment, followed by water management infrastructure like pumps, aerators, and filtration systems. You’ll also need water quality testing equipment to monitor pH, dissolved oxygen, ammonia, and nitrite levels throughout production cycles. Initial fingerling stock represents another significant expense, with quantities ranging from a few thousand fish for small operations to tens of thousands for commercial scale farms. Permit fees vary by location and can run anywhere from minimal processing fees to several thousand dollars depending on your state’s aquaculture regulations. Most new operators underestimate the cost of backup power systems, which can save an entire stock during outages.

    Feed costs typically represent 40% to 60% of operating costs in most fish farming operations, making them the largest ongoing expense you’ll face. For catfish specifically, producers often calculate feed requirements in bags: a common rule of thumb suggests you’ll need roughly 8 to 12 bags of 50-pound commercial catfish feed per 1,000 fish over a six-month grow-out period, though actual catfish feed requirements vary based on water temperature, fish size, and feed conversion ratios. Labor and utilities form your other major ongoing expenses, with costs varying significantly by scale and automation level. Aeration and water pumping drive most utility costs, while labor needs depend on whether you’re running manual feeding systems or automated ones. Insurance, maintenance, and regular water quality testing add to your fixed monthly overhead regardless of production volume.

    Revenue projections must account for your specific harvest cycle and mortality rates. Tilapia reach market size in 6 to 8 months, while catfish need 12 to 18 months. If you stock 10,000 fingerlings and achieve an 80% survival rate at 1.5 pounds per fish, you’ll harvest 12,000 pounds. At $3.50 per pound wholesale, that’s $42,000 per cycle. Your cash flow projection should show negative months during grow-out periods and positive spikes at harvest. Most operations break even between months 18 and 30, assuming you secure funding through a combination of personal investment (typically 20% to 30%), agricultural loans with 5% to 8% interest rates, and possibly USDA grants for sustainable aquaculture systems.

    Which Fish Farming Business Is Most Profitable?

    Which fish farming business is most profitable? Salmon farming typically generates the highest revenue per pound, but requires cold water, high capital investment, and sophisticated recirculating systems. Shrimp aquaculture offers strong returns in tropical and subtropical regions, though disease outbreaks can wipe out entire crops. Salmon and shrimp typically command premium wholesale prices, while tilapia and catfish are positioned as more affordable options. These profitable fish species compensate for lower market prices with faster growth cycles, lower feed costs, and simpler production systems that work in warm climates.

    Profitability hinges on four critical factors: local market prices (which can swing 50% based on proximity to urban centers), growth rate to harvest size, feed conversion ratio (FCR), and regional demand patterns. Trout farming works well in mountain states where cold spring water flows year-round and local restaurants pay premium prices for fresh product. A tilapia operation in Arizona might thrive due to consistent warm temperatures and low heating costs, while the same setup in Montana would burn cash on climate control. The ‘most profitable’ species is whichever one matches your water temperature, available infrastructure, and the customers actually buying fish within 200 miles of your farm.

    Regulatory Considerations

    Starting a fish farming business requires securing aquaculture permits and meeting regulatory compliance standards specific to your region. In the U.S., fish farmers typically need a National Pollutant Discharge Elimination System (NPDES) permit if they discharge wastewater. State and local authorities add their own requirements for water usage, fish health, and environmental protection. California demands water rights documentation and fish stocking permits, while coastal states often require separate permits for marine species versus freshwater operations.

    Your business plan should include a dedicated compliance section that maps out the permit application process with realistic timelines. Budget 3 to 6 months for federal permits and another 2 to 4 months for state approvals, though complex sites near protected waterways can take longer. List each required permit by name, the issuing agency, estimated fees, and renewal schedules. Include copies of application checklists from your state’s environmental or agriculture department. Document your water source permits, discharge permits, and any special use authorizations for public waters. This compliance timeline becomes your roadmap for launch, since you cannot stock fish legally until permits are in hand. Track which permits require annual renewals versus multi-year terms to avoid lapses that could shut down operations.

    Compliance with local and international regulations is crucial. The Food and Agriculture Organization (FAO) sets guidelines for sustainable aquaculture practices, and adhering to these can enhance your credibility and marketability. Additionally, if you plan to export your fish, understanding the regulations set forth by international bodies, such as the World Trade Organization (WTO), is essential to avoid hefty fines and trade barriers.

    1. Research local aquaculture laws and regulations.
    2. Obtain necessary environmental permits.
    3. Ensure compliance with health and safety standards.
    4. Stay updated on international trade regulations if exporting.

    Market Trends and Consumer Preferences

    Fish consumption trends indicate a steady increase, driven by the recognition of fish as a nutritional powerhouse rich in protein, omega-3 fatty acids, and essential vitamins. Health-conscious consumers are incorporating more fish into their diets, significantly boosting demand. As more people become aware of these nutritional benefits, the fish farming industry is poised to attract substantial investment and innovation. With strategic planning, this sector can anticipate notable market growth in the coming years.

    Consumer preferences have shifted toward sustainability in seafood purchasing. Many buyers now actively seek fish from environmentally responsible farms, even when it costs more. Growing numbers of consumers prioritize sustainably raised seafood and accept higher prices for certified products, creating real opportunities for farms that can prove their environmental credentials. Fish farmers who invest in eco-friendly practices, from water recirculation systems to organic feed, can tap into this market segment and command higher prices per pound. Sustainable aquaculture operations that earn certification from bodies like the Aquaculture Stewardship Council or Best Aquaculture Practices typically see price premiums of 10 to 30 percent over conventional fish. The key is third-party verification. Buyers will pay more for eco-friendly fish farming, but they need proof your practices actually deliver on environmental claims.

    • Increased demand for organic and antibiotic-free fish.
    • Preference for local sourcing to reduce carbon footprints.
    • Growth in popularity of aquaponics and integrated multi-trophic aquaculture (IMTA) systems.

    Marketing & Sales Strategy

    Your pricing needs to cover feed costs (typically 40-60% of total expenses), labor, utilities, and leave room for profit margins of 15-25% for sustainable operations. Start by calculating your cost per pound of fish, then research what local restaurants pay wholesalers versus what consumers pay at farmers markets. Tilapia might wholesale at $3-4 per pound but fetch $7-9 retail, while premium species like barramundi can command $12-15 per pound direct to consumers.

    Distribution channels determine your margins and workload. Direct sales through farmers markets or a farm stand deliver the highest returns but require significant time investment. Restaurants offer steady volume at mid-range prices and appreciate consistent weekly deliveries of 20-50 pounds. Wholesalers move large quantities but expect 30-40% discounts from retail prices. Many successful operations split inventory: 40% direct sales, 40% to restaurants, and 20% to local grocers or co-ops.

    Build credibility through third-party certifications like Best Aquaculture Practices (BAP) or organic certification if your system qualifies. These badges matter to high-end restaurants and health-conscious consumers willing to pay premium prices. Your promotional mix should include a simple website with online ordering, weekly social media posts showing harvest days or water quality practices, and face time at two or three regular farmers markets. Email newsletters to restaurant clients announcing seasonal availability keep you top of mind when chefs plan menus.

    Customer retention in fish farming hinges on consistency and quality. Restaurants drop suppliers who can’t deliver 50 pounds every Thursday without fail. Create standing order agreements with your top five accounts and offer a 5-10% discount for committed monthly volumes. Your unique selling proposition might be same-day harvest delivery, antibiotic-free practices, or a heritage breed that competitors don’t raise. One North Carolina farmer built his brand around delivering live fish to Asian markets, a service no one else offered within 100 miles.

    3. Operations Plan

    Your farming methods and infrastructure form the backbone of your operation. You’ll choose between recirculating aquaculture systems (RAS), traditional pond systems, or cage culture. RAS systems can increase production efficiency by enabling higher stocking densities and faster growth rates compared to traditional pond systems. Pond systems, though, often deliver cost advantages in regions with suitable climate and land availability. Labor will consume up to 50% of your operational expenses, so build this reality into your operational budget from day one. Efficient workforce management becomes critical to cost management, especially during harvest periods and daily feeding schedules. Seasonal changes directly impact your supply chain. Temperature swings and rainfall patterns alter fish growth rates and feed availability throughout the year. Install biofilters to maintain water quality and aeration systems to keep oxygen at proper levels. Your feeding strategy needs specifics: feed type, feeding frequency, stock density targets, and biosecurity protocols to prevent disease outbreaks. Investors want to see these operational details spelled out. It proves you understand the practical realities of running a fish farm, not just the theory.

    Your choice of farming system will determine your operational costs, labor needs, and profit margins from day one. Recirculating aquaculture systems (RAS) filter and reuse water continuously, making them ideal for areas where water is scarce or expensive. RAS systems offer precise control over water temperature, pH, and oxygen levels, which can optimize fish growth rates compared to less controlled environments. The tradeoff is steep: expect high upfront investment in tanks, biofilters, and monitoring equipment, plus you’ll need staff who understand the technology. Pond systems cost less to establish and work well if you have access to land and reliable water sources. The downside is less control. Water temperature swings with the seasons, and maintaining consistent quality becomes harder as fish density increases. Cage culture in lakes or reservoirs uses existing water bodies, cutting infrastructure costs. But you’re at the mercy of natural conditions, storms can damage equipment, and you may face pushback from recreational users or environmental groups. Match your system to what you can actually afford to build and operate, not what sounds most impressive.

    • Pond farming: Traditional and cost-effective for many species
    • Tank/RAS systems: Offer greater environmental control and water conservation
    • Cage farming: Uses natural water bodies with controlled feeding

    Equipment Requirements:

    Your fish farm needs a core set of materials to function. Tanks or ponds form the foundation, sized according to your target species and production volume. A 1,000-gallon tank can support roughly 100 pounds of tilapia at harvest, though stocking density varies by species and system type.

    Water quality equipment keeps fish alive. Aerators pump oxygen into the water, critical during hot weather when dissolved oxygen drops. Filtration equipment removes waste and maintains ammonia at safe levels. Most recirculating systems need both mechanical filters (to catch solid waste) and biological filters (to break down dissolved toxins). Pumps circulate water through these systems, with backup pumps essential since a single failure can kill your entire stock within hours.

    Daily operations require testing kits for pH, ammonia, nitrite, and dissolved oxygen. Test at least once daily, more often during the first month after stocking. Nets in multiple sizes handle everything from sampling small fingerlings to harvesting market-size fish. Keep separate nets for different ponds to prevent disease spread.

    Budget for replacement parts and spares. Aerator diaphragms wear out, pump seals fail, and nets tear. The materials needed for fish farm startups often cost 30 to 40 percent of total initial investment, though this drops significantly if you’re converting existing ponds rather than building from scratch.

    • Ponds or tanks
    • Aeration systems and pumps
    • Filtration systems (mechanical and biological)
    • Water quality testing equipment
    • Feeding equipment
    • Harvesting tools (nets, graders)
    • Backup generators (critical for power outages)

    Production Timeline:

    Your fish farm won’t produce revenue on day one. Most tilapia operations need 90 to 120 days from stocking to first harvest, while catfish typically require 150 to 180 days. Map out your setup phase first: pond construction or tank installation, water system testing, and biosecurity protocols take anywhere from two to six months depending on scale. Your stocking schedule should account for market demand patterns. If local restaurants buy more fish during summer months, work backward from those peak periods to determine when fingerlings go into your system. Batch production works well for smaller operations, where you stock new fish every four to six weeks to create a continuous harvest cycle. Larger farms often use all-in, all-out systems that stock an entire pond at once, then harvest completely before restocking. Build buffer time into your production schedule for water quality issues, disease outbreaks, or slower than expected growth rates. A realistic timeline includes these setbacks rather than assuming perfect conditions.

    • Stocking schedule and feeding rates
    • Harvesting strategy
    • Contingency plans for losses (oxygen depletion, disease, predators)

    Risk Management Strategies

    Fish farming presents several risks, such as disease outbreaks, water quality challenges, and volatile market prices. Diseases like Infectious Pancreatic Necrosis (IPN) can devastate entire stocks, while inadequate water conditions may hinder growth or increase mortality rates. Market prices fluctuate significantly, driven by factors like consumer demand and competition. Implementing biosecurity measures and disease prevention techniques can help mitigate these risks, ensuring a more stable and productive operation.

    To mitigate these risks, implement a comprehensive biosecurity plan. Regularly monitor the health of your fish and enforce strict sanitation protocols to prevent disease outbreaks. Investing in high-quality water filtration systems is crucial for maintaining optimal water conditions, significantly reducing potential health issues. Diversifying your product offerings can also provide a buffer against market fluctuations. For instance, consider selling both live and processed fish to attract different consumer segments.

    • Develop a contingency plan for disease outbreaks, including vaccination protocols.
    • Regularly test water quality parameters and adjust feeding strategies accordingly.
    • Establish relationships with multiple suppliers to secure feed and supplies, reducing dependency on a single source.
    • Monitor market trends and adjust pricing strategies to maintain competitiveness.

    Financial Projections

    Startup costs for a fish farming operation can vary significantly based on scale and location. For a small to medium-sized farm, expect initial investments between $10,000 to $50,000. Here’s how that capital requirement typically breaks down: tanks or pond construction ($3,000 to $15,000), aeration and filtration systems ($2,000 to $8,000), fingerlings or juvenile fish ($1,000 to $3,000), and land leasing or purchase ($2,000 to $20,000 depending on your region). Operational costs run another $5,000 to $10,000 annually for feed, labor, and maintenance. Most new farmers piece together their startup capital from personal savings, agricultural loans through the USDA or local banks, and occasionally grants from state aquaculture programs. Understanding these funding sources early helps you match your initial investment breakdown to what lenders actually approve.

    Startup funding for your fish farm can come from personal savings, bank loans, or equity investors interested in aquaculture operations. Many operators also pursue government grants and subsidies designed to support sustainable farming practices. For example, the USDA offers specific aquaculture grant programs, while some states provide low-interest loans for commercial fish farming operations. Angel investors and agricultural venture capital firms have also become more active in the aquaculture space, particularly for farms using recirculating aquaculture systems or other innovative technologies.

    Projected revenue for fish farming depends heavily on species choice and market demand. Tilapia typically sells at competitive retail prices, and well-managed operations can achieve healthy profit margins. Actual prices and margins vary significantly by region, market conditions, and production costs. Careful forecasting will help you prepare for market fluctuations and ensure a more sustainable business model.

    Financial Management & Budgeting

    Your budget determines whether your fish farm survives its first year or joins the 60% that fail due to poor financial planning. Feed alone eats up 40-60% of your operating costs, which means a single miscalculation in feed pricing can wipe out your profit margin. I’ve seen farmers who nailed their production targets still go under because they didn’t account for seasonal price swings in fingerlings or underestimated electricity costs for aeration systems. Track every expense category separately: feed, fingerlings, labor, utilities, equipment maintenance, and water treatment. Build in a 15-20% buffer for the unexpected, because something always breaks at the worst possible time.

    Cost control strategies can make or break a fish farm. Regularly reviewing supplier contracts for better rates or exploring alternative feed options can trim expenses. Implementing energy-efficient practices not only reduces costs but also enhances sustainability. For example, using solar-powered aeration systems can cut energy costs significantly over time.

    Financial risks lurk around every corner, from fluctuating market prices to unexpected equipment failures. A robust risk management plan involves diversifying income streams and investing in insurance. Allocating 10% of your budget for emergencies can safeguard against unforeseen challenges, ensuring your farm remains resilient even during tough times.

    Financial Management

    Effective financial management in fish farming begins with precise budgeting. Start by assessing all initial expenses, such as setting up ponds, purchasing fingerlings, and feed costs. A well-structured budget should also anticipate ongoing operational costs and potential fluctuations in market prices. Consider allocating at least 10% of your budget for unforeseen expenses to avoid disruptions.

    Cost control is equally critical. Regularly review and optimize expenses without compromising quality. For instance, negotiate bulk purchase discounts with suppliers or explore local alternatives for fish feed to trim costs. Implementing a robust tracking system can help identify and eliminate unnecessary expenditures, ensuring profitability.

    • Diversifying fish species to mitigate price drops
    • Insuring operations against natural disasters
    • Setting aside a financial buffer for emergencies

    Financial risk management is about being prepared for uncertainties. Diversifying fish species can protect against market volatility, while insuring your farm can safeguard against unexpected events like floods or disease outbreaks. Finally, maintaining a financial buffer ensures you can weather short-term losses without jeopardizing the business.

    Technology and Innovation in Fish Farming

    Technology is reshaping fish farming in extraordinary ways. Automated feeding systems now deliver precise amounts of feed at optimal times, boosting growth and reducing waste. These systems rely on sensors that monitor fish behavior and environmental conditions, allowing farms to adjust feed delivery with remarkable accuracy. As a result, labor costs drop while efficiency skyrockets. Some operations can now feed thousands of fish with just a few clicks, illustrating the cutting-edge technology in aquaculture. Recent advancements include AI in aquaculture, which analyzes vast amounts of data to optimize feeding schedules and enhance fish health. Additionally, blockchain for traceability ensures that every fish can be tracked from hatchery to market, bolstering consumer trust. The influence of technology on fish farming is profound, driving innovations that make operations smarter and more sustainable.

    Water quality monitoring systems are another innovation making waves. These systems continuously track parameters like pH, temperature, and oxygen levels. Real-time data allows farmers to react quickly to any changes, preventing potential fish kills and ensuring a healthy environment for optimal growth. Such precision management not only safeguards fish stocks but also enhances overall productivity.

    • Automated feeding systems reduce manual labor and waste.
    • Sensors adjust feeding based on real-time data.
    • Water quality monitoring tracks pH, temperature, and oxygen.
    • Real-time alerts prevent environmental issues.

    Sustainability Practices

    Eco-friendly farming methods are crucial for achieving sustainability in fish farming. Integrated multi-trophic aquaculture (IMTA) enables farmers to grow various species together, creating a self-sustaining system. By recycling waste nutrients from fish, farmers can promote the growth of seaweeds and shellfish, fostering a balanced ecosystem that reduces environmental impact. Opting for eco-friendly feed options lessens reliance on wild fish stocks, which is a key aspect of sustainable aquaculture practices. Participating in certification processes can strengthen your commitment to these methods, attracting environmentally conscious consumers and expanding market access. This approach not only boosts productivity but also enhances water quality, benefiting both the business and the surrounding ecosystem.

    Obtaining certifications like the Aquaculture Stewardship Council (ASC) or GlobalGAP can enhance your credibility and marketability. These certifications require adherence to strict environmental standards and promote responsible practices. For instance, ASC-certified farms must demonstrate low environmental impact, efficient resource use, and social responsibility, which can appeal to environmentally conscious consumers and open doors to new markets.

    • Use of renewable energy sources like solar panels to power operations
    • Implementing water recycling systems to reduce waste
    • Conducting regular environmental impact assessments to ensure compliance with local regulations

    Sustainability practices protect natural resources and cut costs at the same time. Feed made from fish processing waste, spent brewery grains, or food industry by-products can reduce your feed bill by 15-30% compared to conventional formulations while keeping waste out of landfills. Investors increasingly screen for environmental practices before committing capital, so documenting your water recirculation systems, waste management protocols, and energy efficiency measures in your business plan strengthens your funding pitch. You can also highlight partnerships with local processors who supply by-products, turning their disposal problem into your cost advantage.

    4. Management & Staffing

    Outline your organizational structure and team:

    • Roles and responsibilities of key personnel
    • Staffing requirements and qualifications
    • Recruitment and training strategy

    Fish farming demands daily monitoring (365 days a year) and skilled personnel with knowledge of water chemistry and disease management.

    Marketing Strategy

    Branding and positioning are crucial to standing out in the fish farming market. Your brand should reflect quality, sustainability, and freshness, appealing to health-conscious consumers. A memorable logo, catchy tagline, and a consistent color scheme can create a strong identity. Position your business as a local, eco-friendly alternative to mass-produced seafood, emphasizing environmental responsibility.

    Online marketing tactics can significantly broaden your reach. Utilize social media platforms like Instagram and Facebook to showcase your farm, share stories about your fish, and engage with customers. Regular posts featuring high-quality images of your products can attract attention. Consider launching an email newsletter to keep customers informed about new products and promotions.

    • Attend local farmers’ markets to sell your fish directly and build relationships with customers.
    • Collaborate with local restaurants to feature your products on their menus, enhancing visibility.
    • Invest in SEO for your website to appear in search results when potential customers look for fresh fish.
    • Use Google Ads to target specific demographics interested in sustainable seafood.

    Marketing Strategy

    Effective marketing strategies are essential for attracting customers to your fish farming business. Begin by pinpointing your target market, which may include local restaurants, grocery stores, and even direct consumers. Use content marketing to showcase your fish by creating engaging blog posts or videos that highlight the benefits of your products. Offering samples is a powerful tactic; it not only allows potential buyers to experience the quality of your fish but can also pave the way for long-term contracts. Enhance your online presence with SEO tactics to improve your website’s visibility in search engines, making it easier for customers to find you. Additionally, maintain social media engagement by sharing updates on your farm, customer testimonials, and recipes that feature your fish, creating a community around your brand.

    Digital marketing can significantly expand your reach. Create a professional website showcasing your products, farming practices, and sustainability efforts. Use Search Engine Optimization (SEO) techniques to rank higher in search results. Content marketing, like blogs focused on the health benefits of your fish, can also engage potential customers.

    Social media platforms are invaluable for connecting with your audience. Share behind-the-scenes content, recipes, and customer testimonials on platforms like Instagram and Facebook. Regular updates can help build a community around your brand. Local outreach, such as participating in farmer’s markets and community events, can further establish your presence and foster loyalty.

    Business Model & Strategy

    Selecting the right business model for your fish farming venture is crucial for maximizing profitability. A direct-to-consumer approach can yield profit margins around 30%. By setting up a farm shop or participating in local markets, you foster personal connections with customers, which is vital for building loyalty. This strategy requires a detailed marketing plan that emphasizes digital tactics, particularly effective SEO and engaging content to enhance your online visibility. A proactive social media strategy can significantly contribute to brand growth and attract new customers. On the other hand, wholesale distribution to restaurants and grocery stores offers a more stable income stream, though profit margins tend to be lower, averaging about 15%. Each model comes with its own set of challenges, so it’s essential to assess your goals, available resources, and the competitive landscape. Partnering with local businesses can further boost customer engagement and help your operation stand out in a crowded market.

    Identify your revenue streams early. Beyond selling fish, think about additional services or products that can enhance your income. For instance, you might consider offering fish farming equipment, providing consultancy services, or even organizing guided tours of your farm. Each of these revenue streams can help stabilize your business in the face of market fluctuations.

    Scalability is another key factor. How will your farm adapt as demand grows? If you’re raising tilapia, for example, do you have the capacity to increase production without compromising quality? This might mean investing in larger tanks or more efficient feeding systems. Planning for scalability ensures you’re not caught off guard if your business takes off.

    5. Financial Plan

    Attracting investors and lenders relies on precise financial projections. This part of your business plan should clearly outline anticipated revenue streams, operating costs, and profit margins for the next three years. For example, if your market research indicates first-year revenue of $200,000, break this down by fish species and sales channels. Conducting a thorough break-even analysis will help you pinpoint when you’ll recoup your initial investment. Explore various funding options, such as aquaculture grants, potential loans, and private investments, and clearly state how much you intend to secure from each source. A detailed financial outlook not only builds your credibility but also strengthens relationships with investors, providing the essential backing for your fish farming enterprise. Financial forecasting goes beyond mere calculations; it establishes a solid foundation for sustainable growth.

    Estimating startup costs in fish farming requires a detailed breakdown to ensure financial success. Begin by considering capital expenditures—these might include expenses like land purchase, construction of ponds or tanks, and equipment acquisition. For instance, setting up a medium-sized fish farm might require $50,000 to $100,000 just for infrastructure. Next, account for operational costs such as feed, labor, and utilities, which could run between $20,000 to $40,000 annually. Accurate financial projections are crucial; they help in understanding when the business might break even or generate profit. By carefully outlining these costs, you create a realistic financial roadmap for your farm.

    Source: Based on estimates for mid-sized operations

    Key Financial Documents:

    • Income statements and balance sheets
    • Cash flow statements (critical since production cycles can be 1-2 years before first harvest)
    • Break-even analysis
    • Loan repayment schedules

    Production Costs by Species (Reference):

    • Catfish (ponds): $0.90–$1.30 per pound
    • Tilapia (ponds): $1.50–$3.00 per pound
    • Shrimp (ponds): $2.50–$3.00 per pound

    Financial Projections

    Creating detailed financial projections for your fish farming operation is critical. For the first three years, break down expected revenue, costs, and profit margins by species. For example, if you plan to farm tilapia, you might anticipate revenues around $2.50 per pound. Given that a well-managed tilapia farm can yield 10,000 pounds per acre annually, your total revenue could reach $25,000 per acre.

    Cost structures vary significantly by species. For instance, the initial investment for fingerlings, feed, and equipment can range from $10,000 to $15,000 for a small-scale operation. Operating costs, including feed and labor, can run approximately $1.50 per pound for tilapia. This results in a profit margin of roughly 40%, depending on market conditions.

    For other species, like catfish, the financial outlook can differ. Catfish may yield lower per-pound revenue, around $1.50, but they often have a quicker turnaround time. Understanding these variances helps in crafting a realistic and tailored business plan.

    Marketing & Sales Strategy

    Marketing is the engine of your fish farming business. Begin by pinpointing your target audience—local restaurants, grocery stores, or farmers’ markets. Each segment has unique needs. Restaurants often prioritize fresh, sustainably sourced fish, while grocery chains focus on bulk supply and consistent quality. Tailor your messaging to resonate with these groups. For local eateries, emphasize your sustainable practices and the freshness of your catch. Grocery stores will value your reliability in delivering high-quality fish consistently. Implement SEO strategies to enhance your online presence; focus on keywords like “sustainable fish” and “local seafood” to improve search rankings. Create compelling blog content about fish farming to engage your audience and foster brand loyalty. Use email marketing to keep customers informed about new stock, promotions, and recipes. Social media engagement is crucial; share mouthwatering recipes and tips for sustainable seafood. Invest in targeted ads on Instagram and Facebook to broaden your reach. Building partnerships with local chefs and participating in community events can significantly boost your market presence and credibility. Understanding customer segmentation allows for a more refined strategy, helping you connect effectively with each group.

    Digital marketing can significantly boost your visibility. Establish a strong online presence through an engaging website and active social media profiles. Consider running targeted ads on platforms like Facebook and Instagram, which can help you reach potential customers with precision. Regularly update your online followers with news about your farm, sustainability practices, or special promotions to keep them engaged.

    Don’t overlook the power of local partnerships. Collaborate with local businesses such as restaurants or health food stores. A local seafood restaurant, for example, might be interested in featuring your fish as a fresh, sustainable option. These partnerships can open up new sales channels and increase your brand’s credibility. It’s about building relationships that benefit both parties.

    Market Entry Strategies

    Entering the fish farming market requires a strategic approach. Begin by conducting thorough market research to identify local demand for various fish species. For example, tilapia and catfish are popular in many regions due to their fast growth and marketability. Determine the competition in your area and analyze their pricing structures, product offerings, and customer base.

    Barriers such as high initial investment and regulatory hurdles can pose challenges. For instance, securing permits for water use and waste management can be time-consuming and costly. To overcome these obstacles, consider starting on a smaller scale. This approach allows for manageable costs while you experiment with different species and farming techniques. Additionally, building relationships with local agricultural extension offices can help navigate the regulatory landscape.

    • Conduct market research to understand demand and competition.
    • Start small to minimize risks and costs.
    • Build relationships with local regulatory bodies for guidance.
    • Explore alternative financing options, such as grants or loans, to alleviate initial expenses.

    Funding & Investment Strategy

    Securing funding for your fish farming business requires a well-thought-out strategy. Start by identifying local government grants aimed at sustainable agriculture, which can offer substantial financial support. For example, states such as California and Florida provide grants between $5,000 and $50,000 specifically for aquaculture initiatives. Additionally, consider reaching out to angel investors who are passionate about aquaculture and sustainable food systems; establishing strong relationships with these individuals is vital. Crowdfunding platforms can also be a valuable resource, allowing you to showcase your business plan to a broader audience and attract small-scale investors. Attend industry conferences and networking events to present your ideas and connect with potential backers. Cultivating a diverse network can open doors to crucial funding opportunities necessary for launching and expanding your venture.

    Outline clear investment opportunities to attract potential investors. Highlight projected returns based on market research and provide detailed financial forecasts. Clearly communicate your unique selling proposition and how your business stands out in the fish farming sector. This could include innovative farming techniques or a niche market focus.

    • Research loan options from banks specializing in agricultural loans.
    • Consider microfinance institutions for smaller-scale funding.
    • Develop a repayment plan that aligns with your revenue projections.
    • Ensure that any loan terms are flexible enough to accommodate the growth phases of your business.

    6. Marketing & Sales Strategy

    • Define your sales channels: wholesale distributors, restaurants, direct-to-consumer, or farm stands
    • Pricing strategy based on market research
    • Brand positioning and promotion tactics

    Regulatory & Risk Management

    Starting a fish farming business requires careful attention to a variety of legal obligations. First, pinpoint the exact permits and licenses your local authorities require. Typically, you’ll need aquaculture permits, water use licenses, and health regulations certifications. These requirements can vary widely depending on your location. For instance, in California, you must obtain a permit from the California Department of Fish and Wildlife, while in Florida, the Florida Fish and Wildlife Conservation Commission oversees aquaculture regulations. Failing to secure even one essential document can lead to costly delays and compliance issues. Connect with local regulatory agencies early in the permitting process to clarify environmental regulations. They can provide vital insights into compliance intricacies and help you avoid common missteps, setting a solid foundation for your business.

    Environmental compliance is essential for sustainable fish farming. Your operation must meet local regulations regarding waste management, water quality standards, and biodiversity protection. For instance, the Clean Water Act in the U.S. specifies allowable discharges and mandates water treatment processes. Ignoring these requirements can result in significant fines and damage to your business’s reputation. Stay informed and proactive to ensure your farm operates within legal limits and contributes positively to the ecosystem.

    Developing a solid risk management plan is non-negotiable. Identify potential threats such as disease outbreaks, equipment failure, or market fluctuations. Mitigation strategies might include regular health screenings for fish, backup power systems, and securing insurance policies. A well-thought-out plan can mean the difference between weathering a storm and going under.

    7. Regulatory & Risk Management

    Permits Required:

    • Commercial aquaculture license (state-level)
    • Water use permits
    • Environmental permits for water discharge
    • Food processing/handling licenses

    Risk Management:

    • Disease outbreak protocols
    • Biosecurity measures
    • Equipment failure contingency plans
    • Market price fluctuation strategies

    Risk Assessment & Mitigation

    Fish farming can be fraught with challenges that threaten your operation’s viability. Effective disease management is non-negotiable; a sudden pathogen outbreak can wipe out your fish within days, leading to devastating financial losses. Market volatility compounds these issues—prices can swing wildly due to shifts in consumer demand or disruptions in global supply chains. Weather conditions also pose significant risks; for example, a sudden rise in water temperature can spell disaster for cold-water species like trout, resulting in severe mortality rates. To combat these risks, a comprehensive biosecurity plan is essential. Regular health checks can catch issues early, while temperature monitoring systems help you respond swiftly to environmental changes. Additionally, having insurance policies in place can provide a safety net against unexpected losses, ensuring your business remains resilient in the face of adversity.

    Mitigation strategies should be tailored to each risk. For disease control, consider implementing a strict biosecurity plan. Regular water quality assessments and maintaining optimal stocking densities can help minimize disease spread. To guard against market volatility, diversifying your product line might cushion against price drops.

    Insurance is another layer of protection. Policies might cover losses from natural disasters, equipment failure, or even disease outbreaks. While some insurers offer specialized aquaculture policies, always scrutinize the fine print to ensure comprehensive coverage. An annual review of your insurance needs, in line with changes in your operation, is a smart move.

    Environmental Impact & Sustainability

    Evaluate your fish farm’s environmental impact by conducting detailed environmental assessments. Start with a comprehensive site assessment to grasp the local ecosystem fully. This step is crucial to prevent disruptions to wildlife and water quality. For example, if your farm is adjacent to a river, routinely measure water flow and quality. Use this data to inform your waste management strategies and feed practices. Implement sustainable practices, such as using biodegradable feed and establishing buffer zones to protect nearby habitats. These actions not only minimize harm but also enhance the long-term viability of your operation.

    Adopt sustainable practices to minimize harm. Use recirculating aquaculture systems (RAS) to recycle water and reduce waste. Choose feed that’s sustainably sourced and designed to minimize pollution. Integrating polyculture—raising multiple species in tandem—can enhance efficiency. Tilapia and catfish, for example, can coexist by utilizing different levels of the water column.

    • Comply with local and national environmental regulations.
    • Secure necessary permits for water use and discharge.
    • Regularly report environmental data to relevant authorities.

    Sustainability Practices

    Sustainable practices in fish farming are vital for long-term success and environmental stewardship. One effective method is implementing integrated multi-trophic aquaculture (IMTA), where different species are farmed together. This approach allows waste from one species to provide nutrients for another, minimizing environmental impact. For example, raising fish alongside shellfish or seaweeds can create a balanced ecosystem that enhances productivity.

    Using recirculating aquaculture systems (RAS) can further improve sustainability. These systems recycle water, reducing consumption by up to 90% compared to traditional methods. This technology helps maintain water quality and minimizes waste discharge, making fish farming more environmentally friendly.

    1. Aquaculture Stewardship Council (ASC) certification
    2. GlobalGAP certification
    3. Marine Stewardship Council (MSC) eco-label
    4. Best Aquaculture Practices (BAP) certification

    Achieving certifications like ASC or GlobalGAP not only demonstrates commitment to sustainable practices but also enhances marketability. Eco-labels signal to consumers that your products meet high environmental and social standards, potentially commanding higher prices and increasing customer loyalty.

    Sustainability Practices in Fish Farming

    Sustainability in fish farming isn’t just a trend; it’s a necessity. Implementing practices such as integrated multi-trophic aquaculture (IMTA) can significantly enhance ecological balance. By cultivating multiple species together—like fish, shellfish, and aquatic plants—farmers can utilize waste from one species as nutrients for another. This symbiotic approach minimizes waste and maximizes productivity.

    Eco-friendly feed is another critical component. Traditional fish feed often relies on wild-caught fish, which places immense pressure on marine ecosystems. Opting for feeds made from plant-based proteins, insect meals, or by-products from agriculture can reduce the environmental footprint. For example, using insect protein can cut feed conversion ratios by up to 30%, translating into less waste and more efficient growth.

    1. Implementing closed-loop systems to recycle water and nutrients
    2. Regularly monitoring water quality to prevent pollution
    3. Using renewable energy sources to power operations
    4. Educating staff on sustainable practices and their importance

    Waste management strategies are equally crucial. Effective systems should include composting fish waste and using it as fertilizer for crops. This not only reduces the environmental impact but also creates additional revenue streams. By adopting these sustainable practices, fish farmers not only ensure regulatory compliance but also enhance their marketability to eco-conscious consumers.

    Useful Tools & Resources

    • Financial model templates: Customizable Excel models for pond, raceway, and oyster production help analyze profitability and cash flow
    • Budget calculators: Available from extension services like Alabama Cooperative Extension
    • Species-specific guides: Southern Regional Aquaculture Center (SRAC) provides detailed fact sheets

    Species-Specific Farming Techniques

    Tilapia and catfish each demand specific farming techniques that cater to their unique behaviors and habitat preferences. Tilapia flourish in warm, freshwater settings, requiring water temperatures between 25-30°C to optimize their breeding cycles. To promote rapid growth, farmers often use floating feed pellets that are high in protein. Harvesting typically occurs when tilapia reach weights of 500-600 grams, which usually takes about 6-7 months. Understanding these detailed farming techniques and growth conditions is crucial for successful tilapia production.

    Catfish, on the other hand, are often raised in pond systems. These ponds should have a depth of 1.5 to 2 meters to support their bottom-dwelling nature. For breeding, catfish prefer secluded environments, so providing artificial spawning areas can increase yield. Feeding involves a mix of natural feed like small fish and formulated feed to achieve a balanced diet. Optimal harvesting size is around 1 to 1.5 kg, reached at 18-24 months, depending on conditions.

    • Tilapia: Warm water, protein-rich floating pellets, harvest at 500-600g.
    • Catfish: Pond systems, artificial spawning areas, harvest at 1-1.5kg.

    Funding Sources and Financial Assistance

    Securing funding for your fish farming venture is critical. Various options exist that cater specifically to aquaculture. For instance, the U.S. Department of Agriculture (USDA) offers loans and grants designed for farmers, including those in the fish farming industry. Programs like the Rural Development loan program can provide low-interest loans for operational costs and infrastructure.

    State agricultural departments often have grants available for innovative practices in fish farming. For example, the National Oceanic and Atmospheric Administration (NOAA) provides funding for projects that promote sustainable aquaculture. These grants can cover research, development, and implementation costs.

    1. USDA loans and grants
    2. NOAA funding for sustainable projects
    3. Local agricultural development programs
    4. Private investment from venture capitalists interested in aquaculture

    Networking with local aquaculture associations can also lead to investment opportunities. Investors are increasingly looking for sustainable practices in fish farming, and demonstrating a solid business plan can attract their attention. Engaging with local investment groups or crowdfunding platforms can also yield additional financial support.

    Funding Sources

    Securing funding is a critical step in establishing a successful fish farming operation. Various options exist, each with its own advantages and requirements. Traditional bank loans offer structured repayment plans, but often require collateral and a solid business plan. On the other hand, government grants can provide non-repayable funds, especially those aimed at sustainable aquaculture practices, such as the USDA’s Specialty Crop Block Grant Program.

    Private investors, including venture capitalists and angel investors, may also be interested in funding innovative aquaculture projects. They often bring not just capital, but also valuable industry connections. Networking through aquaculture conferences or local business incubators can lead to potential partnerships.

    • USDA grants for sustainable farming
    • Small Business Administration (SBA) loans
    • Aquaculture-specific funding programs
    • Private equity and angel investments

    Crowdfunding platforms like Kickstarter or GoFundMe have gained traction in recent years. These can be effective for raising smaller amounts of capital while simultaneously building a customer base. Consider launching a campaign that highlights your unique approach to fish farming, whether it’s organic practices or innovative fish feed solutions.

    Business Plan Template

    Creating a solid business plan can feel overwhelming, but a template simplifies the process. To help you get started, we’ve provided a downloadable fish farming business plan template. This template outlines essential sections that need to be filled out.

    • Executive Summary: A snapshot of your business, goals, and strategies.
    • Market Analysis: Research on your target market and competition.
    • Operational Plan: Details on daily operations, location, and facilities.
    • Financial Projections: Revenue forecasts, funding requirements, and break-even analysis.
    • Marketing Strategy: How you plan to attract and retain customers.

    Each section requires specific details that reflect your unique business model. For example, in the Financial Projections section, include realistic numbers based on your research. This template serves as a guiding framework, helping you articulate your vision and strategy clearly.

    Business Model Overview

    Fish farming can be approached through various business models, each catering to different market demands and operational capacities. For instance, extensive systems rely on natural water bodies, utilizing low-density stocking rates and minimal feeding. This model suits those focusing on sustainability, as it requires less input but offers lower yields. Conversely, intensive systems maximize space and resources, often employing advanced technologies and high-density stocking to achieve significant production volumes. These operations can yield thousands of pounds of fish per acre but come with increased risks and higher management costs.

    Another viable model is the semi-intensive approach, which strikes a balance between extensive and intensive systems. It typically involves moderate stocking densities and supplemental feeding, offering a middle ground in terms of investment and output. The choice of model not only influences profitability but also impacts sustainability. An environmentally friendly model can enhance market appeal, particularly among consumers increasingly concerned about ethical sourcing. Thus, selecting the right business model is crucial for long-term success and ecological responsibility.

    • Extensive systems: Low-density, natural feeding, sustainable but lower yields.
    • Intensive systems: High-density, maximized production, higher costs and risks.
    • Semi-intensive systems: Balanced approach, moderate yields, manageable costs.

    Financial Projections

    Financial projections form the backbone of any fish farming business plan. For a small-scale operation, say a 1,000-square-foot pond, initial investments might include $10,000 for setup, with projected yearly revenue of about $25,000 from selling tilapia. Contrast that with a medium-scale farm of 10,000 square feet, where setup costs could rise to $50,000, but revenues may reach $200,000 annually, thanks to increased production and economies of scale.

    Realistic financial planning is crucial. Overly optimistic projections can lead to cash flow shortages, hampering growth. Factor in all expenses such as feed, labor, and equipment maintenance. For instance, if feed costs account for 30% of your total expenses, accurately estimating these figures ensures you aren’t blindsided later. A detailed financial forecast not only aids in securing loans but also sets a clear roadmap for profitability.

    • Include startup costs: equipment, land, licenses
    • Estimate ongoing operational costs: feed, labor, utilities
    • Project income based on market prices and production rates
    • Analyze break-even point to understand when profits begin

    Sustainability Practices

    Implementing sustainable practices in fish farming is not just an ethical choice; it’s a strategic business move. Techniques such as integrated multi-trophic aquaculture (IMTA) allow farmers to cultivate multiple species in a symbiotic environment. For instance, pairing fish with shellfish and seaweeds can enhance water quality and reduce feed costs. Additionally, using recirculating aquaculture systems (RAS) minimizes water usage and lowers environmental impact.

    Consumers today are increasingly aware of environmental issues and often choose products based on sustainability credentials. A 2021 report revealed that 66% of global consumers are willing to pay more for sustainable brands. This trend highlights the importance of transparent practices—such as sourcing feed responsibly and adhering to ethical farming standards. By showcasing these efforts in marketing materials, fish farms can attract a broader customer base and foster brand loyalty.

    1. Utilize environmentally friendly feed alternatives.
    2. Implement water recycling systems to conserve resources.
    3. Regularly monitor and improve habitat quality.
    4. Certify your farm with recognized sustainability standards.

    Funding Sources

    Funding your fish farming venture requires a strategic approach. Grants from government programs or agricultural organizations can provide crucial startup capital without the need for repayment. For instance, the USDA offers various grants aimed at aquaculture projects, which can cover expenses like equipment and initial operating costs.

    Loans are another viable option. Traditional banks or credit unions often have specific programs for agricultural businesses. A well-prepared business plan can significantly improve your chances of securing a loan. Look into the Small Business Administration (SBA) for guaranteed loan options with favorable terms.

    Private investors can also be a source of funding. Approach individuals or groups interested in aquaculture, offering them equity in exchange for their investment. This route not only provides funding but may also bring valuable expertise to your business.

    • Government grants from entities like the USDA
    • Traditional loans from banks or credit unions
    • SBA-backed loans for favorable terms
    • Private investors seeking equity opportunities

    Sustainability Practices

    Incorporating sustainable practices into your fish farming business is not just a trend; it’s a necessity for long-term viability. Techniques such as integrated multi-trophic aquaculture (IMTA) allow for the cultivation of different species that complement each other. For example, growing shellfish alongside fish can help filter waste and improve water quality, creating a more balanced ecosystem.

    Choosing eco-friendly species can significantly impact sustainability. Opt for fish like tilapia or catfish, which require lower feed conversion ratios and are less demanding on resources. Additionally, utilizing aquaponics combines fish farming with vegetable cultivation, maximizing space and resource efficiency.

    • Implement water recycling systems to minimize waste.
    • Use organic feeds whenever possible to reduce chemical runoff.
    • Explore renewable energy sources, such as solar panels, to power operations.

    Common Challenges

    Fish farming is not without its hurdles. One major challenge is disease management. Fish are susceptible to various pathogens, which can decimate stocks if not addressed promptly. Regular health checks and maintaining optimal water quality can significantly reduce outbreaks.

    Another common issue is fluctuating market prices. Fish prices can vary dramatically based on demand, season, and even local competition. To mitigate this risk, consider establishing contracts with local restaurants or markets. This ensures a steady income regardless of market volatility.

    • Implement biosecurity measures to prevent disease spread.
    • Develop relationships with reliable buyers to secure stable prices.
    • Invest in training to improve farming techniques and fish health management.

    Water quality management also poses challenges. High ammonia or low oxygen levels can stress fish, leading to poor growth rates. Regular testing and using aeration systems can help maintain a healthy environment.

    Startup Costs and Financial Projections

    Starting a fish farming operation necessitates a clear understanding of the initial investment required. This can range dramatically based on the scale of the operation. For a small-scale fish farm, expect to invest anywhere from $10,000 to $50,000. This includes costs for land, water rights, and basic infrastructure like tanks or ponds. Larger operations could see initial costs soar to $200,000 or more, especially if you’re incorporating advanced technology for water quality management or breeding.

    • Land acquisition or lease fees
    • Construction of fish tanks or ponds
    • Water quality testing and management systems
    • Purchase of juvenile fish or eggs
    • Feed and nutrition supplies
    • Labor costs for farm management and harvesting
    • Insurance and permits for operation

    Ongoing operational costs are another crucial factor in your business plan. These typically include feed, which can account for 40-60% of your total variable costs. Labor costs will vary based on the size of your operation and the number of employees needed. Regular maintenance of equipment and facilities also adds up. You should budget for water treatment and testing, along with any veterinary care for the fish. A detailed understanding of these costs will help you project your cash flow and profitability accurately.

    Sustainability Practices

    Incorporating eco-friendly practices is vital for a successful fish farming operation. Techniques such as integrated multi-trophic aquaculture (IMTA) can enhance sustainability. This method involves cultivating different species that complement each other, allowing for natural waste recycling and minimizing environmental impact. For example, farmed fish can be raised alongside seaweed and shellfish, creating a balanced ecosystem.

    Certifications like the Marine Stewardship Council (MSC) and the Aquaculture Stewardship Council (ASC) can significantly enhance your marketability. These standards signal to consumers that your fish farming practices meet high environmental and social criteria. A recent study found that certified seafood can command prices up to 20% higher than non-certified products, making it a smart investment for your business.

    • Utilizing renewable energy sources, such as solar panels, to power operations.
    • Implementing water recycling systems to conserve resources.
    • Reducing antibiotic use through better fish health management and biosecurity measures.

    Risk Management Strategies

    Fish farming presents various risks that can impact profitability and sustainability. Disease outbreaks, water quality fluctuations, and market volatility are just a few examples. For instance, a sudden drop in water temperature can lead to stress among fish, making them more susceptible to diseases like columnaris or ich. Similarly, feed prices can fluctuate dramatically, affecting your bottom line.

    • Implement biosecurity measures to prevent disease outbreaks, such as regular health checks and quarantine protocols for new stock.
    • Invest in water quality monitoring systems to track parameters like pH, oxygen levels, and ammonia concentrations.
    • Diversify your fish species to spread risk; for example, raising both tilapia and catfish can provide a buffer against market shifts.

    Market research is also essential. Understanding demand trends can help you decide which species to farm. For example, if demand for a particular fish species is declining, focusing on alternatives like shrimp or trout might be wise. By staying informed about market conditions, you can adjust your production strategies accordingly.

    Startup Costs and Financial Considerations

    Starting a fish farming business requires a significant initial investment. You’ll need to account for land acquisition, which can range from $1,000 to $10,000 per acre, depending on location. Infrastructure costs, including tanks, aeration systems, and water filtration, can add another $20,000 to $50,000. Don’t overlook the cost of fingerlings, which can be between $0.10 to $2 per fish, and feed, often the largest ongoing expense. A good rule of thumb is to budget around $2,000 to $5,000 for the first batch of fish.

    After the initial setup, ongoing operational costs will include feed, labor, maintenance, and utilities. Feed costs can consume up to 50% of your total budget. To manage these expenses effectively, consider bulk purchasing and forming partnerships with local suppliers. Regular monitoring of water quality and fish health can prevent costly diseases and ensure optimal growth rates, ultimately safeguarding your investment. Utilize technology, such as automated feeders and monitoring systems, to streamline operations and reduce labor costs.

    Sustainability Practices in Fish Farming

    Sustainable practices are crucial in aquaculture, not just for environmental health but also for business viability. Adopting eco-friendly methods can boost your farm’s reputation and appeal to a growing demographic of conscientious consumers. For instance, integrated multi-trophic aquaculture (IMTA) combines different species to create a balanced ecosystem. This method utilizes waste from one species as feed for another, reducing feed costs and minimizing environmental impact.

    Another effective technique is the use of recirculating aquaculture systems (RAS). These systems conserve water by recycling it and filtering out waste, which can decrease water consumption by up to 90%. This approach not only mitigates the strain on local water resources but also allows for year-round production in controlled environments.

    • Utilizing renewable energy sources like solar or wind to power operations.
    • Employing natural feed alternatives, such as insect meal, to reduce reliance on fishmeal.
    • Implementing stringent biosecurity measures to minimize disease spread and chemical use.

    Market Entry Strategies

    Entering the fish farming market requires a strategic approach to ensure sustainability and profitability. Start by identifying local demand; research which fish species are popular in your area. For instance, tilapia and catfish have strong consumer bases in many regions. Tailoring your production to meet these preferences can boost initial sales.

    Forming partnerships can significantly enhance your market entry strategy. Collaborating with local restaurants and grocery stores can create a direct distribution channel for your fish. Consider establishing agreements that allow these businesses to feature your products prominently, potentially even offering them exclusive supply rights.

    • Attend local farmers’ markets to showcase your fish and connect with consumers directly.
    • Utilize social media to create buzz around your brand and attract customers.
    • Engage with local fishery associations for networking and support.

    Distribution channels are critical. Direct-to-consumer sales can provide higher margins, while wholesaling to local markets can lead to volume sales. Assess the logistics involved in both options; ensure you have a reliable method for transporting live fish or processed products. Streamlined logistics can make or break your market entry.

    Financial Projections

    Financial projections are the backbone of your fish farming business plan. Start by outlining expected revenue based on your production capacity. For example, if you plan to raise 10,000 fish at an average market price of $5 each, your gross revenue could be projected at $50,000. However, expenses will also climb; feed, utilities, and labor could total around $30,000 annually, depending on your operational scale.

    A break-even analysis is essential. Calculate the point at which your income matches your expenses. If your total fixed costs are $20,000 and your contribution margin per fish sold is $3, you would need to sell approximately 6,667 fish just to cover costs.

    Consider your funding sources. Many fish farmers turn to local banks for loans, while others may seek grants from agricultural agencies or partnerships with investors interested in aquaculture. Crowdfunding platforms can also provide a unique opportunity to tap into community support while raising capital.

    Sustainability Practices

    Eco-friendly farming methods are critical for a successful fish farming business. Techniques such as integrated multi-trophic aquaculture (IMTA) allow for the cultivation of multiple species that can benefit from each other, reducing waste and improving overall farm health. For example, combining fish farming with seaweed cultivation can help absorb excess nutrients, leading to a more balanced ecosystem.

    Certifications such as the Marine Stewardship Council (MSC) and the Aquaculture Stewardship Council (ASC) can greatly enhance your marketability. These labels signal to consumers that your practices meet rigorous sustainability standards. Achieving such certifications can also open doors to premium markets, where consumers are willing to pay more for ethically sourced products.

    Sustainability is no longer just a buzzword; it’s a decisive factor in consumer choices. A Nielsen study showed that 66% of global consumers are willing to pay more for sustainable brands. This trend is particularly strong among younger generations, who prioritize environmental impact. Integrating sustainable practices into your business model not only meets market demand but also builds a positive brand image.

    Funding Sources

    Funding your fish farming venture requires a strategic approach. Start by exploring grants specifically aimed at aquaculture projects. Organizations such as the USDA offer programs that can cover a significant portion of your startup costs, often up to 50%. These grants are highly competitive but can provide non-repayable funds, reducing your financial burden.

    Loans are another viable option. Traditional banks and credit unions may offer agricultural loans tailored for fish farming. Interest rates can vary, but you might find loans with rates as low as 3% for well-prepared business plans. Additionally, the Small Business Administration (SBA) provides loan guarantees that can help you secure funding with favorable terms.

    Private investment can also play a crucial role in your financing strategy. Angel investors and venture capitalists are increasingly interested in sustainable aquaculture due to its growth potential. Presenting a solid business plan that outlines projected returns can attract the right investors, allowing you to scale your operations more quickly.

    • Grants from organizations like the USDA
    • Agricultural loans from banks and credit unions
    • SBA loan guarantees
    • Private investments from angel investors and venture capitalists

    Market Research Techniques

    Identifying your target market is critical for a successful fish farming venture. Start with surveys and interviews. Reach out to local fish markets, restaurants, and consumers to gather insights on preferences. Online questionnaires can yield valuable data quickly. Tools like Google Forms or SurveyMonkey can help streamline this process.

    Utilizing secondary research is another effective method. Websites like Statista and the USDA provide statistics on fish consumption trends, pricing, and market demand. These resources can give you a clearer picture of your competition and potential pricing strategies.

    • Social media platforms for consumer insights
    • Google Trends for tracking interest over time
    • Industry reports from organizations like the Food and Agriculture Organization (FAO)

    Networking with industry professionals through forums or local aquaculture associations can also provide firsthand market knowledge. Events and trade shows are excellent opportunities to gather real-time feedback and understand market dynamics.

    Financial Projections

    Financial projections are a critical component of any fish farming business plan. Start by outlining your expected revenue streams, which may include the sale of live fish, processed fish products, and by-products like fish feed or manure. For instance, if you plan to sell tilapia, the average price per kilogram can range from $2 to $4, depending on your market. If you project selling 10,000 kilograms in your first year, that’s a potential revenue of $20,000 to $40,000.

    Operating costs will significantly impact your bottom line. Estimate expenses such as feed, equipment, labor, and utilities. For example, feed costs can account for 40% to 60% of your total operational expenses. Conducting a break-even analysis will help you determine how many fish you need to sell to cover these costs. If your total fixed costs are $30,000 and the contribution margin per kilogram of fish sold is $3, you’ll need to sell 10,000 kilograms to break even.

    Funding options also require careful consideration. You might explore bank loans, grants specifically for aquaculture, or even crowdfunding. Each option has its pros and cons, so assess which aligns best with your financial strategy and risk tolerance.

    Market Analysis

    Understanding your competition is critical in fish farming. Identify local farms, their production capacity, and their product offerings. For instance, if a nearby farm specializes in organic tilapia, you might consider focusing on a different species or a unique selling proposition, such as superior quality or sustainability practices. Analyze their pricing structures as well; if they sell tilapia at $4.00 per pound, assess whether you can compete or if you should target a premium market.

    Market segmentation is equally vital. Categorize potential customers into specific groups, such as restaurants, grocery stores, and direct consumers. Each segment has distinct needs. Restaurants may prioritize freshness and sustainability, while grocery stores might focus on price and volume. Target demographics can include health-conscious consumers seeking omega-3-rich fish or families looking for affordable protein sources. Tailoring your marketing strategy to these demographics can significantly enhance your outreach and sales.

    Business Model

    Fish farming can take several business model forms, each with unique attributes and challenges. One common approach is direct-to-consumer sales, where farmers sell their fish directly at farmers’ markets, through community-supported agriculture (CSA) programs, or via online platforms. This model allows for higher profit margins, as it eliminates middlemen. For instance, selling a pound of fresh trout directly might yield $8, while the wholesale price could be only $4.

    On the other hand, wholesale distribution offers a more stable income stream but often at lower prices. Selling to restaurants or grocery stores can secure bulk contracts, providing predictable revenue. However, it requires consistency in supply and quality. For example, if you establish a contract with a local grocery chain, you might need to ensure a steady supply of fish year-round.

    • Direct-to-consumer: Higher profit margins, more control over branding.
    • Direct-to-consumer: Requires more marketing effort and customer engagement.
    • Wholesale: Stable income through bulk contracts.
    • Wholesale: Lower profit margins and dependence on middlemen.
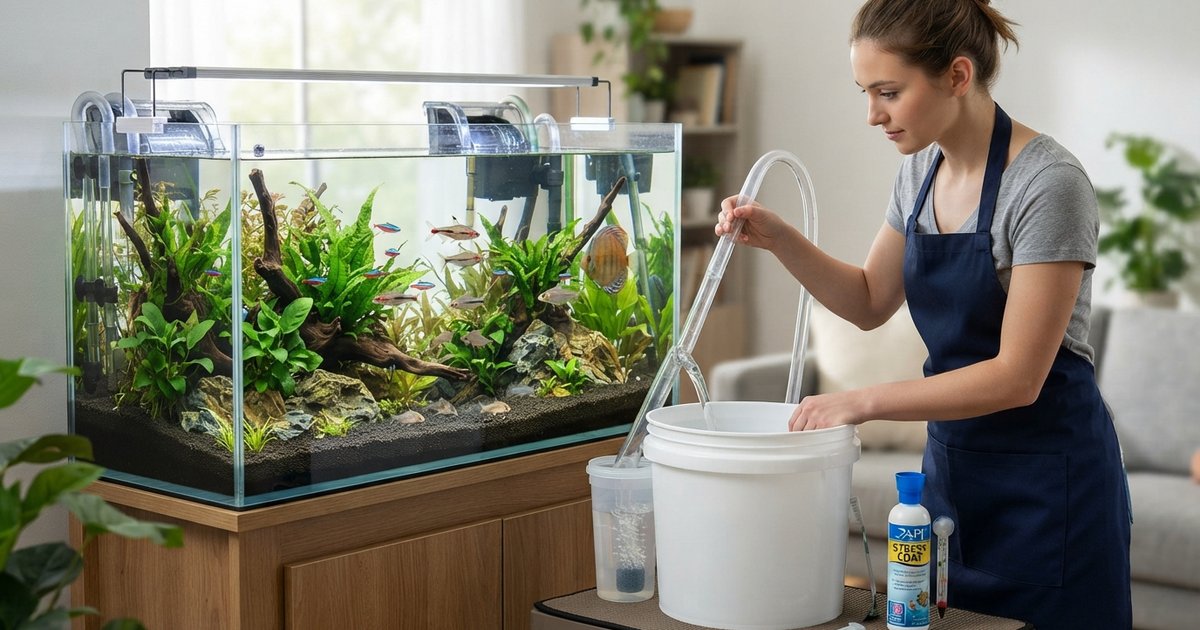
  • Essential Fish Farming Equipment: A Complete Guide for Your Aquaculture Business

    Your aquaculture operation depends on four core categories of equipment: water quality management, aeration, feeding systems, and monitoring tools. This guide walks through the specific equipments needed for fish farming, from the materials that keep your water parameters stable to the automated systems that reduce labor costs by 40% or more. Water management systems control ammonia and nitrite buildup, the two compounds that kill more farmed fish than disease. Aeration equipment maintains dissolved oxygen above the critical 5 mg/L threshold. Drop below that level and you’ll watch your stock gasp at the surface before they start dying. Quality feed dispensers deliver precise portions at scheduled intervals, eliminating the guesswork that leads to wasted feed or stunted growth. Get these core systems right from the start, and you’ll spend your time scaling production instead of fighting daily crises.

    Starting a fish farm requires careful planning around the core equipment categories: water management systems, feeding technology, monitoring devices, and biological filtration. Your complete list of fish farming equipment will depend on your operation’s scale and production method. Recirculating aquaculture systems (RAS) cut water usage by up to 90% compared to flow-through setups, which directly impacts your monthly utility bills and regulatory compliance. Automatic feeders handle precise portion control at set intervals, reducing feed waste that typically accounts for 50-60% of operating costs in commercial operations. Water quality monitors track dissolved oxygen, pH, ammonia levels, and temperature continuously, catching problems before they kill stock. Biofilters convert toxic ammonia from fish waste into nitrites and then nitrates through bacterial colonies. The materials needed for a backyard tilapia setup might include just a basic aerator, thermometer, and manual feeder, while a commercial salmon facility runs sophisticated sensor networks tied to automated response systems. Integrated multi-trophic aquaculture (IMTA) systems add another layer by cycling nutrients between species like fish, shellfish, and seaweed to boost overall productivity per gallon of water.

    Why Quality Equipment Matters in Fish Farming

    The equipment you choose directly impacts your bottom line, often determining whether your operation runs at 15% margins or struggles to break even. Take aeration systems: maintaining dissolved oxygen at 5 mg/L prevents the chronic stress that can slow tilapia growth rates by 30% or more, turning a profitable harvest into months of wasted feed costs. I’ve seen farms cut feed waste by 20% after switching to automatic feeders with programmable portion control, because manual feeding almost always means overfeeding during morning rounds and underfeeding when you’re busy with other tasks. Your nets matter more than most beginners realize. Knotless nylon nets cost twice as much as knotted alternatives, but they prevent the scale damage and stress injuries that downgrade your fish from premium to standard pricing at market. Quality fiberglass tanks represent a significant upfront investment, but they eliminate the temperature swings and pH crashes common in cheaper alternatives, reducing medication costs and mortality losses. The real question isn’t whether to buy proper equipment, but whether you can afford the operational costs of running a farm without it.

    • Maintain water quality
    • Prevent disease outbreaks
    • Reduce labor costs
    • Increase fish survival rates
    • Maximize production efficiency

    1. Water Management Systems

    Beginner’s Guide to Essential Fish Farming Equipment

    **Essential Materials Needed for a Fish Farm: Your Starter Checklist**

    Setting up a small-scale fish farm requires three core pieces of basic equipment: tanks or ponds, an aeration system, and a water quality test kit. Polyethylene tanks are durable and resist UV damage, making them a reliable choice for beginners. Your aeration setup can start with an affordable aquarium pump connected to air stones, or you can upgrade to venturi diffusers that create finer bubbles and better oxygen transfer. Test your water parameters at least twice weekly using kits that measure pH, ammonia, and nitrite levels. Water test kits are affordable and typically include reagents for multiple tests. Skip the fancy digital meters at first. They’re expensive and the chemical test kits give you accurate enough readings to keep your fish alive.

    Cost determines what most beginners can actually launch. Local classifieds and online marketplaces stock used tanks and pumps at roughly half the price of new equipment. DIY bio-filters built from plastic barrels and PVC piping can offer significant cost savings compared to commercial units. Start with the essentials: a reliable tank, adequate aeration, and basic filtration. Automated systems and monitoring equipment can wait until your operation generates revenue. Careful planning around used equipment and homemade filtration systems keeps your initial investment modest while you learn the fundamentals.

    Most fish farmers hit their first major bottleneck around 5,000 to 10,000 pounds of annual production, when manual feeding becomes unsustainable. At this threshold, automated feeding systems pay for themselves within 18 months through labor savings alone. Your expansion path should follow your filtration capacity: if you’re running individual biofilters on each tank, switching to a centralized recirculating system lets you double stocking density without doubling your floor space. Plan your commercial fish farming equipment purchases in stages. Add remote monitoring sensors to track dissolved oxygen and temperature before you scale up, not after you’ve already expanded. I’ve seen too many operations lose entire tanks during expansion because they added fish faster than their monitoring capacity. When scaling operations from hobby to commercial level, budget 30% more than your equipment costs for the electrical upgrades and plumbing modifications you’ll need. Each doubling of production requires rethinking your backup systems, especially aeration and power redundancy.

    Pumps

    Water pumps are a cornerstone of any fish farming operation, pivotal for regulating water levels, ensuring proper circulation through filtration systems, and draining ponds during harvest. Among the latest water pump technology, submersible pumps like the Grundfos SP series excel in deep water applications, effectively moving large volumes while consuming minimal energy. In contrast, centrifugal pumps such as the Gorman-Rupp T3A3 are well-suited for surface water circulation and filtration tasks. Selecting the right pump model hinges on your specific requirements, including the scale of your operation and the intended use of each pump type.

    • Centrifugal pumps: Set horizontally around the pond’s outer edge
    • Turbine pumps: Installed vertically for deeper water applications

    Choosing the right pump is crucial for your aquaculture setup and hinges on your pond’s size and specific needs. For smaller ponds, a submersible pump often suffices, while larger operations usually require a more powerful surface pump. During hot months, evaporation can rapidly drop water levels, making a reliable pump a necessity. Assess how much water you need to circulate and the frequency of circulation. For budgeting, consider the long-term savings: investing in a high-quality pump may involve a higher initial cost, but it can reduce maintenance expenses and help maintain optimal water conditions for your fish. Conduct a cost-benefit analysis to compare the upfront investment with potential savings on repairs and replacements over time.

    Filtration Systems

    Clean water is crucial for healthy fish, and filtration systems are at the heart of this process. These systems fall into three categories: mechanical, biological, and chemical filters. Mechanical filters, like screens or meshes, trap debris and uneaten feed. Biological filters use beneficial bacteria to transform harmful ammonia into safer compounds. Chemical filters employ activated carbon or other media to neutralize pollutants and eliminate harmful chemicals. Advanced filtration systems and innovative aquaculture filters are making waves, offering enhanced efficiency and precision. Each type is essential for maintaining a balanced and clean aquatic environment.

    • Mechanical filters: Remove solid particles like fish waste and uneaten food
    • Biological filters: House beneficial bacteria that break down harmful ammonia and nitrites 
    • UV sterilizers: Eliminate pathogens and harmful microorganisms 

    Recirculating Aquaculture Systems (RAS)

    For intensive farming operations, RAS systems recycle water through mechanical and biological filters, reducing water consumption by up to 90% compared to traditional systems. These systems are particularly valuable in areas with limited water resources.

    2. Aeration and Oxygenation Equipment

    Fish thrive on oxygen, yet natural levels often fall short in densely stocked farming systems. Aeration equipment comparison is crucial for choosing the best aeration systems to maintain sufficient dissolved oxygen. Paddlewheel aerators, for instance, excel in shallow ponds, boosting oxygen through surface agitation. In contrast, diffused aeration systems, which release bubbles through submerged tubes, are ideal for deeper waters. With these tools, you can stock more fish and achieve faster growth rates.

    Efficient aeration equipment is vital for maintaining optimal oxygen levels in your aquaculture setup. Paddlewheel aerators are a popular choice, especially in larger ponds, due to their ability to move substantial volumes of water, thus enhancing oxygen transfer rates. For deeper water bodies, diffused air systems offer an effective solution by releasing air bubbles at the pond’s bottom, ensuring even distribution of oxygen throughout. Choosing the right aeration system can significantly impact fish growth and health, making it a crucial component of your aquaculture business strategy.

    • Paddle wheel aerators: Create surface agitation to increase oxygen transfer
    • Diffused air systems: Release fine bubbles for efficient oxygenation
    • Surface agitators: Mix water to distribute oxygen evenly
    • Venturi injectors: Add oxygen directly into water lines

    Proper aeration also helps recycle water by removing impurities and improving overall water quality.

    3. Automatic Feeding Systems

    Feeding is a major cost in fish farming, and using the right equipment can make a big difference. Programmable feeders, for instance, allow you to set precise feeding schedules, ensuring your fish get the right amount of food at the right times. This not only cuts down on waste but also supports steady growth. Solar-powered feeders offer another advantage, especially in remote areas. They reduce reliance on electricity, lowering operational costs and boosting sustainability. Both types of feeders save labor by automating the process, freeing up time for other tasks.

    Benefits of Automatic Feeders:

    • Dispense precise amounts at scheduled intervals
    • Reduce feed waste and pollution
    • Save time compared to manual feeding
    • Promote uniform fish growth

    Modern automated feeders can be programmed to adjust feeding rates based on fish behavior and appetite, maximizing feed conversion ratios. However, ensure your water is properly filtered before using automatic feeders, as overfeeding in saturated water can harm fish.

    4. Monitoring and Testing Equipment

    Regularly monitoring water conditions is crucial for maintaining a healthy aquaculture environment. Key equipment includes dissolved oxygen sensors, which are vital for ensuring fish have enough oxygen to thrive. Temperature probes help maintain stable water temperatures, crucial for species-specific growth and health. pH meters are essential for keeping the water’s acidity levels in check, as even slight imbalances can stress fish and affect their development. These tools are not just gadgets; they are the backbone of effective water management, each playing a critical role in sustaining a productive fish farming operation.

    • pH meters: Measure water acidity or alkalinity
    • Dissolved oxygen meters: Track oxygen levels
    • Ammonia testers: Monitor toxic waste levels
    • Temperature sensors: Ensure optimal temperature for your fish species

    Smart Monitoring Systems

    Modern fish farms increasingly rely on IoT-based monitoring systems that provide real-time data and alerts. These systems can:

    • Track multiple water parameters continuously
    • Send alerts when conditions deviate from optimal ranges
    • Allow remote monitoring via smartphone apps
    • Store data for trend analysis

    5. Harvesting and Handling Equipment

    When it’s time to harvest your fish, efficient equipment minimizes stress and maintains product quality.

    Seine Reels

    Seine reels are essential for collecting fish from ponds during harvest. The seine net is thrown into the water where it sinks to the bottom. A tractor on the shore pulls the net, gathering fish inside. The fish are then transferred for sorting.

    Nets and Grading Equipment

    • Handling nets: Catch and transfer fish without injury
    • Fish graders: Sort fish by size for different markets or growth stages
    • Sorting bins: Hold fish temporarily during sorting 

    Fish Pumps

    For larger operations, fish pumps transport fish from ponds to transport containers, reducing handling stress and labor costs.

    6. Tank and Pond Equipment

    Cultivation Tanks

    Fish are raised in tanks or ponds depending on your farming scale and system type. Tanks come in various materials:

    • Fiberglass: Durable and lightweight
    • Plastic: Affordable and versatile
    • Concrete: Long-lasting for permanent installations

    Pond Accessories

    Essential pond equipment includes :

    • Overflow systems: Maintain consistent water levels
    • Filtration grilles: Prevent debris from entering filters
    • Protective nets: Keep predators away from fish
    • Gratings: Provide secure access around ponds

    7. Biosecurity and Protection Equipment

    Preventing disease outbreaks is essential for profitable fish farming . Key biosecurity equipment includes:

    • UV sterilizers: Eliminate waterborne pathogens
    • Ozone generators: Disinfect water and remove organic compounds
    • Quarantine tanks: Isolate sick fish
    • Protective nets: Prevent bird and mammal predators 

    Heating and Cooling Systems

    Maintaining optimal water temperatures isn’t just a recommendation—it’s a necessity. Different fish species have their own comfort zones. Tilapia thrive in temperatures between 75°F and 85°F, while trout need cooler waters, around 50°F to 60°F. A few degrees off can lead to stress, slowed growth, or even disease. Precision in temperature control ensures your fish are living in their ideal conditions.

    Energy efficiency in heating and cooling systems can save your aquaculture business significant costs over time. Geothermal systems, for example, tap into the Earth’s natural heat, providing a consistent temperature with minimal energy input. Solar-powered systems harness sunlight, converting it into energy to regulate water temperature. These solutions not only cut down on electricity bills but also reduce your carbon footprint, making your operations more sustainable.

    8. Transportation Systems

    Live fish transport requires specialized equipment to ensure fish arrive safely at market :

    • Oxygenated tanks: Maintain oxygen levels during transport
    • Insulated transport containers: Keep water temperature stable
    • Live fish transport vehicles: Designed specifically for aquaculture

    Equipment Selection Tips

    When choosing fish farming equipment, consider :

    1. Species requirements: Different fish have different needs
    2. Farming system: RAS, pond, or cage-based systems require different equipment
    3. Scale of operation: Match equipment capacity to your production goals
    4. Budget: Balance initial costs with long-term benefits
    5. Climate conditions: Choose equipment suitable for your local environment
    6. Maintenance requirements: Consider availability of parts and service

    Starting Small: Equipment for Beginners

    If you’re just starting out, you don’t need all the equipment at once. Begin with the essentials :

    • Cultivation tank or pond
    • Water pump
    • Basic filtration system
    • Aeration device
    • Water testing kit
    • Nets for handling
    • Manual feeder (upgrade to automatic later)

    As your operation grows, you can gradually invest in more advanced equipment to improve efficiency and productivity.

    Sustainability Considerations

    Modern aquaculture equipment increasingly focuses on sustainability :

    • Energy-efficient systems: Solar-powered aerators and feeders
    • Water conservation: RAS systems reduce water use by up to 90%
    • Waste management: Equipment for collecting and recycling waste
    • Reduced chemical use: UV and ozone systems minimize need for antibiotics

    Final Thoughts

    Investing in the right fish farming equipment is essential for success in aquaculture. Whether you’re starting small or running a commercial operation, quality equipment improves fish health, reduces labor, and increases profitability.

    Take time to research your options, choose equipment suited to your specific needs, and don’t hesitate to invest in quality—it will pay off in the long run through healthier fish and higher yields.

    Heating and Cooling Systems

    Fish are ectothermic creatures, meaning their body temperature mirrors their environment. Keeping water at an optimal temperature is crucial for their growth, metabolism, and immune function. For instance, tilapia thrive between 25°C and 30°C, while trout prefer cooler waters around 10°C to 15°C. Deviation from these ranges can lead to stress and disease, impacting your yield and profitability.

    • Electric heaters and heat pumps for precise control in smaller setups
    • Geothermal systems for large-scale operations where sustainable energy is prioritized
    • Chillers for cooling water in species-specific setups
    • Solar-powered options to reduce carbon footprint and operating costs

    Energy efficiency is a significant concern for sustainable aquaculture. Geothermal systems, while having higher initial costs, offer long-term savings by tapping into the earth’s consistent temperatures. Solar-powered solutions, though dependent on weather conditions, can drastically cut electricity bills. Balancing cost, efficiency, and environmental impact is key when selecting a system. Choose wisely based on your farm’s size, location, and the species you cultivate.

    Lighting Equipment

    Proper lighting plays a crucial role in fish growth and overall health. Fish rely on light cues to regulate their biological rhythms, which impact feeding behaviors, reproduction, and stress levels. For instance, certain fish species grow faster under specific light durations and intensities. Tailoring light conditions can lead to optimized growth rates and improved aquaculture outcomes.

    Selecting the right lighting system depends on your farm’s specific needs. Common options include fluorescent, LED, and metal halide lights. Fluorescent lights are cost-effective and emit a broad spectrum, suitable for general use. Metal halide lights offer intense brightness, often used in larger tanks. However, LED lights are gaining popularity due to their longevity and energy efficiency. They provide customizable light spectra and consume significantly less power, making them an eco-friendly choice.

    • Fluorescent: budget-friendly, broad spectrum
    • Metal Halide: high intensity, ideal for large tanks
    • LED: efficient, customizable, long-lasting

    Plumbing Systems

    Plumbing systems are the backbone of efficient water circulation in fish farming. They ensure that water moves correctly through tanks, filters, and other infrastructure, maintaining optimal conditions for fish health. Without a well-designed plumbing setup, you risk poor water quality and stressed fish, which can lead to disease outbreaks and reduced growth rates.

    There are several types of plumbing systems you might encounter in aquaculture. PVC and HDPE pipes are common due to their durability and resistance to corrosion. Valves, such as ball and gate valves, are essential for controlling water flow and making quick adjustments when needed. Don’t forget about the fittings—elbows, tees, and reducers help navigate tight spaces and connect different sections efficiently.

    Regular maintenance is crucial for keeping your plumbing system in top condition. Inspect pipes and joints frequently for leaks or blockages. A simple flashlight can help spot any issues in hard-to-reach areas. Clean filters regularly to prevent debris buildup that can obstruct water flow. Also, check the pressure gauges to ensure the system is operating within the recommended range. These steps can prevent costly repairs and downtime.

    Hydroponics Equipment

    Hydroponics systems offer a sustainable way to make use of fish waste by turning it into valuable nutrients for plant growth. This synergy between aquaculture and hydroponics is known as aquaponics, and it can significantly enhance the productivity of your fish farming operation. Imagine a setup where fish waste that would otherwise require disposal becomes a resource for growing vegetables or herbs, effectively turning two processes into a closed-loop system.

    There are several types of hydroponics systems that can be integrated with fish farming. The Nutrient Film Technique (NFT) is popular for leafy greens, as it circulates a thin film of nutrient-rich water over plant roots. For larger plants, consider Deep Water Culture (DWC), where roots are submerged in oxygenated water. Flood and Drain systems, also known as ebb and flow, are versatile and can accommodate a variety of crops. Each system offers unique benefits, so the choice depends on your specific crops and space constraints.

    • Nutrient Film Technique (NFT) for leafy greens
    • Deep Water Culture (DWC) for larger plants
    • Flood and Drain (ebb and flow) for versatility with different crops

    Plumbing Systems

    Proper plumbing systems are the lifeblood of any aquaculture setup. Efficient water circulation isn’t just a technical detail; it’s vital for maintaining fish health. Poor water flow can lead to stagnation, resulting in low oxygen levels and accumulated waste—both detrimental to fish. A well-designed plumbing system ensures that water moves continuously, facilitating gas exchange and waste removal. This keeps your fish thriving and stress-free.

    In aquaculture, plumbing systems often incorporate PVC pipes due to their durability and resistance to corrosion. They’re lightweight yet strong, able to handle the constant flow of water without breaking down. Coupled with these pipes, you’ll find essential components like valves and filtration units. Valves control water flow, allowing you to adjust circulation as needed. Filtration units, on the other hand, remove impurities, maintaining water quality. The combination of these materials and components creates a reliable system that supports the complex needs of fish farming.

    Lighting Systems

    Lighting systems in fish farming play a critical role in regulating the biological rhythms of aquatic life. Fish, much like humans, respond to light cues, which influence their feeding patterns, growth rates, and reproductive cycles. The right lighting can enhance spawning success and improve overall fish health by simulating their natural environment. Light exposure can even be used strategically to control maturation in species like salmon, where regulating daylight hours impacts the timing of reproductive milestones.

    Different types of lighting systems serve varied purposes in aquaculture. LED systems are popular due to their energy efficiency and ability to provide specific light wavelengths that can influence fish behavior. For instance, blue and green spectrums are often used to mimic natural underwater conditions, reducing stress and promoting healthy growth. Fluorescent lighting, while older, still offers broad-spectrum light that can suit general fish farming needs if budget constraints exist. Meanwhile, halogen bulbs might find their place in hatcheries where a more intense light source is necessary for certain developmental phases. Each system has its advantages, and choosing the right one depends on the specific needs of your aquaculture setup.

    Sustainable Practices in Fish Farming

    Sustainability is crucial in aquaculture. Overfishing and environmental degradation threaten fish populations and ecosystems. Adopting sustainable practices helps mitigate these risks and can enhance the long-term viability of your fish farming business.

    • Utilizing recirculating aquaculture systems (RAS) that minimize water use and waste production.
    • Implementing integrated multi-trophic aquaculture (IMTA), where different species coexist, enhancing nutrient cycling.
    • Choosing biodegradable nets and gear to reduce plastic pollution in aquatic environments.

    Eco-friendly fish farming not only protects the environment but also appeals to a growing market of conscious consumers. Fish raised sustainably often command higher prices. Additionally, healthier ecosystems can lead to more robust fish populations, ensuring a stable supply for your business.

    Common Challenges in Fish Farming

    Fish farming presents unique challenges that can impact profitability and sustainability. Disease outbreaks are a constant threat, with pathogens spreading rapidly in crowded conditions. Water quality issues, including pH imbalance and ammonia buildup, can also lead to stress and mortality among stock. Environmental factors such as temperature fluctuations and oxygen levels further complicate operations.

    Choosing the right equipment can significantly reduce these risks. For instance, high-quality water filtration systems maintain optimal conditions by removing harmful substances, while automated aeration systems ensure consistent oxygen levels. Regular monitoring tools help detect imbalances early, allowing for timely interventions.

    • Invest in disease management solutions, such as vaccines and probiotics, to boost fish resilience.
    • Implement a rotation system for harvesting to prevent overcrowding and reduce stress.
    • Stay informed about local regulations and best practices to remain compliant and efficient.

    Future Trends in Fish Farming Equipment

    Emerging technologies are reshaping aquaculture at a rapid pace. Automation is becoming a staple, with automated feeders and monitoring systems enhancing operational efficiency. Drones and underwater robots are now used for tasks like feeding, monitoring fish health, and even cleaning. These innovations not only save time but also reduce labor costs.

    Aquaponics is gaining traction, merging fish farming with hydroponics. This symbiotic system allows for sustainable food production, utilizing fish waste as nutrients for plants. Some farms report a yield increase of up to 30% by integrating these systems.

    1. Incorporation of AI for predictive analytics in fish farming.
    2. Development of bio-secure systems to combat disease outbreaks.
    3. Advancements in sustainable feed alternatives, including insect protein.

    Looking ahead, the future of aquaculture equipment points towards even greater sustainability and efficiency. Industry experts predict that within the next decade, smart technology will dominate fish farming. Expect to see more IoT devices that provide real-time data, allowing farmers to make informed decisions based on precise environmental conditions.

    Sustainable Practices in Fish Farming

    Sustainability is more than a buzzword in aquaculture; it’s a necessity. Fish farming can profoundly impact local ecosystems, so adopting sustainable practices is critical. By reducing waste and conserving resources, fish farms can enhance their long-term viability while protecting aquatic environments.

    Innovative technologies have emerged to minimize the environmental footprint of fish farming. For example, recirculating aquaculture systems (RAS) use advanced filtration methods to reuse water, cutting down on waste and conserving freshwater supplies. This technology can reduce water usage by up to 90% compared to traditional farming methods.

    • Solar-powered aerators that reduce energy consumption
    • Biodegradable feed options made from sustainable sources
    • Aquaponics systems that integrate fish farming with plant cultivation

    Sustainable equipment not only supports environmental stewardship but can also enhance productivity. Investing in energy-efficient pumps and solar energy systems can significantly lower operational costs while reducing carbon footprints. This dual benefit makes sustainability a smart choice for forward-thinking fish farmers.

    Common Mistakes in Equipment Selection

    Choosing the right equipment for fish farming isn’t just about what’s available; it’s about aligning your choices with the specific needs of the fish species you’re cultivating. For instance, tilapia and trout require different water temperatures and oxygen levels. Neglecting these requirements can lead to high mortality rates and reduced growth.

    Long-term maintenance costs can easily overshadow initial investment savings. A cheap pump may save a few bucks upfront, but if it fails after six months, the replacement costs and potential losses in fish health can stack up quickly. Investing in quality equipment upfront often pays off in reliability and longevity.

    Choosing low-quality equipment for short-term savings might seem tempting, but it often leads to bigger headaches down the line. Poor-quality nets can tear easily, leading to escaped fish or predator issues. Similarly, subpar water filtration systems can compromise water quality, putting your entire stock at risk.

    Future Trends in Fish Farming Equipment

    Emerging technologies are rapidly transforming fish farming. Innovations like recirculating aquaculture systems (RAS) and integrated multi-trophic aquaculture (IMTA) enhance productivity while minimizing environmental impact. RAS allows for greater control over water quality and reduces water usage by up to 90% compared to traditional methods.

    Automation and AI are becoming pivotal. Automated feeding systems can adjust feed rates based on real-time fish behavior analytics, optimizing growth and reducing waste. AI-driven monitoring tools can predict disease outbreaks by analyzing behavioral patterns, allowing farmers to take proactive measures.

    Sustainable equipment is on the rise. Advancements include biodegradable netting materials and solar-powered aeration systems. These innovations not only reduce reliance on fossil fuels but also decrease plastic pollution, setting a new standard for environmentally responsible aquaculture practices.

    Sustainability in Fish Farming Equipment

    Sustainable practices are essential for the future of aquaculture. Using environmentally friendly equipment reduces negative impacts on ecosystems and conserves energy. For instance, solar-powered aeration systems not only cut electricity costs but also minimize reliance on fossil fuels. These systems can save up to 70% on energy bills, a significant advantage for any fish farm.

    Investing in energy-efficient pumps and filters can further enhance sustainability. Variable frequency drives (VFDs) on pumps allow for better control of water flow, which means less energy consumption. Additionally, choosing biodegradable nets and feed can help reduce plastic waste and lessen the carbon footprint associated with traditional fish farming practices.

    • Solar-powered aeration systems
    • Energy-efficient pumps with VFDs
    • Biodegradable nets
    • Eco-friendly fish feed options

    Implementing these sustainable equipment choices not only supports the environment but can also appeal to conscious consumers. As demand grows for responsibly sourced seafood, fish farms that prioritize sustainability may find themselves at a competitive advantage.

    Common Mistakes in Equipment Selection

    One of the most common mistakes in equipment selection is prioritizing cost over quality. Many fish farmers opt for the cheapest options, thinking they will save money. However, low-quality equipment often leads to higher operational costs in the long run due to frequent repairs and replacements.

    Another frequent error is failing to match equipment size and capacity with the specific needs of the farm. For example, a pump that is too small will struggle to handle water flow, while one that is too large can waste energy and disrupt the ecosystem.

    • Always conduct a needs assessment before purchasing equipment to ensure it aligns with your farming goals.
    • Invest in equipment that has proven durability and reliability, even if it means spending a bit more upfront.
    • Consult with experienced aquaculture professionals or suppliers for recommendations tailored to your specific situation.

    Ignoring maintenance needs is another pitfall. Equipment requires regular upkeep to function efficiently. Failing to factor in maintenance can lead to unexpected downtime.

    Sustainable Practices in Fish Farming

    Sustainability is increasingly vital in aquaculture. As the global demand for fish rises, the pressure on natural ecosystems intensifies. Fish farmers are recognizing that adopting sustainable practices not only protects the environment but also enhances long-term profitability.

    Innovative technologies are making it easier to reduce environmental impact. For instance, recirculating aquaculture systems (RAS) utilize sophisticated filtration and water treatment processes, cutting water usage by up to 90%. Similarly, biofloc technology enables farmers to raise fish in a nutrient-rich environment that minimizes waste.

    • Implement integrated multi-trophic aquaculture (IMTA) to recycle nutrients and improve water quality.
    • Utilize renewable energy sources, such as solar or wind, to power operations.
    • Adopt selective breeding practices to enhance growth rates and disease resistance, reducing reliance on antibiotics.

    Common Mistakes to Avoid

    Overfeeding is one of the most common mistakes in fish farming. It might seem harmless, but it can lead to serious water quality issues. Excess food decomposes, increasing ammonia levels and depleting oxygen. This not only affects fish health but can also result in costly fish kills. Aim for a feeding schedule based on the specific needs of your fish species, and adjust as they grow.

    Water quality monitoring is crucial but often overlooked. Fish require specific pH, temperature, and oxygen levels to thrive. Neglecting regular checks can lead to diseases and stunted growth. Invest in quality testing kits and make it a routine part of your management tasks.

    Every fish species has unique requirements. Ignoring these specifics can compromise your entire operation. For example, tilapia thrive in warmer waters, while trout prefer colder environments. Research the needs of your chosen species and ensure your equipment and systems are tailored accordingly.

    Future Trends in Fish Farming Equipment

    Emerging technologies are revolutionizing aquaculture, making fish farming more efficient and sustainable. Innovations like recirculating aquaculture systems (RAS) allow farmers to minimize water usage while maximizing fish yield. For example, RAS can recycle up to 99% of water, significantly reducing environmental impact.

    Automation and the Internet of Things (IoT) are becoming indispensable in modern fish farming. Smart sensors monitor water quality, temperature, and feeding schedules in real time. This technology helps farmers make data-driven decisions, reducing labor costs and improving fish health.

    • Increased demand for energy-efficient systems
    • Integration of AI for predictive analytics
    • Shift towards modular and scalable equipment solutions

    As the industry evolves, equipment needs will shift accordingly. Farmers will increasingly require tools that adapt to changing regulations and environmental conditions. Expect a rise in demand for biosecurity equipment and sustainable feed solutions. Keeping pace with these trends will be crucial for success.

    Sustainable Practices in Fish Farming

    Sustainability is a cornerstone of modern aquaculture. As fish farming grows, so does the need to minimize its environmental footprint. Practices that focus on reducing waste, conserving water, and maintaining biodiversity are essential. For example, recirculating aquaculture systems (RAS) can reduce water usage by up to 90% compared to traditional methods.

    Innovative technologies are leading the charge in sustainability. Biofloc technology allows farmers to convert waste into a protein source, enhancing growth rates while lowering feed costs. Additionally, integrated multi-trophic aquaculture (IMTA) creates a balanced ecosystem by farming different species together, utilizing nutrient waste from one species to feed another.

    • Implementing efficient feed management practices to reduce overfeeding
    • Utilizing renewable energy sources like solar power for operations
    • Regularly monitoring water quality to prevent pollution and disease
    • Engaging in certification programs that promote sustainable practices

    Sustainable fish farming isn’t just a trend; it’s a necessity. By adopting practices that protect the environment, farmers can not only increase their yield but also contribute to the health of our oceans and waterways.

    Common Challenges in Fish Farming

    Disease outbreaks can devastate a fish farm, leading to significant losses. Common ailments like ichthyophthirius (ich) or bacterial infections require prompt action. Regular health monitoring and biosecurity measures, such as quarantine for new stock and maintaining a clean environment, can help mitigate risks. Additionally, investing in vaccines and probiotics can enhance fish resilience.

    Water quality is the lifeblood of aquaculture. Parameters like pH, ammonia levels, and dissolved oxygen must be meticulously monitored. High ammonia concentrations can stress fish, leading to poor growth rates and increased mortality. Utilizing water test kits and automated monitoring systems can help maintain optimal conditions. Regular water changes and proper filtration systems are also crucial in preventing toxic buildups.

    Market fluctuations pose a significant challenge for fish farmers. Prices can vary dramatically based on demand, seasonality, and competition. Establishing contracts with local buyers or diversifying your product line can provide more stability. Understanding market trends and consumer preferences can help farmers make informed decisions, ensuring they remain profitable even during downturns.

    Future Trends in Fish Farming Equipment

    Emerging technologies are reshaping aquaculture, driving efficiency and sustainability. Innovations like recirculating aquaculture systems (RAS) are gaining traction. These systems recycle water and enhance biofiltration, minimizing waste and increasing stocking densities. Additionally, advancements in water quality monitoring tools allow farmers to track parameters in real-time, enabling immediate adjustments.

    Automation is transforming fish farming operations. Automated feeding systems use sensors to dispense the right amount of feed based on fish behavior and environmental conditions. This not only reduces labor costs but also ensures optimal growth rates. Drones and underwater robots are also making their mark, providing aerial surveys and underwater inspections, thus enhancing farm management.

    Looking ahead, predicted advancements include the integration of artificial intelligence for predictive analytics. This could optimize breeding programs and improve disease management significantly. Furthermore, bioengineering might lead to the development of hardier fish species that require less feed and are more resistant to diseases, making farms more sustainable.

    Sustainable Practices in Fish Farming

    Sustainability in aquaculture is not just a buzzword; it’s a necessity. Fish farming impacts local ecosystems, and adopting sustainable practices can mitigate this. Efficient use of resources like water and feed reduces waste and conserves energy, ensuring a healthier environment.

    For instance, recirculating aquaculture systems (RAS) significantly minimize water use while maintaining optimal fish health. These systems filter and reuse water, reducing the need for freshwater intake by up to 90%. Aeration devices powered by renewable energy sources also enhance oxygen levels without relying on fossil fuels.

    • Biodegradable nets to reduce plastic pollution
    • Solar-powered pumps for water circulation
    • Advanced feeding systems that minimize waste
    • Biofilters that naturally clean water and support aquatic life

    Investing in equipment that encourages eco-friendly practices not only supports the environment but can also enhance your farm’s profitability. Consumers increasingly prefer sustainably sourced seafood, making it a competitive advantage.

    Cost-Effective Equipment Options

    Starting out in fish farming doesn’t have to drain your finances. Look for budget-friendly equipment options like DIY fish tanks made from repurposed materials. Old bathtubs or large plastic containers can serve as effective rearing tanks. Many farmers swear by using barrels or totes for smaller setups. These alternatives can save you hundreds compared to brand-new tanks.

    Aeration systems can be pricey, but you can find cost-effective solutions. Consider purchasing used aerators or making your own using simple PVC pipes and air stones. This can dramatically reduce your initial investment while still ensuring your fish get the oxygen they need.

    • Explore local agricultural grants and loans tailored for aquaculture.
    • Join cooperative groups that offer shared equipment and bulk purchasing discounts.
    • Look into financing options through agricultural credit unions with favorable terms.

    Sustainable Practices in Fish Farming

    Sustainability is crucial in aquaculture, not just for regulatory compliance but for the health of our oceans and ecosystems. Responsible practices ensure that fish farming can thrive without depleting natural resources or harming marine life. For instance, using closed-loop systems can significantly reduce water usage, making farms more efficient.

    Innovative technologies like recirculating aquaculture systems (RAS) and integrated multi-trophic aquaculture (IMTA) are paving the way for sustainable fish farming. RAS allows for water reuse, minimizing waste while maintaining high fish densities. IMTA promotes biodiversity by combining fish farming with the cultivation of seaweeds and shellfish, which can absorb excess nutrients.

    • Implementing feed management systems to optimize feed conversion ratios.
    • Regularly monitoring water quality to prevent disease outbreaks.
    • Utilizing renewable energy sources, such as solar panels, to power operations.

    Common Mistakes in Equipment Selection

    One of the biggest pitfalls in equipment selection is overlooking the specific needs of the fish species you plan to farm. For instance, tilapia thrive in warmer waters, while trout require cooler temperatures. Choosing a filtration system or aerator that doesn’t match these requirements can lead to poor growth rates and, ultimately, financial losses.

    Many farmers focus solely on the initial purchase price of equipment, ignoring long-term operating costs. A cheaper aerator may save you money upfront but could result in higher energy bills and frequent maintenance needs. An investment in energy-efficient models may yield savings over time, making them a smarter choice.

    Local climate conditions play a crucial role in equipment effectiveness. For example, if your farm is in a region that experiences extreme temperature fluctuations, selecting equipment with insulation or heating capabilities becomes essential. Neglecting to account for these factors can compromise your fish’s health and growth.

    Future Trends in Fish Farming Equipment

    Emerging technologies are transforming fish farming at an unprecedented rate. For instance, genetic selection is leading to faster-growing and disease-resistant fish strains. This not only enhances productivity but also reduces the need for antibiotics. Similarly, advanced breeding techniques, such as CRISPR, are set to revolutionize stock improvement.

    Automation and the Internet of Things (IoT) are cutting operational costs and increasing efficiency. Smart feeding systems, equipped with sensors, optimize feed distribution based on real-time water quality and fish behavior. This can reduce waste by up to 30%, directly impacting profitability.

    • Solar-powered aeration systems
    • Biodegradable nets
    • Water recycling technologies
    • AI-driven monitoring tools

    Sustainability is at the forefront of fish farming innovations. Companies are focusing on reducing their carbon footprint and minimizing environmental impacts. For example, water recirculation systems are now capable of reusing up to 99% of water, while also ensuring optimal conditions for fish growth. These advancements are not just beneficial for the environment; they also appeal to increasingly eco-conscious consumers.

    Choosing the Right Equipment for Your Needs

    Start by assessing your specific aquaculture goals and the species you’re farming. For instance, tilapia requires different tank conditions than trout. If you’re running a small-scale operation focusing on ornamental fish, your equipment needs will differ significantly from a commercial catfish farm. Clearly defined goals guide your equipment choices.

    Next, consider the scale of your operation. A backyard pond setup might only need basic aeration systems, while a larger facility could require advanced filtration and water quality monitoring systems. Budget constraints play a crucial role as well. Investing in high-quality equipment can seem daunting, but cutting corners often leads to higher costs in maintenance and replacements down the line.

    Evaluating long-term benefits is essential. For example, a high-quality feed system can reduce waste and improve fish growth rates, ultimately enhancing profitability. Research shows that investing in reliable aeration equipment can increase survival rates by up to 15%. Prioritizing equipment that aligns with your operational needs ensures a sustainable and productive aquaculture business.

    Innovations in Fish Farming Equipment

    Recent advancements in aquaculture technology are transforming the fish farming industry. Innovations such as automated feeding systems use sensors and AI to determine optimal feeding times and amounts, reducing waste and enhancing growth rates. For instance, a study by the Food and Agriculture Organization found that automated systems can improve feed efficiency by up to 30%.

    Recirculating aquaculture systems (RAS) have gained traction for their ability to minimize water usage and improve biosecurity. By filtering and reusing water, these systems dramatically reduce the environmental impact of fish farming. A case study from a Norwegian salmon farm demonstrated that implementing RAS led to a 50% reduction in water consumption while maintaining high fish health.

    1. Automated feeding systems that optimize feed delivery
    2. Recirculating aquaculture systems (RAS) for water conservation
    3. Advanced monitoring tools for real-time health assessment
    4. Sustainable energy solutions, such as solar-powered aeration units

    One notable example is a tilapia farm in Israel that integrated solar energy into its operations. This not only cut operating costs by 40% but also demonstrated a commitment to sustainability that appealed to eco-conscious consumers. Such implementations showcase how embracing innovation can lead to both increased productivity and environmental stewardship.

    Aquaculture Technology Innovations

    Innovations in aquaculture technology have transformed how fish farming operates, driving efficiency and sustainability to new heights. For instance, automated feeding systems equipped with sensors can optimize feed distribution, reducing waste and ensuring fish receive the right amount of nutrition. These systems can cut feed costs by as much as 30%, significantly impacting profitability.

    Water quality management has also seen major advancements. Technologies like real-time monitoring systems allow farmers to track oxygen levels, pH, and ammonia concentration continuously. This data enables immediate adjustments, preventing potential fish loss and maintaining optimal growing conditions.

    • Recirculating aquaculture systems (RAS) that recycle water, reducing water usage by up to 90%.
    • AI-driven analytics for predicting fish growth and health, improving yield forecasting.
    • Biological filtration systems that enhance water quality through natural processes, supporting a more sustainable farming model.

    Sustainability in Fish Farming

    Sustainable practices in fish farming are essential for long-term viability and environmental health. Techniques like integrated multi-trophic aquaculture (IMTA) allow farmers to cultivate different species together, creating a balanced ecosystem. For instance, growing shellfish alongside finfish can help filter water and utilize waste produced by fish as nutrients for shellfish. This not only boosts productivity but also minimizes environmental impact.

    Choosing eco-friendly equipment can significantly enhance sustainability. Options such as solar-powered aerators reduce reliance on fossil fuels and lower operational costs. Additionally, using biodegradable nets and feed can mitigate the pollution often associated with traditional materials. Investing in water recirculation systems minimizes water use and maximizes efficiency, allowing farms to recycle up to 90% of their water.

    1. Integrated multi-trophic aquaculture (IMTA) for ecosystem balance
    2. Solar-powered aerators for energy efficiency
    3. Biodegradable nets to reduce pollution
    4. Water recirculation systems to conserve resources

    Sustainable Practices in Fish Farming

    Sustainability plays a critical role in aquaculture, directly affecting both environmental health and economic viability. As fish farming grows, so does its impact on ecosystems. Sustainable practices not only help mitigate harm to aquatic life but also enhance the quality of fish produced. Adopting these practices can lead to a more efficient operation and increased consumer trust.

    • Recirculating Aquaculture Systems (RAS) that reduce water use by up to 90%, recycling water continuously.
    • Solar-powered aerators that lower energy costs and carbon footprints.
    • Integrated Multi-Trophic Aquaculture (IMTA) setups that utilize waste products from one species to nourish another, promoting a balanced ecosystem.
    • Biodegradable nets and gear that minimize plastic pollution in oceans and waterways.

    Common Challenges in Fish Farming Equipment

    Equipment failures can cripple your fish farming operation. Regularly inspect pumps, aerators, and filtration systems for signs of wear. A broken pump can lead to oxygen depletion, jeopardizing fish health. Implement a routine check every week to catch issues early.

    Longevity hinges on proper maintenance. Clean your equipment thoroughly every month, especially in high-use seasons. Replace filters as needed and lubricate moving parts to prevent rust and corrosion. Keeping a log of maintenance activities can help track when each piece of equipment was last serviced.

    Cost management requires strategic planning. Invest in energy-efficient systems that may have a higher initial cost but reduce long-term expenses. Consider bulk purchasing supplies to take advantage of discounts. Always have a budget for unexpected repairs, as delays can lead to larger losses.

    Sustainable Practices in Fish Farming

    Sustainability in aquaculture is no longer just a trend; it’s a necessity for the future of our oceans and fish populations. Overfishing and habitat destruction have pushed many species to the brink, making responsible farming practices paramount. By adopting sustainable methods, fish farmers can contribute to biodiversity and reduce their environmental impact.

    Eco-friendly equipment options are essential for minimizing waste and energy consumption. For instance, solar-powered aerators can significantly cut down on electricity costs while ensuring optimal oxygen levels in fish tanks. Additionally, using recirculating aquaculture systems (RAS) can reduce water usage by up to 90%, making it a smart choice for conserving this vital resource.

    • Utilize biodegradable nets to minimize plastic pollution.
    • Implement water filtration systems to ensure effluent quality.
    • Choose sustainable feed options that reduce reliance on wild fish stocks.

    Regulatory Considerations

    Before setting up your fish farming operation, understanding the regulatory landscape is crucial. Each country and region has specific permits and licenses required for aquaculture. For example, in the United States, fish farmers may need to apply for permits from both state and federal agencies, including the Environmental Protection Agency (EPA) and state departments of fish and wildlife.

    Compliance with environmental standards is another key aspect. Many jurisdictions enforce regulations to ensure that fish farming doesn’t negatively impact local ecosystems. This often includes waste management protocols to prevent water pollution and guidelines for sustainable fish stocking practices. In some areas, you might be required to implement measures to protect native species and habitats.

    1. Obtain necessary aquaculture permits from local authorities.
    2. Follow state and federal environmental regulations regarding water quality and waste disposal.
    3. Implement best practices for fish health management to avoid disease outbreaks.

    Future Trends in Fish Farming Equipment

    Emerging technologies are reshaping the aquaculture industry, with automation and data analytics leading the charge. For instance, smart feeding systems utilize sensors and algorithms to optimize feeding schedules based on fish behavior, reducing waste and improving growth rates. These systems can increase feed efficiency by up to 30%, translating to significant cost savings.

    Sustainability is another focal point in innovations. Recirculating aquaculture systems (RAS) are gaining traction, allowing for the reuse of water and minimizing environmental impact. These systems can reduce water usage by up to 90%, making them ideal for areas with limited water resources. Additionally, advancements in biofiltration technology enhance water quality while reducing the need for chemical treatments.

    • Smart feeding systems that adapt to fish behavior
    • Recirculating aquaculture systems (RAS) for water conservation
    • Bioreactors for efficient waste management
    • IoT devices for real-time monitoring of fish health and water quality

    Essential Tools for Beginners

    Starting a fish farming venture can be both exciting and overwhelming. A basic equipment checklist for new fish farmers typically includes items like tanks or ponds, aeration systems, water quality testing kits, and feeders. For a small-scale operation, a 500-gallon tank can be a good starting point, along with a simple air pump for aeration. Water quality is crucial; invest in a reliable test kit that measures pH, ammonia, nitrites, and nitrates.

    Selecting affordable yet effective tools requires a bit of research. Look for second-hand equipment from local farmers or aquaculture groups. Websites like Craigslist or Facebook Marketplace often have listings for used tanks or pumps at a fraction of the new price. Don’t compromise on quality, though—ensure all equipment can withstand the conditions of your farming environment. Consider starting with manual feeding systems before upgrading to automated feeders as your operation grows.

    • 500-gallon tank or pond
    • Aeration system (air pump)
    • Water quality testing kits
    • Manual or automated feeders
    • Fish net for handling

    Essential Tools for Beginners

    Starting your fish farming journey doesn’t have to break the bank. Basic equipment includes a reliable fish tank or pond, water filtration systems, aerators, and nets for handling fish. A small, well-maintained tank can start at around $200, while basic aeration systems typically range from $50 to $150. For beginners, investing in a 300-gallon tank allows for a manageable number of fish, making it easier to learn the ropes.

    Cost-effective solutions are key for new farmers. Consider purchasing used equipment to save on initial costs. Local aquaculture groups or online marketplaces often have affordable second-hand tanks or filters. Additionally, DIY options for aeration and filtration can cut costs significantly.

    A gradual investment strategy helps you scale up without overwhelming your budget. Start with essential tools, then reinvest profits into larger tanks, advanced filtration systems, or automated feeding devices as your business grows. This approach allows you to refine your techniques and expand your operation sustainably.

    Energy Efficiency in Fish Farming Equipment

    Energy-efficient equipment is crucial in fish farming, not just for reducing costs but also for minimizing environmental impact. By utilizing systems that consume less energy, farms can significantly cut their operational expenses. For instance, energy costs often make up to 30% of total production costs in aquaculture. Reducing this percentage can lead to substantial savings.

    Solar-powered aerators and pumps are excellent examples of energy-efficient technology. These systems harness solar energy to oxygenate water and circulate it throughout the farm. This approach reduces reliance on fossil fuels, translating into lower electricity bills. Similarly, geothermal systems maintain optimal water temperatures using the earth’s natural heat, which is particularly useful for farms in colder climates.

    Adopting such technologies not only helps decrease the carbon footprint of your aquaculture operations but also enhances sustainability, which can attract eco-conscious consumers. By integrating energy-efficient equipment, you’re investing in a future-proof business that aligns with global sustainability goals.

    Complete Equipment Checklist for Fish Farming

    A working fish farm requires equipment across five core categories: water management (pumps, aerators, filters, testing kits), feeding systems (automatic feeders, storage bins), monitoring tools (oxygen meters, thermometers, pH testers), harvesting gear (nets, grading machines, transport tanks), and biosecurity supplies (footbaths, disinfectants, quarantine tanks). Your startup budget will depend heavily on scale. A backyard tilapia operation might run on $2,000 to $5,000 in basic equipment, while a commercial recirculating aquaculture system can demand $50,000 or more before stocking a single fish.

    Separate your shopping list into essentials and upgrades based on your farm size. Every operation needs water quality test kits, at least one backup aerator, and proper nets for handling fish. Automatic feeders save labor but aren’t critical for farms under 1,000 fish. UV sterilizers and oxygen generators fall into the optional category for pond systems with good natural aeration, but become essential in high-density indoor setups. Grading equipment matters once you’re harvesting multiple size classes regularly, typically at 5,000+ fish capacity.

    • Water management: submersible pumps (minimum 1,500 GPH for 1,000-gallon systems), paddle wheel or diffuser aerators, mechanical and biological filters, API or Hach test kits for ammonia, nitrite, nitrate, and pH
    • Feeding: pellet feeders (manual or timer-based), waterproof storage containers, feed measuring scoops
    • Monitoring: dissolved oxygen meter, digital thermometer, backup battery-powered aerator for power outages
    • Harvesting: seine nets sized to your pond, fish baskets or totes, live haul tanks with portable aerators
    • Biosecurity: foot dip stations with quaternary ammonium disinfectant, separate nets for quarantine areas, hand washing stations

    Most Profitable Fish Species and Their Equipment Requirements

    Tilapia consistently delivers the highest profit margins for small to medium operations, with ROI potential of 30-50% per cycle due to fast growth rates (6-8 months to market size) and minimal equipment investment. Catfish runs a close second in warm climates, requiring similar basic setups but slightly longer grow-out periods. Salmon and trout command premium prices but demand sophisticated recirculating aquaculture systems (RAS) with chillers, which can cost $50,000-$200,000 for a commercial setup. Your choice hinges on local market prices, climate, and capital availability.

    Temperature control separates species dramatically. Tilapia thrives at 82-86°F and tolerates basic aeration in warm regions, needing only simple heaters in cooler months. Catfish operates well between 75-85°F with paddle wheel aerators as the primary equipment investment. Trout requires constant 50-60°F water, demanding either natural cold springs or expensive chilling systems that consume 40-60% of operational electricity costs. Salmon needs similar cold water plus higher oxygen levels, which means backup generators become essential equipment rather than optional insurance.

    Calculate your break-even before buying specialized gear. A 1,000-gallon tilapia system can turn profitable within 12-18 months with $3,000-$5,000 in basic equipment (tanks, aerators, biofilters). The same investment in trout means adding $8,000-$15,000 for temperature management alone. Feed conversion ratios matter too: tilapia converts at roughly 1.5:1, while salmon achieves 1.2:1 but costs three times as much per pound of feed. Match your species to existing conditions rather than fighting your climate with equipment.

    Feed Requirements: How Much Feed Do You Need?

    For 1000 catfish, expect to use 8 to 12 bags of feed per month, depending on their size and water temperature. Fingerlings consume less, around 3 to 5 bags monthly, while fish approaching harvest weight will push that number to 15 bags or more. Your exact consumption depends on fish weight, feed type, and how aggressively you’re pushing growth.

    Feed conversion ratio (FCR) determines your profitability more than almost any other metric. A good catfish operation runs at 1.2 to 1.5 FCR, meaning 1.2 to 1.5 pounds of feed produces one pound of fish. Tilapia typically achieves 1.5 to 1.8 FCR under decent management. Calculate your monthly needs by multiplying target weight gain by FCR, then by fish count. If you’re raising 1000 catfish from 50 grams to 1 kilogram over six months, you need roughly 950 grams of growth per fish times your FCR of 1.3, which equals 1,235 grams of feed per fish, or 1,235 kilograms total across the growing period.

    Stocking density changes everything. At 10 fish per cubic meter, you’ll maintain better water quality and lower FCR. Push to 25 fish per cubic meter, and feed efficiency drops while disease risk climbs. Higher densities demand more frequent feeding (four to six times daily versus two to three times) and better aeration, which cuts into the cost savings from cramming more fish into your system.

    Complete Equipment Checklist for Fish Farming

    Breaking down your equipment needs by priority prevents overspending while ensuring you don’t miss critical components. Essential equipment includes tanks or ponds (budget $500 to $5,000+ depending on scale), aeration systems ($200 to $2,000), water quality testing kits ($50 to $300), and feeders ($100 to $1,500). These form your baseline investment and you cannot operate without them.

    Optional equipment enhances efficiency but isn’t mandatory for startup operations. This category covers automatic feeders ($300 to $3,000), backup generators ($400 to $2,500), water heaters or chillers ($150 to $4,000), and UV sterilizers ($200 to $1,200). Add these as your operation scales or when specific challenges arise, like temperature fluctuations or disease outbreaks.

    • Water circulation pumps: $150 to $1,000 (essential)
    • Oxygen meters and pH testers: $50 to $500 (essential)
    • Nets and harvesting tools: $30 to $200 (essential)
    • Grading equipment: $100 to $800 (optional, needed at 3-4 months)
    • Backup air pumps: $50 to $300 (optional but recommended)
    • Water filtration systems: $300 to $5,000+ (optional, depends on system type)

    Plan for 15% to 20% of your total equipment budget as contingency funds. Pumps fail, probes need calibration, and unexpected water quality issues require immediate solutions. Buying used equipment can cut costs by 30% to 50%, but only purchase mechanical items like tanks and stands, never used testing equipment or probes where accuracy matters.